Brief Description: Fit Inboard Tank Rib Attachments
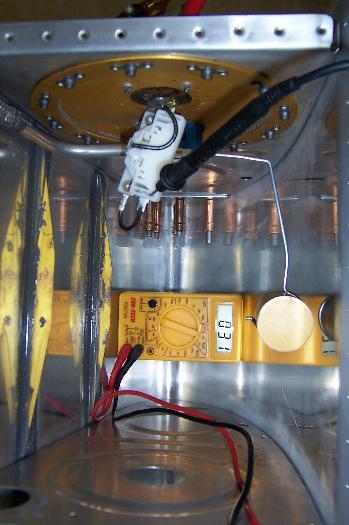
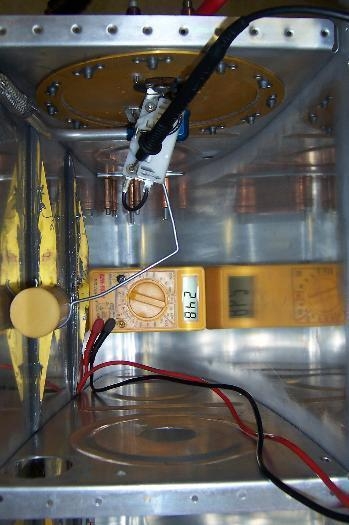
The fuel pickup tube requires an attachment to prevent it from inadvertently loosening and allowing the tube to rotate. There were 2 predrilled .#40 holes in the end plate that were made for an older type of securing bracket. The new ones cannot make use of those holes. So, 2 more holes to plug with rivets when I get to that part tomorrow. The fuel level float arm comes with a totally straight rod attached. For the RV-6 you make two bends. Each one is 3 3/16 in length. Then you make a 90 degree bend on the remaining length and snip it off at 3/4 inch long. That makes an L that you slip into the fuel sender and it locks the float down so it cannot work itself out. It takes some tweaking on the bends to make the final fit. You don't want the float arm to bang on the fuel tank skin top or bottom. You want it to stop within 1/8 inch from the tank skin. Don't get frustrated. Take it slow and it will finally fit. Then hook up the ohm meter and read the resistence by simulating a full tank and then lower the float to simulate an empty tank. My readings were 31 OHMs full and 248 OHMs empty.
Tomorrow I will install nutplates to secure the fuel sender and then proseal the fuel and vent line fittings, end stiffeners, 4 hole-plugging rivets, anti rotation bracket for fuel pickup tube. I will cut the vent line tube to length, put in the snap bushings as I install each rib. I have to remember to flare the vent line after slipping on the hardware once I start it into the rib holes.