
|

|
|
|
Todd's Web site
|
Date: 11-27-2010
|
Number of Hours: 2.35
|
Manual Reference: 8-36 & 8-37
|
Brief Description: Fuselage Riveting #19 (and rear battery tray)
|
|
No riveting partner today, so I was relegated to a few things I can do by myself...
-Finished riveting the mid-side skins around the around the spar openings with a squeezer
-Installed the little bulkhead bracket in the elevator bellcrank area. The plans called for the use of AN470AD3-4 rivets (small button heads), but the kit doesn't provide any. So I drilled the 4 holes where you see button heads to #30 and installed AD4-4 rivets. On the side rivets, I dimpled the holes and installed AN426AD-3.5 (countersunk) rivets. It aint goin' nowhere.
-Went ahead and cleko'd together, drilled, countersunk, deburred, scuffed, primed, assembled, and installed the rear battery tray mount. Since I'm planning an O-360 with a lightweight fixed pitch prop, I'm not planning on installing a rear battery, but the nutplates are already installed on the baggage ribs, and it could provide a handy place to mount some equipment later. Plus in case I do decide to put the battery in the rear, it's there.
Getting ready to go on another TDY for a few days, but will be itching to work on it as soon as I get home!
|
|
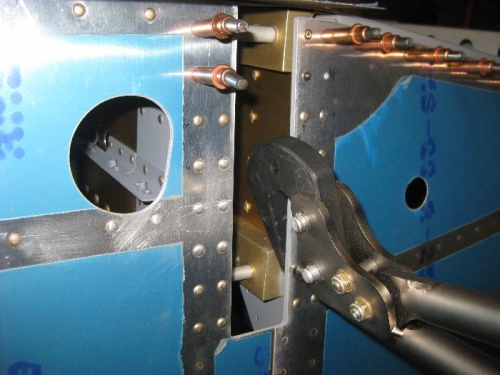
Squeezing the rivets around the spar opening on the mid fuse side skins
|
|
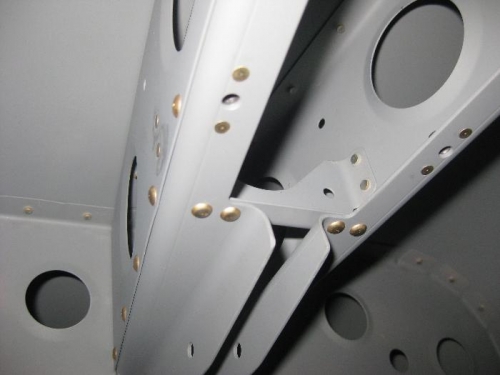
Installed the bellcrank rib up in the baggage ribs
|
|
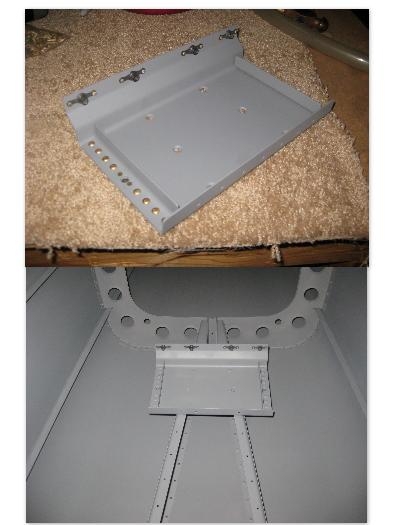
Assembled and mounted the rear battery tray...even though I'm planning on a firewall mount...
|
|
|
|
|
|
|
|
|
Copyright © 2001-2024 Matronics. All Rights Reserved.
|