Brief Description: Left Wing #29 - bellcrank and bottom skin riveting
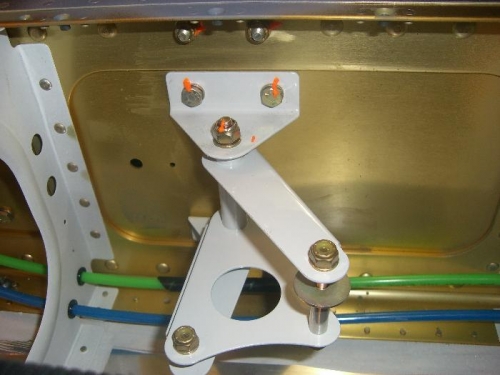
Took me awhile to get the bushing cut to the right length and fit into the bellcrank tube. The bushing was straight, but I ended up having to ream out the tube for it to slip in properly. I had to remove the topside (bottom in the picture) bracket to get the AN4-32 bolt in. I put some Lubriplate between the bushing and bellcrank, then torqued everything into place. It rotates nice and smooth. For future inspection purposes, I went ahead and put some torque stripe on the bolts for the bellcrank bracket/tiedown bolts.
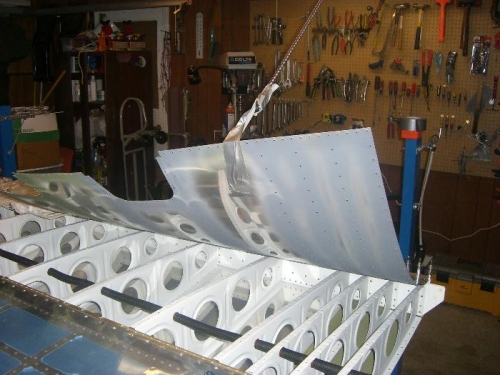
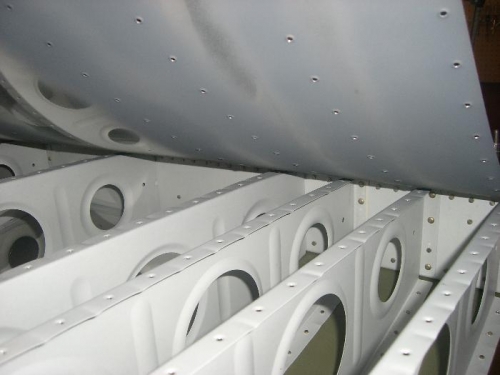
Went ahead and started riveting the inboard bottom wing skin to the rear spar. A few bungee cords and some duct tape served to lift the skin to allow access for bucking. I'm taking this nice and easy, because there's some tricky bucking going on here. It would be alot easier with a helper to operate the rivet gun, but this can be done by yourself.
Left aileron bellcrank installed. You can see the SafeAir pitot and AOA tubing that fits under it.