
|
|
Tims Lightning XS
|
Date: 8-8-2017
|
Number of Hours: 3.00
|
Manual Reference: 9a
|
Brief Description: Rt. Fuel Tank - 3
|
|
Because of size limitations, I'm doing one wing and tank at a time. Now that the epoxy on the filler collar has cured overnight, I slid the tank out of the wing. A bit of grease on the sleve threads kept them from getting boogered (real word, I think) up. The tank slid out easily.
Then, I flocked the inside of the Filler collar/fuel tank junction. Seems like overkill because of the good seal on the outside, but this is my first airplane. I'll follow the direction the best I can.
The next step is to bond the fuel probes into the end of the tanks. Before bonding, test the probes to be sure they function properly. Mine were great. Now, more hole cutting. Then, bend the probes to ALMOST touch the top of the tank and ALMOST touch the bottom of the tank. The closer you get, the better the fuel readings will be.
|
|
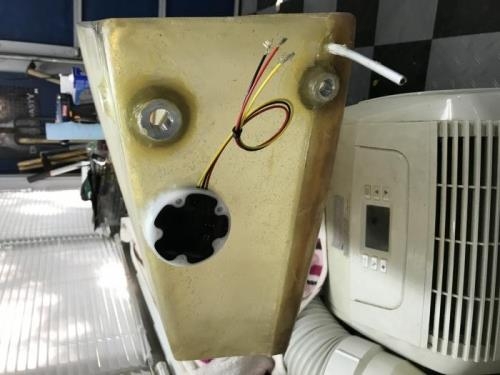
Floxed in, now let it cure.
|
|
|
|
|
|
|
|
|
Copyright © 2001-2024 Matronics. All Rights Reserved.
|