
|

|
|
|
Home of the Spodplane
|
Date: 6-24-2022
|
Number of Hours: 9.00
|
Manual Reference: 23-01
|
Brief Description: Engine mount new jig
|
|
Over the last couple of weeks cut out the pieces for the new jig, welded the perimeter and the attachment plates. Discover a tendency for things to warp when cooling, so bash some bits off and start again. MEASURE where the firewall bits should go and weld them in place. Have to bash one off again but finally I'm happy.
I pack with washers under the firewall mounts until the dynafocal is in the right position, then fit the uprights. Again I put too much heat in and have to disassemble and bash/cut off bits more than once.
Now I take out the washers, break the tack welds as required, and adjust the tubes to the right arrangement. I fit a rail under the lower tubes, so the lower parts are all in the required plane,
I put all these parts aside, and fit the second dynafocal for my mount. The only difference is I have some 3/4" tubing, reamed out to a 3/8" ID and some 3mm washers for my firewall points. I adjust all the mild steel forms for these, and transfer to the 4130 and notch all the tubes, rigging them in the jig with hot glue as before. Much easier the second, (fourth?) time.
Drilled 3/32" relief holes where tubes meet, (including in the jig), with 1/8" oogered around a bit in those joints that are still tacked together. All went back to the welder on 24/06/22. Fingers crossed. I was quite aplogetic about my crappy welding offending his eyeballs. He nicely said it was not the worst he has seen...
|
|
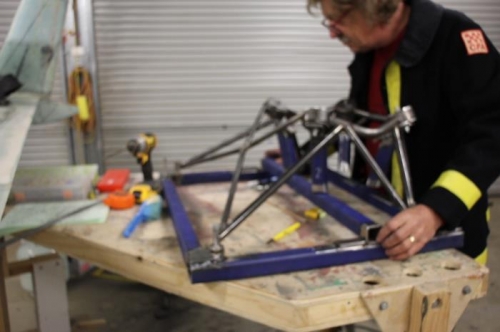
Bit blurry, but using the tacked mount to make the new jig
|
|
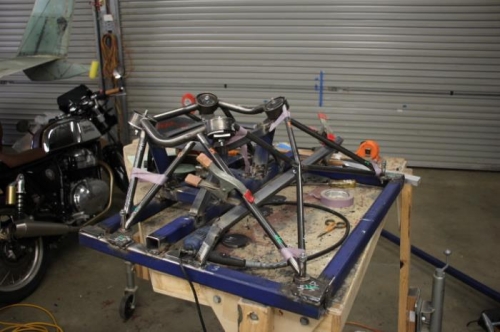
Finished re-rigging AW mount. Mile looks the same on this scale.
|
|
|
|
|
|
|
|
|
Copyright © 2001-2024 Matronics. All Rights Reserved.
|