Brief Description: Main Electrical Panel 3D Mockup
The forward side of the forward baggage compartment bulkhead is used as the Main Electrical Panel. With a robust Electrical System providing for failure and isolation there are a fair number of electrical components to be located. The area between the seatback and baggage compartment was already being used for Flight Controls but there was still plenty of space for a compatable partner. I have done some ""What If""placement investigations using just software but felt it was time to look at a full size fit check of the best looking alternative. So I got a 20""x30"" sheet of Foam Board from an office supply store along with a Glue Stick to use as the base. Then I printed out an unequipped bulkhead picture with background grid at full size across 12 sheets of card stock paper. With some trimming and carefully aligned glueing I had my base. The edges were sealed down with wide box sealing tape to be sure they did not peel up. The top edge is where a crossmember goes so nothing can go past that. The bottom edge had to be clippe just a little but that area on the left is reserved for Elevator controls anyway.
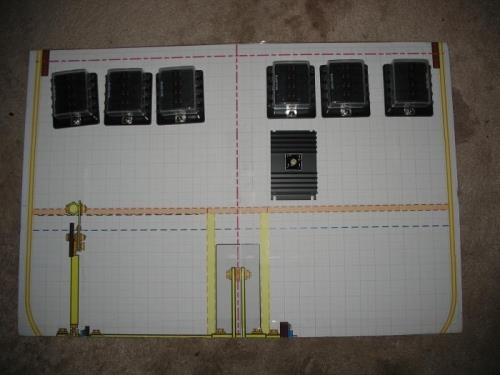
1) The mockup with some recently purchased components that I had on hand. A grounding block goes at top center. The lower black component is a large diode with heat sink that will normally power the Essential Bus #1 Fuse block right above it. The fuse block to the right is Essential Bus #2 and it still needs the Diode, Far right is the Battery Bus and the three on the left are Main Bus #1, #2, #3/