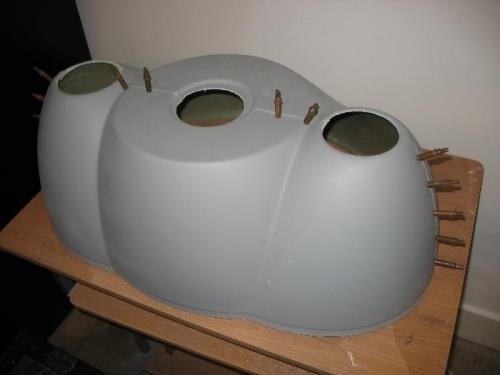
1) The start of comling construction is taking the two halves of the COTS nose bowl and drilling them for attachment to each other. The planned hardware is #6 SS screws into tinnerman flush washers and floating nutplates. Based on the experiences of others I settled on five fastners along the side plus one more right next to the spinner base. The picture shows some clecos in the area that will be covered by the spinner and those holes are just temporary to aid in the overall alignment. A 4-1/2"" hole saw was used to create the original rough openings for the inlets as well as the prop hub opening. The latter is a bit undersized since the depression is sized for a 5-1/2"" hole so that will be enlarged later.
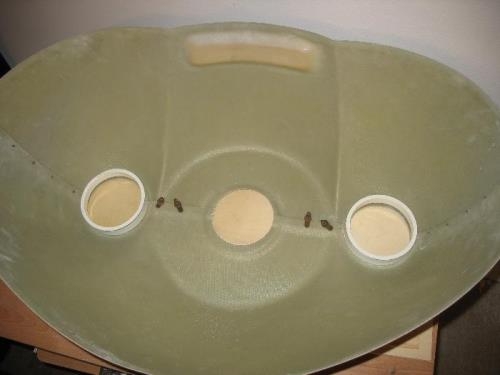
2) The two inlet rings were cut from opposite ends of the coupling. A large pilot hole was drilled into the middle and then a sabre saw was used to cut out the two ends from the middle. The PVC is a remarkably hard material and drilling was not easy. The cutting went fairly easy but made a lot os hard small chips that needed to be cleaned up for safety. The slightly tapered outer edge goes against the nosebowl to make for the best fit. The inner eng will need some inside contouring for better airflow and then all areas to be bonded will need to be roughened with course sandpaper."