
|

|
|
|
Bobs Ten
|
Date: 11-24-2019
|
Number of Hours: 4.50
|
Manual Reference:
|
Brief Description: Install Instrument Panel
|
|
1230 - 1412 1500 - 1748
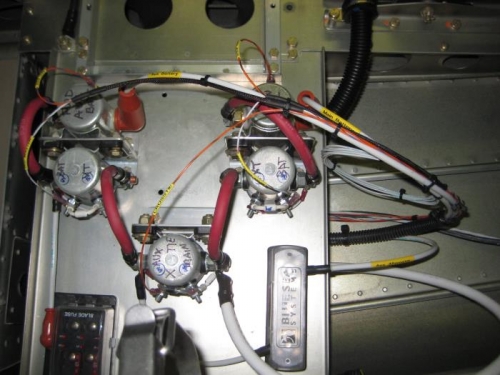
Continue with wiring.
Today, I decided to route the aft contactors. This required removing the previously run wiring and routing from the panel back, the wiring inculded with the panel harness. I opted to do this because the wires are now color coded and easily traced on the wiring diagram. Three of the wires were about two feet short, so a splice was installed using a paralell wrap and soldered joint. The joint was then covered in double wall heat shrink. When installed, the splice remains fully enclosed in the conduit. All wires were labeled and ring terminals installed. The wiring was the connected to the appropriate contactor.
All wires were then organized and tie wrapped in position.
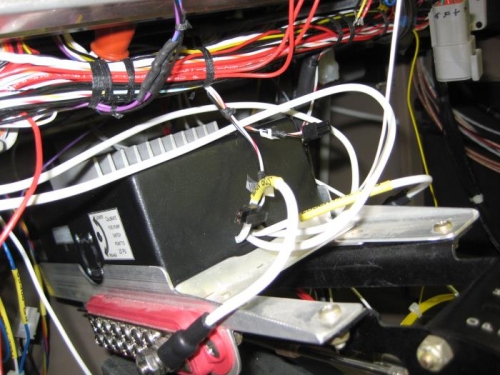
Next, I worked on connecting the emergency power wires, which are 10 AWG. Originally, I installed wild runs from the bus manager to be connected to the switch. When the panel came, the switch was wired with wild runs. I thought about splicing the two wild runs, as working with the bus manager is challenging due to its location. I decided that I did NOT want a splice in the emergency power wires. This necessitated removing the bus manager cover, removing the previously installed wires, and reinstalling the harness wires.
The R & R was challenging but it is now complete...only small wires left to work on!
|
|
|
|
|
|
|
|
|
|
|
|
|
Copyright © 2001-2024 Matronics. All Rights Reserved.
|