Dimple mounting holes in sub panel for flush rivets.
Install doubler using CS4-4 blind rivets.
Install GSU 25 using AN3 bolts.
Install Tee fitting for pitot and 90 degree fitting for AOA in GSU 25.
Trim pitot and AOA lines to correct length and install in push to connect fittings.
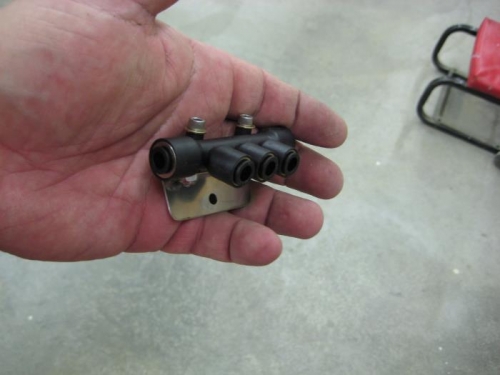
Fabricate bracket to mount static manifold. I decided to go this route as it makes the overall install neat and much easier than using Tees. The bracket was fabricated from 025 SS to provide the necessary rigidity and bend angle.
Mount manifold to bracket and bracket to sub panel.
Trim static line and insert in one end of manifold. Insert length of static line in other end of manifold and trim to fit the installed 90 degree fitting in the GSU 25.
Insert two lengths of staic line into manifold. These lines with go to the G5 and Alternate Static Source switch.
The third static line in the manifold is populated with a 1/4" push to connect fitting coupled to an 1/8" barb fitting. A length of Norprene tubing is connected to this fitting and capped off. The purpose of extra static line is to provide a reference static source for an electronic manometer. Used with a set of piccolo tube in the cowling, an accurate reading og cowl pressure can be obtained. When not in use, this line will remain capped.