
|

|
|
|
Stuarts Web Site
|
Date: 10-7-2013
|
Number of Hours: 3.00
|
Manual Reference:
|
Brief Description: 02 - Alternate air duct
|
|
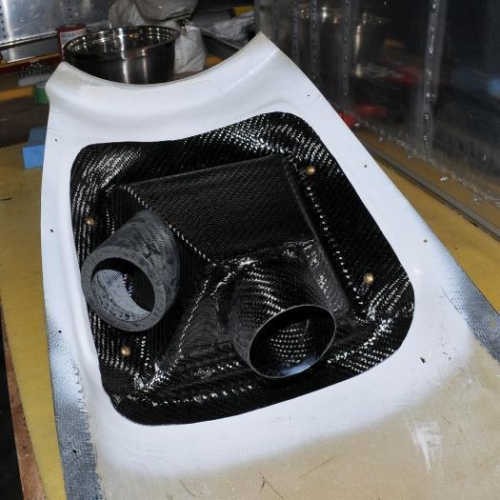
Alternate air duct
First, I drilled holes to match the pre-installed nutplates, then marked out a large hole for the alternate air duct.
I measured the alignment with the front edge of the scoop vertical (in-flight position), such that the alternate air flange is just aft of vertical. This should encourage the silicon baffle seal to close off with ram air pressure, but won't overly resist opening under suction if the filter becomes clogged. The gravity 'closing' vector will be greater with the tail on the ground when ram air pressure is less.
I plan to hinge the aft half of the scoop so I can access the SCAT and pre-flight the fuel servo rod ends, so this will also allow me to press-to-test the silicon baffle seal and ensure it doesn't fuse to the seat. Later I'll slot the top edge of the collar for the silicon seal to stick out, then match a bracket and nutplate to pin it in place. Even if the bracket were to break loose, nothing will be able to fall into the filter box and make its way to the engine.
I'll validate function of the alternate air duct by starting the engine and high-speed taxiing with the normal ram air scoop totally blocked with a rag. However, I won't need full power to get out of trouble in this 200 knot beast ... the engine will happily see me over 150 KTAS at 60% !!
Once satisfied with the positioning, I drilled out the hole, then die-ground in and outside the cover to smooth the Aerosil from the layup, then bedded the duct in epoxy and Aerosil. Later, I'll die-grind this smooth, finish shaping the inside and apply a couple of layers of carbon inside the joint.
Yes, I left room to target the bottom left filter box screw with the driver !! :-)
|
|
|
|

|
|
|
|
|
|
|
|
|
Copyright © 2001-2024 Matronics. All Rights Reserved.
|