Brief Description: Final Installation of Flight Controls
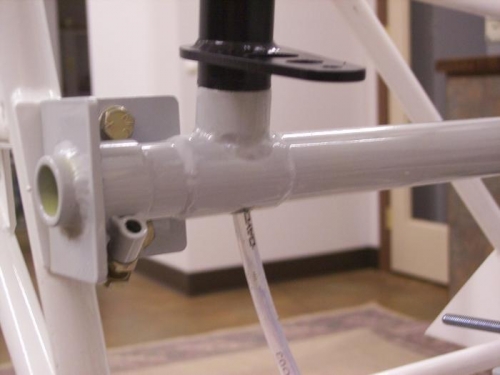
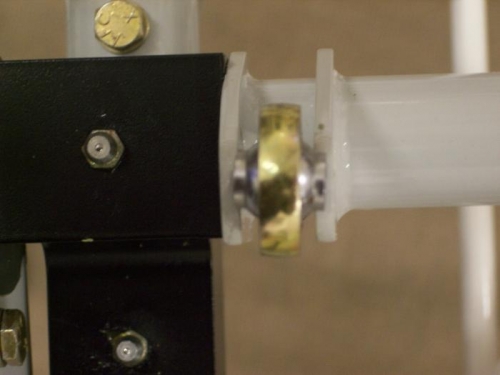
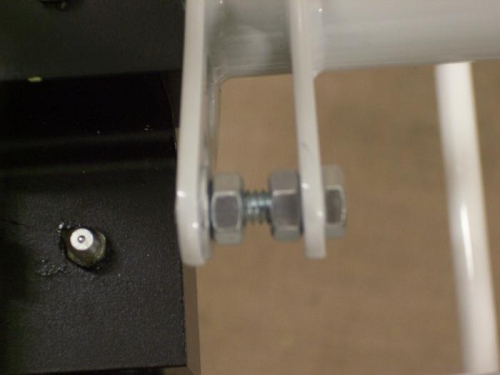
The end of the pilots collective tube requires that you drill a 1/4" hole to facilitate the installation of a nylon tube to house and protect the wiring routed from the collective. A 1/4" tube should be plenty large enough for the various switches I intend to install in the grip. The plans show this tube to be 4" long, but I made it long enought to extend about 4" out from each end of the collective. That should make it much easier to route the wires through it. After the wires are in place I'll pull it back through the hole I drilled and then cut the tube to size. I'll apply sealant around the tube to keep it in place at the base of the collective. One problem I came up against while installing the rod ends into the control clevis was the 'horns" were narrower than the width of the bearing insert (see photo 2). To widen to gap I inserted a threaded bolt and two nuts (photo 3). One of the nuts was tightened against one clevis ear and the other was tightened against the other. I used a washer between the second nut and the ear to avoid gouging the paint. As you tighten the nut it will spread the ears.
Hole drilled and tube installed in collective for wiring