To begin the fabrication of the engine cowling I first needed to locate the nose bowl to obtain the correct gap between the nose bowl and spinner and also to locate the nose bowl laterally. In my case, the propeller/spinner are currently installed and I chose not to remove them, instead I will fabricate a plug that will sit tight against the spinner on which the nose bowl will rest to secure it in the correct position.
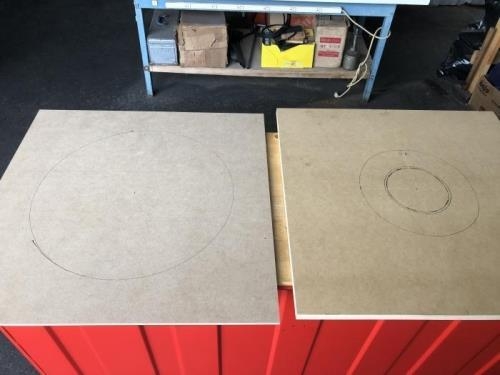
I began by obtaining two square sheets of MDF board, one 1/4" thick, and the second 3/4" thick. I located the center of each board by drawing a diagonal line between each corner and marking where the lines crossed.
The 1/4" board will provide the spacing I want between the spinner and the nose bowl while the 3/4" board will provide the seat for the nose bowl to sit on while I fabricate the engine cowling.
Next I measured the diameter of the propeller shaft and also of the spinner. The measurement from the spinner was transferred to the 1/4" board with an extra inch to the radius while the measurement from the propeller shaft was transferred to the 3/4" board. (In picture #3 you can see where the "measure twice, cut once" concept worked for me as I had miscalculated the radius of the propeller shafrt.)
As the previous owner of my kit had already drilled holes into the nose bowl, I placed the assembled nose bowl on top of the 3/4" board, made sure it was centered and marked the opening. I discovered the opening of the nose bowl was not symetrically round, rather it was a bit oblong so I identified what will become the top of the plug to aid in locating the nose bowl.
After cutting out the 1/4" board for the spinner, I then cut out the 3/4" board along the lines where the nose bowl will sit but did not yet cutout the opening for the propeller shaft.
After drilling a 1/4" hole in the center of each piece I glued them together and used a bolt to alignthe two pieces. After the glue sets I will cut out the center for the propeller flange followed by cutting the pieces in half so I can p