
|

|
|
|
Peters Web Site
|
Date: 3-3-2017
|
Number of Hours: 2.00
|
Manual Reference: 9225501-LOG-03.051
|
Brief Description: Primed and Ready
|
|
After some time away from the workshop it was good to be able to get back in to it for a short while tonight.
I painted all the rudder components with two-pack epoxy primer. Since it's a Friday night, and there isn't a lot of painting, I just used rattle cans rather than get my spray gun out. Costs more to paint this way, but much more convenient when you don't have a lot to do.
I tackled a small dimpling problem tonight as well. One of the ribs that sits on top of the rudder main spar has two holes that need to be dimpled to suit a #10 countersunk bolt. Bugger, I don't have a set of #10 dimple dies!
I'd borrowed a set of dies from a fellow SAAA member, however I think he gave me the wrong size as the dimple they make is not deep enough to fully recess the head of the screw. They sit proud by about 2mm.
Not to worry, amongst the box full of bucking bars my mate Pete gave me was a cylindrical bit of steel with a hole drilled in one end (second photo below). This gave me an idea. I drilled the hole to the diameter and depth of the bolt, and then countersunk it. This would be my female die.
The bolt would be my male die.
I placed the rib on top of the steel cylinder, inserted the bolt through the rib and into the countersunk hole I'd drilled, and then, using a mallet and pin punch, belted the top of the bolt. A couple heavy blows and I had a nice, neat dimple.
Job done.
|
|
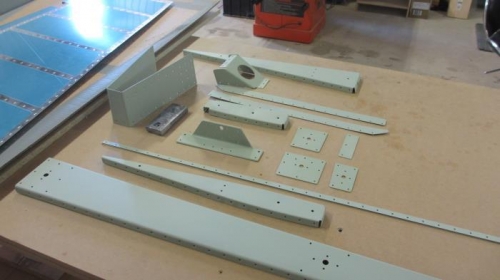
Rudder parts primed and ready
|
|
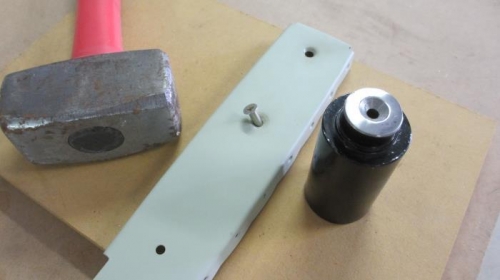
How to dimple, when you don't have a dimple die
|
|
|
|
|
|
|
|
|
Copyright © 2001-2024 Matronics. All Rights Reserved.
|