
|

|
|
|
Pete's RV-8 Web Site
|
Date: 9-9-2010
|
Number of Hours: 2.00
|
Manual Reference: 8-28
|
Brief Description: Fit and match drill seat back support
|
|
Thankfully, I read a couple websites before match drilling the seat back support to the upper longerons and cockpit rail. There is a design weakness in the mating of the seat back support, the underlying spacer, and the cockpit rails.
You can see in the second photo below how close the one hole is that attaches the rail through an underlying spacer to the weldment. This hole is position about as well as it can be and it is still too close to the edge. The plans call for drilling this to #19 for a number 8 flush head screw. The hole in the photo is a #30. If it is enlarged and then dimpled, there is a risk that the aluminum might crack at the edge. I have decided to leave this at #30, dimple, and then attach with a -4 flush head rivet (much safer in my opinion).
By the way, the match drilling was accomplished by first clamping the seat back support to the support plates and the upper longerons. This is absolutely necessary to draw the predrilled hole in the weldment (the guiding hole) as far outboard as possible. Next, I drilled from the bottom using a #40 bit followed by drilling from the top with a #30. Once I saw the edge distance of the #30 hole the decision was made to keep the aft most weldment attach hole at #30 for riveting versus enlarging for a screw. The remaining holes that call for screws were enlarge to #19.
I am happy with results and really glad other builders like Bob Ellis in the UK covered this topic in their builder logs. Generally, Van's shop instructions are right on but had I followed the manual on this procedure, I may well have ruined some parts and had to order replacements.
|
|
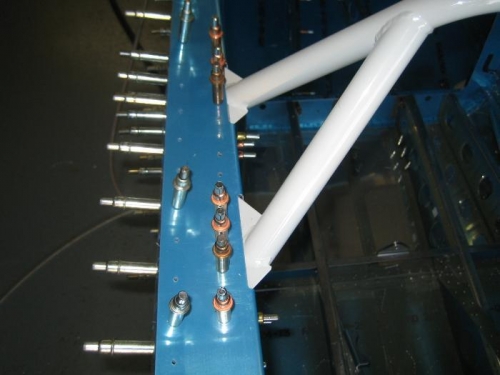
Rails at Seat Back Support
|
|
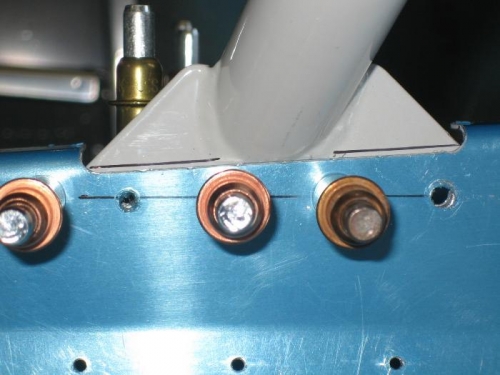
Notice Edge Distance
|
|
|
|
|
|
|
|
|
Copyright © 2001-2024 Matronics. All Rights Reserved.
|