
|

|
|
|
Nate's RV-7 Site
|
Date: 9-10-2019
|
Number of Hours: 1.50
|
Manual Reference: Sect 6-11
|
Brief Description: Prepping the Electric Pitch Trim System
|
|
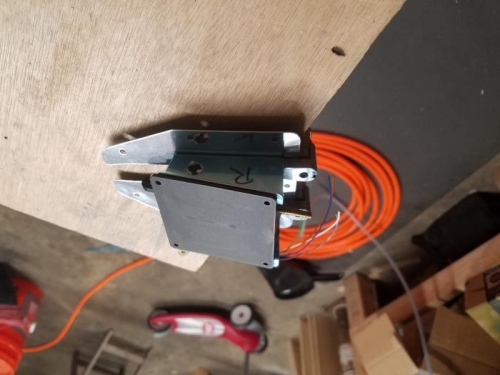
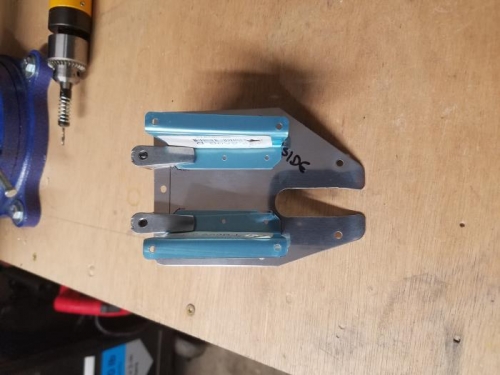
First off, this work was spread over two days, the 9th and 10th of September... While working on the rudder, I needed a break from the stress of riveting the parts together. So I decided to break out the electric trim motor and begin to fit it to the attachment plate and attachment brackets. I started by drawing the baseline across the access panel 3/8th inch from the edge of the plate. this gave me an accurate place to begin working from. Next, I fitted the trim motor to the brackets and labeled all the parts when they were in the correct position and clecoed everything into place (note: I removed the clecos before taking photos). I had a hard time figuring out where to place the trim motor laterally. The plans say that the left bracket should be 1 3/8ths of an inch from the left side of the attachment plate. But Vans recommends simply lining the servo arm up with the center of the notch on the attachment plate. Easy enough. Once it was aligned, the motor I traced the outer edge of the attachment arms to remember where to place them laterally. then I used my 1 inch cleco arms to hold everything in place and gently removed the trim motor from the assembly. After verifying everything was still lined up, I match drilled, deburred, and dimpled the assembly.
the next day I spray primed the interior of the attachment plate, and the brackets, and after allowing a few hours to harden, I used the squeezer to install the rivets. Easy enough to complete, then I was back working on the rudder.
|
|
|
|
|
|

|
|
|
|
|
|
|
|
|
Copyright © 2001-2024 Matronics. All Rights Reserved.
|