
|

|
|
|
Steves Web Site
|
Date: 2-18-2017
|
Number of Hours: 3.00
|
Manual Reference:
|
Brief Description: Elevator repair - Part 1
|
|
I discovered leading edge delamination on one side of one elevator - not good. After a good nights rest to contemplate such a situation and a trip to the aviation department at Lowes, I've started the repair.
I've used "plastic" molding before (actually, I think it's a styrene), it's light weight, sandable, and reasonable strong, flexible, and water proof. I picked up a length that had a inside cove with a radius nearly equal to the elevator leading edge tube. I needed to sand-down one face of the stuff and recountered the radius, but managed to get a reasonable fit between the tube and the inside skin - see pics. Perhaps the real insight was to use a plastic cake decorating bag, 36" piece of tubing and a stick to get epoxy deep into the elevator. You can see the tube and rolled up frosting bag in the first photo, but not the stick I taped the tube to.
It did get a little messy as the epoxy began to seep through the delam and onto the outside of the elevator - hey, at least I knew I was getting epoxy where I wanted it... A quick piece of peel-ply and some seran wrap and I was back in business. I buttered up the molding with some microglass and stuck it in place. It's curing now, but I'm feeling pretty good that it will provide the necessary internal support to enable the external sanding and new layers of uni.
|
|
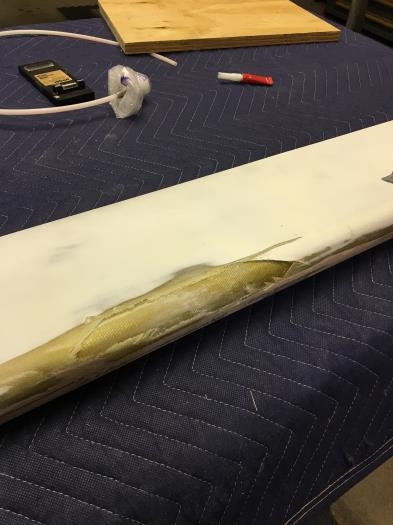
Photo of delmamination and where I peeled back to expose the problem
|
|
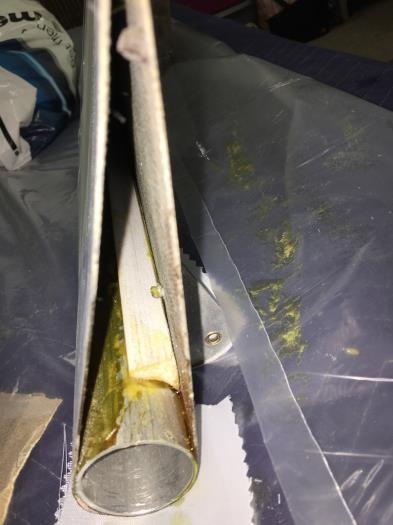
Here's the styrene cove molding epoxy'd in place
|
|
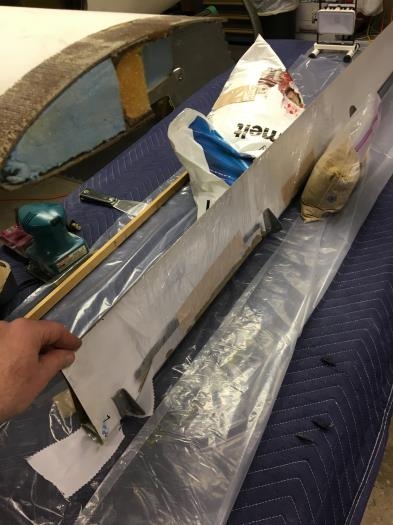
Peel-ply and some seran wrap to keep epoxy oozing out
|
|
|
|
|
|
|
|
|
Copyright © 2001-2024 Matronics. All Rights Reserved.
|