
|

|
|
|
Terrences Web Site
|
Date: 3-4-2010
|
Number of Hours: 8.00
|
Manual Reference: None
|
Brief Description: Bend L-angles & Z-angles 1/4
|
|
Continued to multiple entries because of *%#@>^< Kitlog Pro 2048 character limit!!!
Local Figs refered to by A1, A2, etc.
I utilized the aluminum from my 1st pair of bottom wing skins to make andditional L- and Z-angle material.
The brake that I used to bend the angles was fashioned after a design that Craig Payne invented as described in an article in the Zenair News #169. I modified Craig's design in two ways:
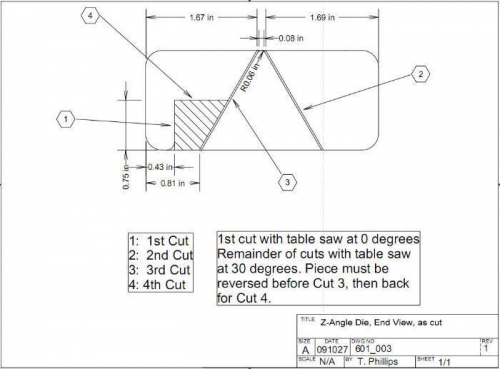
As shown in Fig. B3, I cut the 3 pieces from a single 2x4x12, with the help of my neighbor and his table saw. We could have done a better job of cutting if the 2x4 had been straighter. None-the-less, the pieces were OK. It would be good to have a wheel or something to hold the 2x4 tight against the table at the blade location. The 3 pieces shown in Fig. B3 can be cut from a long 2x4 with just 4 rips.
Procedure for cutting the 36 and 54-mm metal strips:
1. While cutting from one bottom skin, use the edge of the other skin as a straight edge to guide the Olfa knife.
2. Use an 18" combination square set to 36 or 54-mm to mark the cut width every 18" on the base material. I found that 18" was about as far as I could accurately swipe the Olfa knife, keeping it against the straight edge while scoring the base metal.
3. Align the straight edge along the marks, with the marks set just on the edge of the table.
4. Clamp the base material and straight edge to the table at the ends of the material using a ratchet bar clamp or screw bar clamp or pinch spring clamp.
5. Use a ratchet bar or screw bar clamp to hold a metal yearstick ~1/4" from the edge of the straight edge. This will hold the straight edge tight against the base metal and the table top.
6. Score the base metal ~7 times, then move the yard stick to the next 18" section.
7. When the entire length has been scored, break the metal at the score:
|
|
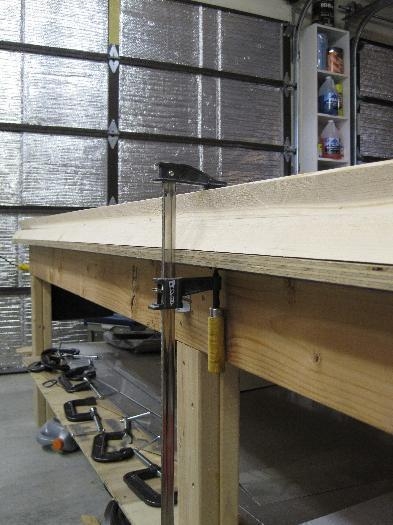
Set up with quick clamp
|
|
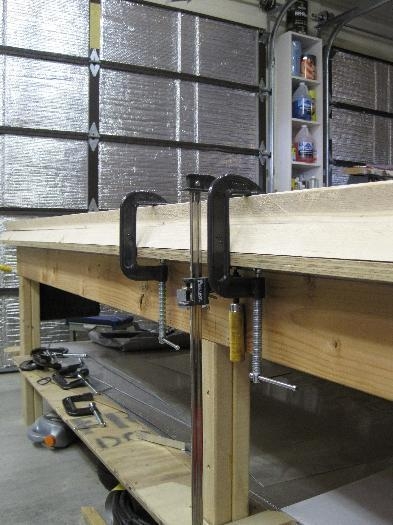
Adding on C-clamps
|
|
Brake cutting setup
|
|
|
|
|
|
|
|
|
Copyright © 2001-2024 Matronics. All Rights Reserved.
|