Brief Description: Drill and cleco the FTTs to the stab
1. Marked rivet lines on the tail ends of both sides of both FTTs, and marked off 40-mm rivet spacing.
2. Drilled the holes (as marked in 1. above) into the FTTs.
4. Measured the location of the tail end of the FTT rib ends with the FTTs in place on the stab.
5. Use the location data to drill #40 and cleco the FTT rib ends to the end ribs.
6. The flange of the FTT was too wide at the tail end to insert fully inside the FTTs, so I filed down the tail end of the flanges until they easily slipped into the FTTs.
7. Inserted the right FTT into the right end of the stab.
8. Used my carpenter square (measured thickness 3.0-mm) as a spacer between the tail end of the FTT and the elevator. Pushed the FTT into the right end of the stab as far as possible.
9. Drilled #40 and clecoed the right FTT 1st to the top stab skin and then to the top of the left FTT rib.
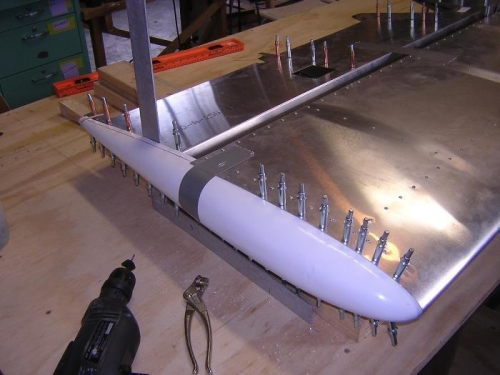
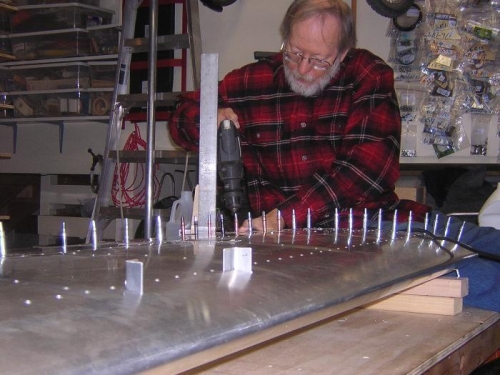
10. Repeated this procedure at the left side. At the left side, I used a rubberband to hold the FTT rib inside of the FTT while I drilled. (Fig. 1)
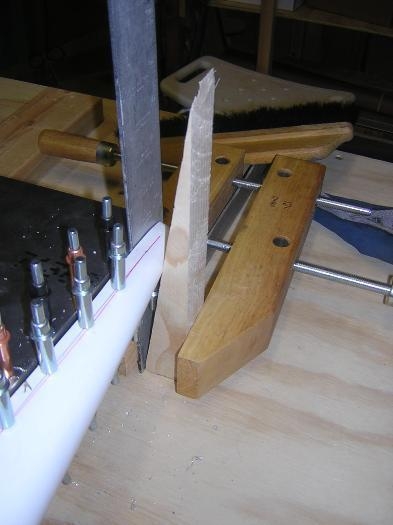
11. After completing the top of the left side, I turned over the rudder/elevator assembly and drilled the bottom side. I used duct tape to hold the FTT tightly to the stab while drilling. At the right end, I used a hardwood clamp and a 2x4 shim against the carpenter square to hold the FTT and the FTT rib together. (Fig. 2 & 3) That worked quite well. The shim acted as both a pivot point at the bottom and as a clamp arm to hold the FTT and FTT rib end together so that the parts would not spread as I drilled . The square provided the correct clearance.
12. Checked the elevator for freedom of motion and clearance from the FTTs. Everything was OK.
13. Drilled and clecoed the FTTs #30 for the A4 rivets. Removed the FTTs.
14. Drilled the FTT rib attachments to the end rib with #30.
15. I deburred the new holes in the stab skin, end ribs, and FTT ribs.