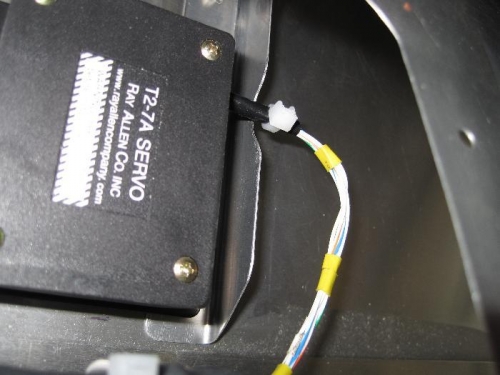
The first step in reassembling my ailerons was to reinstall the aileron trip tab servo.
1) Used a rotary carbide burr to cut a notch in the outboard servo reinforcing angle to clear the control cable.
2) Wrapped the end of the cable with several layers of electrical tape to protect the cables from the edge of the angle. Tightened a small tie wrap around the electrical tape to make sure it did not come loose. S
3) Clecoed and riveted the angles and servo onto the top of the aileron.
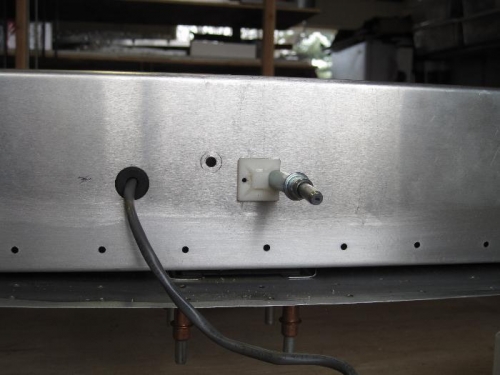
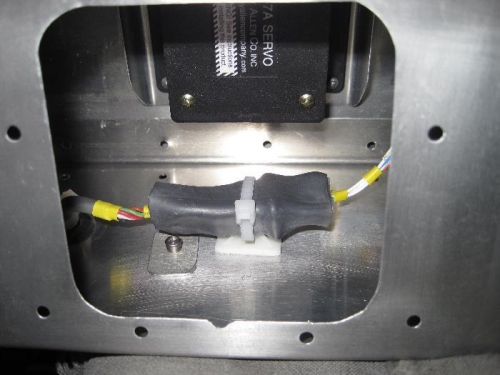
4) When I assembled the right aileron on 1/27/08 I used an adhesive backed cable tie mount to support the connector. The adhesive failed in the intervening 3 years. I decided to use 3/32” blind rivets to hold a new cable tie mount in place. Fig. 2 shows the mount clecoed in place while back drilling the front of the aileron #40 for the pop rivets. I had originally used an Adel clamp inside the aileron to provide stress relief for the cable. I covered the screw hole for the clamp with a small piece of 0.040 6061-T6 held in place with a SS 5/32” blind rivet. I put a tie wrap on the cable to provide stress relief. The connector and tie wrap are shown in Fig. 3.
5) The revised installation greatly reduced the amount of cable inside the aileron.