
|

|
|
|
Terrences Web Site
|
Date: 3-4-2010
|
Number of Hours: 1.00
|
Manual Reference: None
|
Brief Description: Bend L-angles & Z-angles 2/4
|
|
Continued because of Kitlog Pro's *^&#@<&> 2048 character limit!!
Images from this entry referred to as B1, B2, etc.
8. Bend the metal down in 3 passes~20°, ~70°, and 90°, using an ~10" piece of 2x4 scrap to hold the base metal tight to the table top while I push down on the strip with a gloved hand. Then upon bending the metal back, the strip usually separated easily from the base metal.
9. The rough edge from the cutting is most easily deburred after bending into an angle.
Construction of Craig Payne's angle bender (see Zenair News #169.)
The bender consists of 3 parts, two wooden brake dies and the triangular "pusher." In my mod of Craig's original design, I cut all 3 pieces from a single 2x4x12 by making 4 cuts on a table saw. Fig. A3 shows the cut pattern and the sequence of the cuts. If one is just going to make L-angles, skip cuts 1 & 4. Those cuts are necessary to allow the extra bend to form a Z-angle. There is a tendency for the 2x4 to raise up above the table top when making the cuts. Some sort of mechanical hold down mechanism would be good. Be very careful when making cut 4, because cutting too deeply will weaken the brake. Sand one of the bottom corners of the pusher piece to break that angle to help ensure that the bend angle radius is >= 0.125". Try to get the straightest possible 2x4 to make it easier to cut on the table saw.
Setup procedure:
1. Drill (~3/32") pilot holes & countersink for the screws every ~1' top to bottom in the trapezoidal and angular brake pieces (See Fig. B3 for orientation.)
2. Screw the trapezoidal piece to the table, using a laser to ensure that the vertical side of the piece (the inside of the die) is held in a straight line.
3. Use 11/16" or 5/8" plywood scraps to hold the angular piece at a constant distance from the trapezoidal piece when screwing the angular piece to the table.
4. Clearly mark the sanded angle on the triagular pusher so that it is always placed pointing down onto the strip to be bent.
|
|

Ready to bend L-angle
|
|
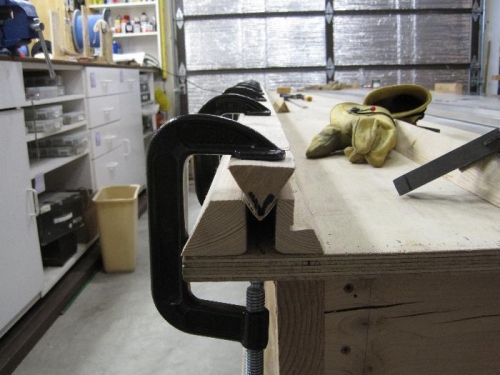
L-angle at end of bend
|
|
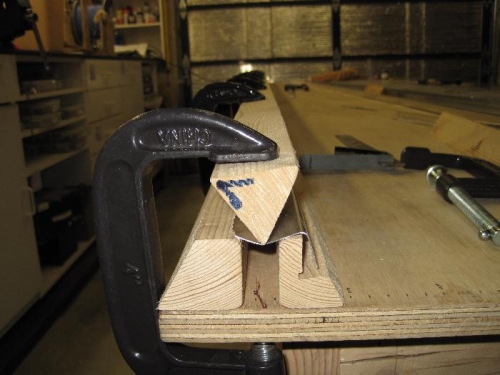
Beginning 2nd bend of Z-angle
|
|
|
|
|
|
|
|
|
Copyright © 2001-2024 Matronics. All Rights Reserved.
|