
|

|
|
|
ZEKE'S WEB SITE
|
Date: 4-27-2009
|
Number of Hours: 3.00
|
Manual Reference:
|
Brief Description: Step 1 in Building Ribs
|
|
Building the ribs starts with assembling the parts. Most ribs take a nose rib, tailored gussets (these are gussets unique to that rib size and fixture), common gussets (used wherever two diagonals meet the cap strip), and three pieces of cap strip material.
In photo 1 you'll see a jig prepared to start assembly. It's waxed and the half inch holes are drilled so I can pop a half-finished rib out of the jig. You will also see that I've covered with hatch marks the area where the front spar will go through the rib. This is so that in the heat of battle while glueing gussets to the rib I don't mess up! I know myself well enough to know that an ounce of prevention is worth a pound of cure! Finally, you'll see I've marked with red sharpey pen the outline of the common gussets. This is so that any rib built on this fixture will have its common gussets in the same location and all ribs will be identical. This isn't necessary with the tailored gussets because their locations are self-indexing: they line up with cap strips in one dimension and spar holes in another. Therefore, if they're lined up properly, there is no chance for variation from rib to rib. This was another tip from Bill.
In photo 2 you'll see the first step in actually constructing a rib. I've found the appropriate nose rib and pressed it into the front of the jig. Next, you have to cut the cap strips for the top and the bottom of the rib.
In photo 3, you'll see the first step that requires any skill or technique - bevelling the two cap strips at the trailing edge of the rib. I asked Bill about this and he said to put all of the bevel in one cap strip. Don't worry about trying to bevel them both. Next, the finished trailing edge is even with the forward end of the slot in the jig that is perpendicular to the chord line. However, Bill said I should leave the "tail" on the rib until later in the assembly process. Then we'll trim all ribs to a uniform dimension on the tail.
|
|
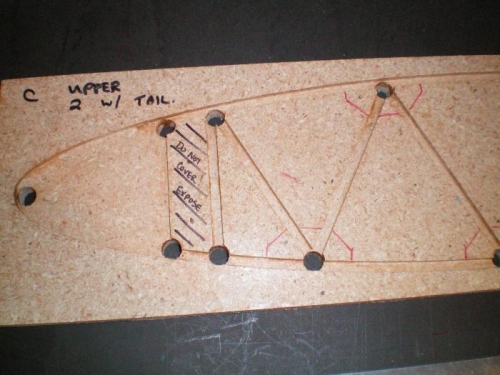
A close up of the jig. I've crossed out the front spar.
|
|
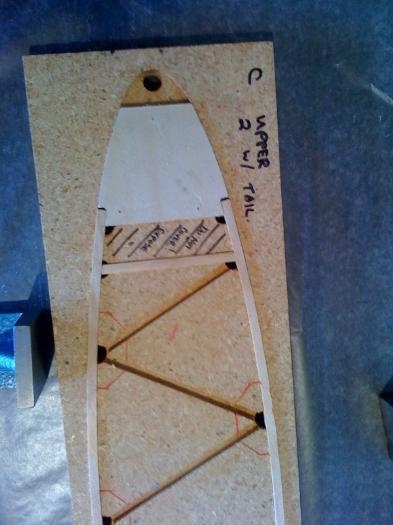
Nose rib layed in the jig. Top and bottom cap strips, and one upright.
|
|
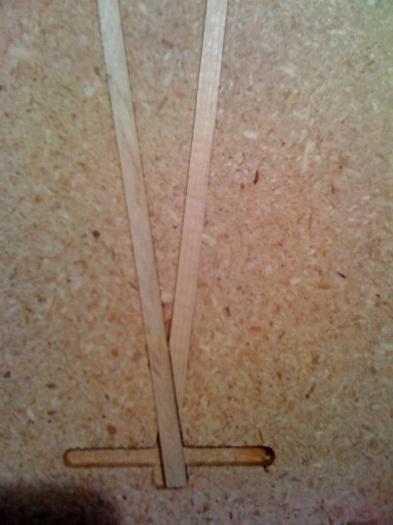
Note the bevel is all in one cap strip. The other is straight.
|
|
|
|
|
|
|
|
|
Copyright © 2001-2024 Matronics. All Rights Reserved.
|