
|

|
|
|
Michaels RV-8
|
Date: 11-16-2013
|
Number of Hours: 2.00
|
Manual Reference:
|
Brief Description: Right Elevator Skeleton Prep Work
|
|
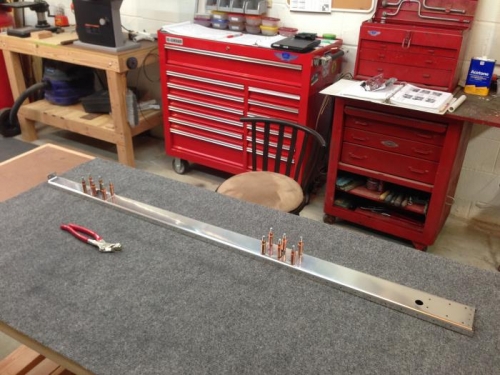
The next step per the construction manual, is the preparing the elevator skeleton. At each hinge point, Spar Reinforcement Plates, E-611PP are use to beef up the structure. The E-611PP is Clecoed to the E-702 Spare and holes get drilled to #30's.
Below is the outboard hinge point. The Spar Reinforcement Plate, E-610PP get drilled to #30 as well. Elevator Spar with the Hinge Reinforcement Plates and K1000-6 Platenuts in place.
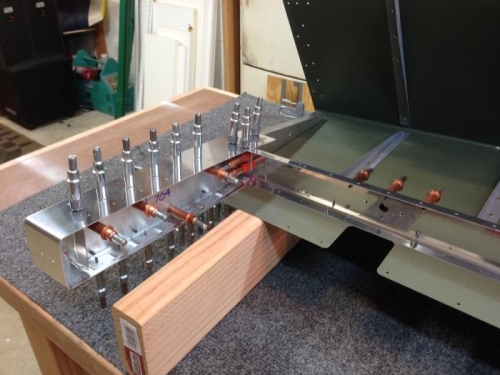
At the elevator tip, there are two ribs, E-703 End Rib, and E-704 Counterbalance Rib that are fastened back to back. Both get fluted and the edges are finished.
Once the two ribs are finished and are straight from the fluting the E-713 counterbalance skin is wrapped around the two ribs. I Clecoed everything to the elevator skin so everything can be drilled.
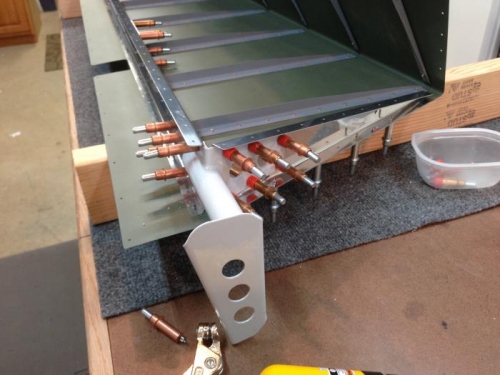
Just another view of the tip, and the slot where the lead E-714 counterweight will fit.
The last two holes on the End Rib has no pre-drilled holes and will get matched drilled once the skin gets fastened. The skin has not been bent yet due to the last few rivets have not been set at this point. The steel Elevator Horn, WD-605-R-1 is Clecoed in place and final drilled to the proper size.
The Spar, Ribs and Control Horn have been drilled and I am ready to disassemble the elevator and turn my attention to the lead counterbalance.
|
|
|
|
|
|
|
|
|
|
|
|
|
|
|
Copyright © 2001-2024 Matronics. All Rights Reserved.
|