It was a very pleasant morning so I opened up the hangar and took the Decathlon out for some exercise before doing anything else. Had a nice flight, the air was smooth and made landings at Sanford and Siler City before returning to Burlington.
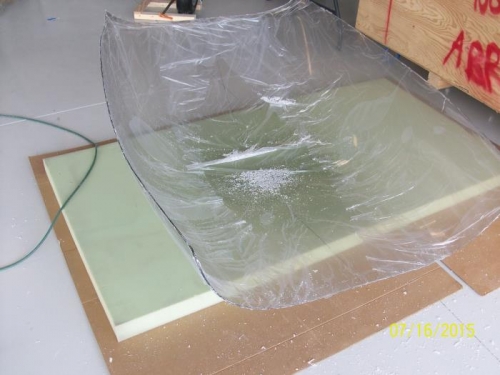
I took advantage of the nice weather (temps in the 80s instead of 90s) and began work on trimming the plexiglass canopy. First the mold flanges around the outside edges were marked and trimmed off. I used a cast saw, like the ones used to remove a cast from a broken arm. It take patience and many passes to get through the 1/4" plexiglass but it does a good job, is fairly easy to control and is pretty safe.
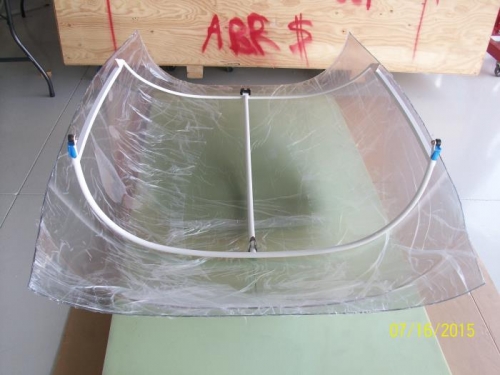
Once the side were trimmed off I placed the canopy frame into the canopy and found the "best-fit" location and marked where the locking handle tube needs to pass through the canopy. The hole was then drilled to size using plexi bits and finally with a unibit. The hole was dressed using sandpaper.
With the hole drilled the frame was placed back into the canopy and the rear cut line was roughed in. This was then cut so the rear of the canopy could be clamped to the frame.
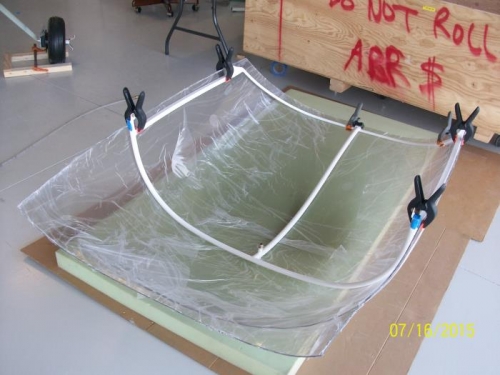
The canopy was then clamped to the frame (and a bolt run through the latch hole to secure the canopy to frame at that point) then the final cut locations were marked at the front of the frame which separates the sliding portion from the windscreen, along the sides of the frame and along the rear of the frame.