Brief Description: R-Elev Tip: Re-enforcing, balancing and rivetting
I cleaned all the old epoxy off both the strips and the tips. I then roughed up the face of the strips a bit with some course sandpaper and did the same to the glass. (It seemed as though the epoxy had previously had more of an issue adhering to the glass than the aluminium). I then re-applied epoxy and again left it to cure for around an our. This time though, I placed a clam on each side of the hole on the tip and drilled it straight to #30 as the skins were already now drilled to #30. The clamps ensured that the strip would not become unstuck again.
I then clecoed it all into place to make sure the all holes were perfectly aligned. I then deburred the Elev skin's hols and the Aluminium side of the fiberglass tips. I dimpled the elevator skins with the pneumatice squeezer on all holes barring the trailing most two (top and bottom) - these I dimpled with a 1/8" pop rivet dimple die due to accessability - quick and easy.
I then countersink the iberglass tips appropriately but rather than dull my microstop countersing bit, I used rotary mounted stones with the dremel tool. Also worked great - basically I just used the old "Eyeball Mk 1" gauge during the "countersinking" of the glass tips and used a CS4-4 rivet to check each one. Also worked great.
I placed the tip on (loosely with no cleco'es) the elevator to check the balance thereof - I needed to remove a few grams of lead from the R-Elev counterweight to get a suitable balance for now (ever so slightly "nose heavy" - will recheck after painting). I then clecoed and pop-rivetted the tip into postition - looks great!
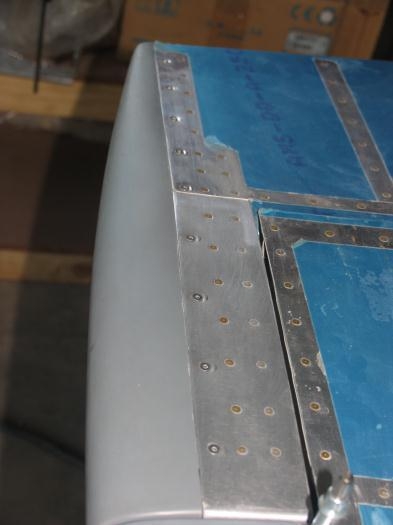
R-Elev tip rivetted into position - fits like a charm!