Date
|
Hours
|
Work Log Summary

|
Details

|
01-23-2022
|
6.00
|
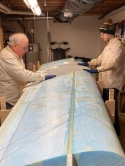
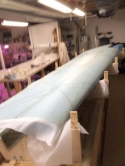
Skin Upper Surface or Right Wing
|
|

|
|
01-23-2022
|
2.00
|
Final Prep Work to Skin Upper Wing
|
Details
|
   |
|
01-23-2022
|
1.00
|
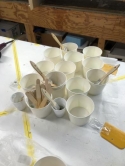
Clean up After Skinning Upper Right Wing and finis
|
Details
|

 |
|
01-22-2022
|
1.00
|
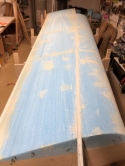
Finish Final Sanding or Right Wing Upper Surface -
|
Details
|
  |
|
01-22-2022
|
1.25
|
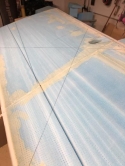
Draw Fiberglass Alignment Lines on Upper Right Win
|
Details
|

 |
|
01-22-2022
|
3.00
|
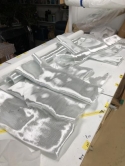
Cut Fiberglass and Peel Ply for Right Wing Upper S
|
Details
|
  |
|
01-22-2022
|
0.50
|
Add Trailing Edge Alignment Supports to Jigs
|
Details
|

  |
|
01-21-2022
|
0.50
|
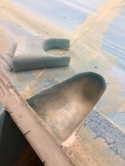
Trim and Prepare Right Wing Upper Wing Bolt Attach
|
Details
|
  |
|
01-21-2022
|
1.00
|
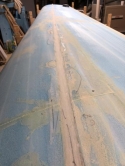
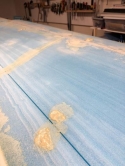
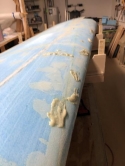
Sand Excess Expanding Foam and Add More to Upper R
|
Details
|
|
|
01-21-2022
|
0.50
|
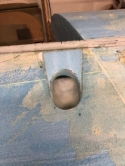
Flox Upper Right Wing Attach Bolt Access Port Inse
|
Details
|
  |
|
01-20-2022
|
0.25
|
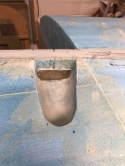
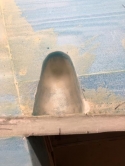
Trim off Excess Fiberglass from Right Wing Upper A
|
Details
|
 |
|
01-20-2022
|
1.25
|
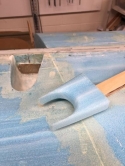
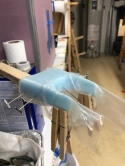
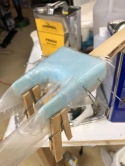
Final Shaping and Fiberglassing of Right Wing Uppe
|
Details
|
|
|
01-20-2022
|
0.30
|
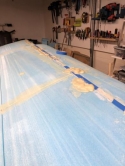
Add Expanding Foam to Continue Repair to Upper Rig
|
Details
|
  |
|
01-19-2022
|
0.10
|
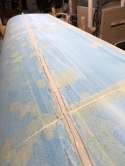
Mark off Final Area Where Upper Right Wing Spar N
|
Details
|
  |
|
01-19-2022
|
1.25
|
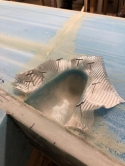
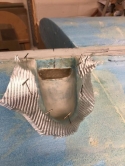
Continue to Work on Right Wing Upper Attach Access
|
Details
|
 |
|
01-18-2022
|
1.25
|
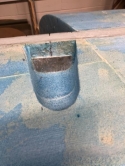
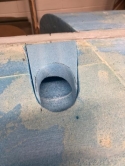
Continue Shaping Right Wing Upper Access Port and
|
Details
|
 |
|
01-18-2022
|
1.00
|
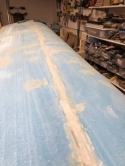
Continue Sanding Right Wing Upper Spar to Final Sh
|
|
  |
|
01-17-2022
|
1.25
|
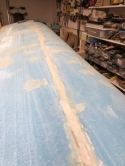
Continue Sanding Upper Right Wing Spar to Shape
|
Details
|
  |
|
01-17-2022
|
1.00
|
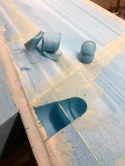
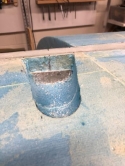
Begin Cutting Right Wing Upper Wing Bole Attach Po
|
Details
|
 |
|
01-16-2022
|
1.25
|
Begin Trimming and Planing off Excess Spar Materia
|
Details
|


|
|
01-15-2022
|
0.50
|
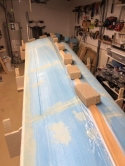
Weight Down Upper Right Wing Spar to Cure
|
Details
|

 |
|
01-15-2022
|
1.00
|
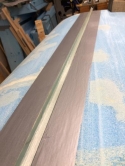
Mask Off and Final Sanding and Vacuuming of Right
|
Details
|
  |
|
01-15-2022
|
7.00
|
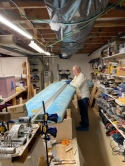
Layup Upper Right Wing Spar
|
|

 |
|
01-15-2022
|
0.75
|
Clean All Roving Components with Acetone
|
Details
|


 |
|
01-14-2022
|
1.25
|
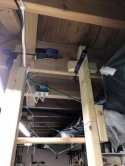
Rebuild Fiberglass Roving Stand to Accurately Posi
|
Details
|
  |
|
01-14-2022
|
1.00
|
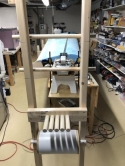
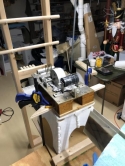
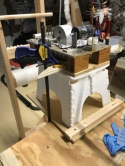
Put Together and Position S-Glass Roving Wetting W
|
Details
|
|
|
01-13-2022
|
2.00
|
Finish Rebuilding and Re-metering Epoxy Pump for u
|
Details
|
   |
|
01-12-2022
|
2.00
|
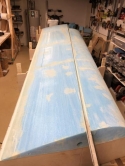
Continue Sanding Expanded Foam on Right Upper Wing
|
Details
|
  |
|
01-11-2022
|
2.00
|
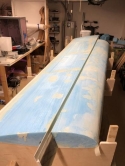
Sand Expanded Foam off of Upper Right Wing Surface
|
Details
|


|
|
01-10-2022
|
0.25
|
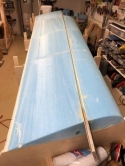
Finish Trimming Trailing Edge Support Foam
|
Details
|
  |
|
01-10-2022
|
1.00
|
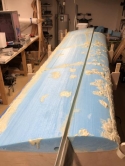
Fill Wing Foam Dents with Expanding Foam
|
Details
|


|
|
01-09-2022
|
0.25
|
Trim Excess Fiberglass from Spar Stub
|
Details
|


 |
|
01-09-2022
|
0.50
|
Trim Excess Fiberglass from Inboard Wing Spar Sect
|
Details
|


|
|
01-09-2022
|
0.50
|
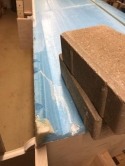
Repair "Snapped" Trailing Edge Corner
|
Details
|
  |
|
01-09-2022
|
1.25
|
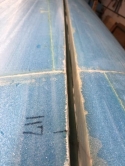
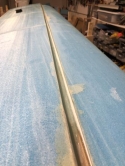
Fill Shear Web "Gap" with Micro
|
Details
|
 |
|
01-09-2022
|
0.50
|
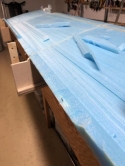
Begin Trimming Excess Support Foam from Wing Trail
|
Details
|


|
|
01-08-2022
|
2.50
|
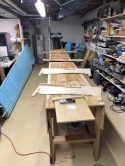
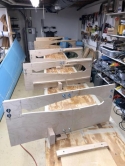
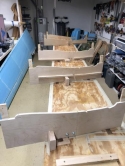
Remove Upper Wing Support Jigs and Replace with Lo
|
Details
|
|
|
01-08-2022
|
0.25
|
Position Wing in Jigs, Upper Surface Up
|
Details
|
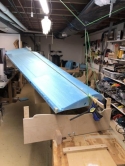
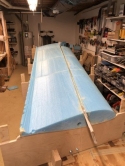
 |
|
01-03-2022
|
2.00
|
Build and Test Post-Curing Oven
|
Details
|
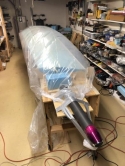

 |
|
01-02-2022
|
1.00
|
Disassemble and Begin Cleaning Epoxy Pump Parts wi
|
Details
|


 |
|
01-02-2022
|
0.75
|
Add Another Layer of Micro to Even Out Trailing Ed
|
Details
|
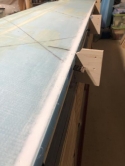
  |
|
01-01-2022
|
1.00
|
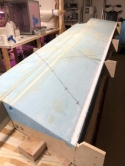
Trim Off Excess Cured Fiberglass from Sides and Tr
|
Details
|
  |
|
01-01-2022
|
0.50
|
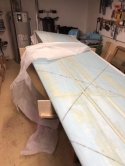
Remove Bottom Right Wing Layup Peel Ply
|
Details
|
  |
|
01-01-2022
|
1.00
|
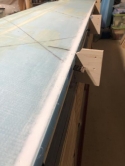
Re-align/Re-level Right Wing Trailing Edge
|
Details
|
  |
|
12-26-2021
|
5.50
|
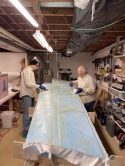
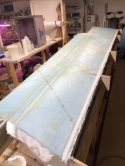
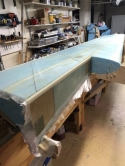
Skin Bottom of the Right Wing
|
Details
|
|
|
12-26-2021
|
1.00
|
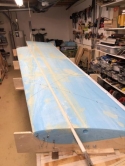
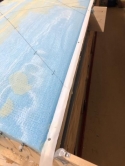
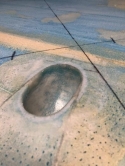
Pincushion Bottom Right Wing Foam and Final Vacuum
|
Details
|
|
|
12-26-2021
|
0.50
|
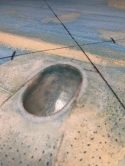
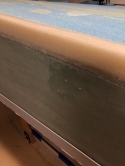
Flox Reinforcement Gap Around Right Wing Bottom Wi
|
Details
|
 |
|
12-26-2021
|
0.75
|
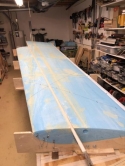
Final Vacuum of Lower Right Wing and Check Final A
|
Details
|
  |
|
12-24-2021
|
2.50
|
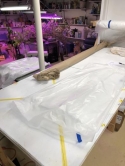
Cut Fiberglass and Peel Ply for Bottom Right Wing
|
Details
|
  |
|
12-21-2021
|
0.50
|
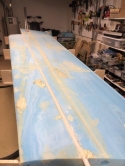
Finish Filling Right Wing Lower Surface Dings with
|
Details
|
  |
|
12-21-2021
|
1.25
|
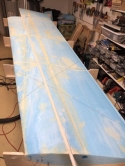
Draw Fiberglass Skin Alignment Lines on Lower Righ
|
Details
|
  |
|
12-20-2021
|
0.50
|
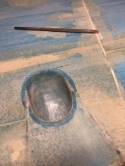
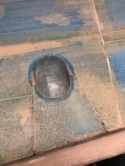
Add Micro to Finalize Opening Area of Bottom Right
|
Details
|
 |
|
12-19-2021
|
0.30
|
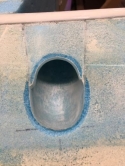
Route out Foam Aroung Lower Right Wing Attach Port
|
Details
|
  |
|
12-19-2021
|
0.30
|
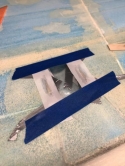
Finish Final Shaping of Right Wing Lower Attach Bo
|
Details
|
  |
|
12-19-2021
|
0.50
|
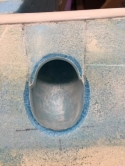
Cut Out Recessed Area Around Bottom Rt Wing Atch.
|
Details
|
  |
|
12-18-2021
|
1.50
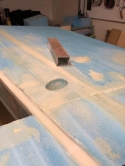
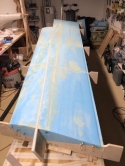
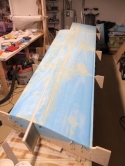
|
Finish Sanding Expanding Foam from Lower Side Righ
|
Details
|
|
|
12-16-2021
|
0.75
|
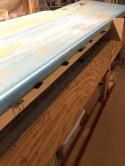
Finish Aligning Right Wing Trailing Edge Supports
|
Details
|
  |
|
12-16-2021
|
2.00
|
Build Upper Right Wing Spar Dam
|
Details
|


|
|
12-11-2021
|
1.75
|
Add Alignment Strips to Trailing Edges of Jigs
|
Details
|


 |
|
12-10-2021
|
0.75
|
Remove Peel Ply, Trim, and Sand Spar Fiberglass Re
|
Details
|
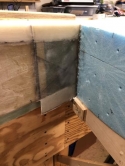
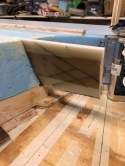
 |
|
12-08-2021
|
1.50
|
Cut and Apply Fiberglass to Spar Section for Repai
|
Details
|
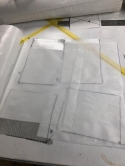


|
|
12-01-2021
|
0.75
|
Flox Insert for Lower Right Wing Attach Bolt Acces
|
Details
|
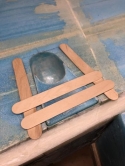
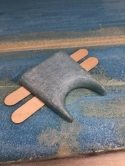
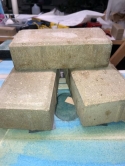
|
|
12-01-2021
|
0.50
|
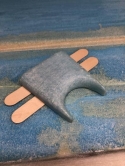
Clean up fiberglass on lower right wing attach bol
|
Details
|
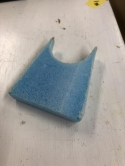
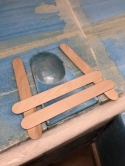
|
|
12-01-2021
|
0.50
|
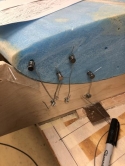
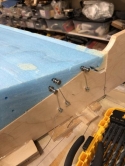
Begin Alignment of Right Wing Trailing Edge
|
Details
|
 |
|
11-30-2021
|
1.00
|
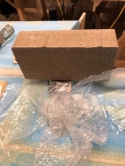
Fiberglass Insert for Lower Wing Attach Bolt Acces
|
Details
|

 |
|
11-30-2021
|
1.00
|
Clean Up Fiberglass at Wing Attach Port and Shape
|
Details
|


 |
|
11-29-2021
|
0.50
|
Sand off delaminated areas from wing shear web ext
|
Details
|
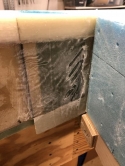
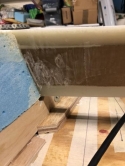
 |
|
11-29-2021
|
0.75
|
Reattach wing jigs that had come loose to the work
|
Details
|
   |
|
11-29-2021
|
1.75
|
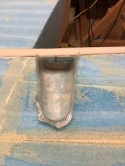
Finish layup of lower right wing attach bolt acces
|
Details
|
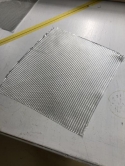
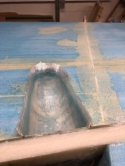
|
|
11-28-2021
|
1.25
|
Clean micro off of WA-4B and re-Alodine
|
Details
|


|
|
11-28-2021
|
1.00
|
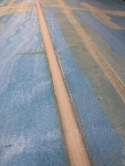
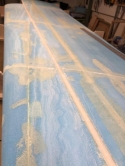
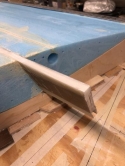
Begin sanding right wing lower spar to final dimen
|
Details
|
|
|
11-27-2021
|
1.00
|
Use wood planer to begin removing excess spar mate
|
Details
|
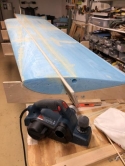
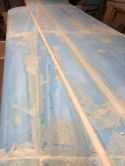
 |
|
11-27-2021
|
0.50
|
Layout Right Wing Lower Wing Attach Port
|
Details
|

  |
|
11-27-2021
|
0.75
|
Layout and cut lower outboard wing attach bolt por
|
Details
|

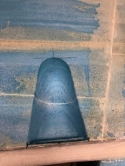
 |
|
11-27-2021
|
0.25
|
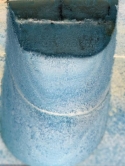
Hotwire Right Wing Lower Attach Bolt Access Port
|
Details
|
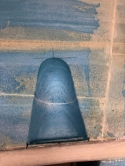
 |
|
11-27-2021
|
0.50
|
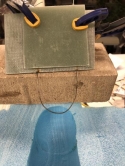
Create jig to hotwire cut wing outboard attach bol
|
Details
|
  |
|
11-27-2021
|
1.00
|
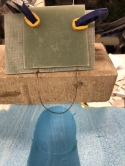
Build Hotwire Jig to Cut Wing Bolt Attach Ports
|
|
  |
|
11-26-2021
|
0.20
|
Remove lower right wing spar dam
|
|

  |
|
11-10-2021
|
2.00
|
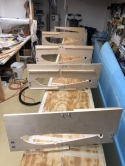
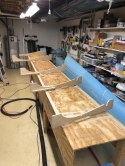
Finish aligning wing jigs
|
Details
|

|
|
11-09-2021
|
1.25
|
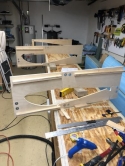
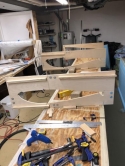
Continue realigning wing jigs for bottom spar and
|
Details
|
 |
|
11-02-2021
|
3.50
|
Micro Fore and Aft Right Wing Sections Together
|
Details
|


|
|
10-09-2021
|
0.75
|
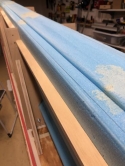
Begin rounding over edges of aft secition of wing
|
Details
|


|
|
06-05-2021
|
1.75
|
Begin Bolting Wing Jig Sections Together
|
|
   |
|
04-24-2021
|
1.00
|
Sand to Fine Tune Scarf Cuts
|
Details
|

  |
|
04-24-2021
|
2.50
|
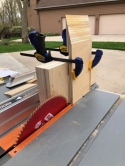
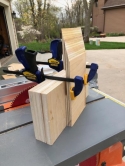
Cut Scarf Joints on DWA-1, 2, 6, 7, and both 3's.
|
Details
|
  |
|
04-24-2021
|
1.00
|
Build Jig to Cut Scarf Joints on Wing Wood Inserts
|
Details
|
  |
|
04-22-2021
|
1.00
|
Begin Trimming Out DWA-2 and DWA-7
|
Details
|

  |
|
04-21-2021
|
0.75
|
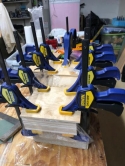
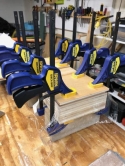
Epoxy Side Plywood Pieces on to DWA-7
|
Details
|
 |
|
03-05-2021
|
0.50
|
Work on Trimming Out Wing Templates
|
Details
|

  |
|
03-02-2021
|
0.75
|
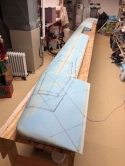
Examine Canard for Areas Needing Repair
|
Details
|


|
|
02-28-2021
|
1.50
|
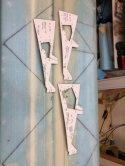
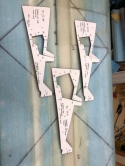
Cut out aileron templates
|
|
 |
|
02-27-2021
|
2.00
|
Continue fiberglass layup imperfection repairs
|
Details
|
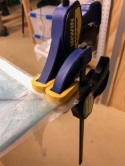
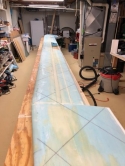
|
|
02-26-2021
|
1.00
|
Finish carving out exposed foam areas in canard.
|
Details
|

  |
|
02-26-2021
|
0.75
|
Continue sanding leading edge fiberglass transitio
|
Details
|

  |
|
02-25-2021
|
1.75
|
Continue carving out foam from exposed canard area
|
Details
|
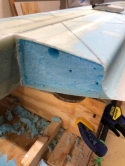


|
|
02-23-2021
|
1.25
|
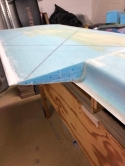
Begin carving out foam from exposed areas of canar
|
Details
|
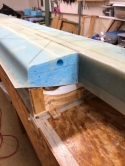
 |
|
02-22-2021
|
2.50
|
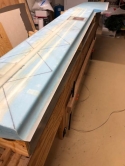
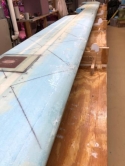
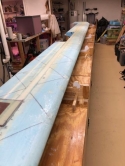
Trim Canard Trailing Edge and Start Sanding Leadin
|
Details
|
|
|
02-21-2021
|
0.75
|
Taking care of some minor repairs to the canard la
|
Details
|
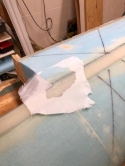
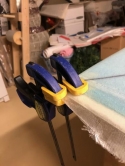
 |
|
02-20-2021
|
8.00
|
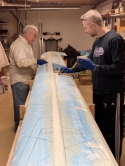
Skin Bottom of Canard
|
Details
|
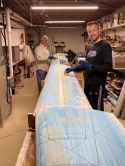
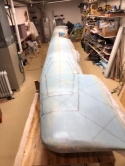
|
|
02-19-2021
|
0.50
|
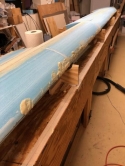
Repair Canard Leading Edge with Expanding Foam
|
Details
|
  |
|
02-19-2021
|
1.50
|
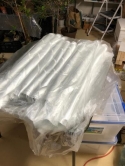
Cut Fiberglass for Canard Upper Skin Layup
|
Details
|
  |
|
02-18-2021
|
2.00
|
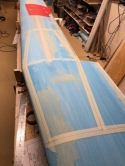
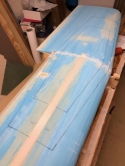
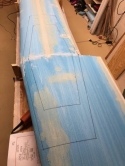
Layout Lines for Canard Fiberglass Reinforcement P
|
Details
|
|
|
02-13-2021
|
0.75
|
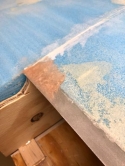
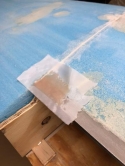
Flox Canard to Tip Transition Areas
|
Details
|
 |
|
02-13-2021
|
0.75
|
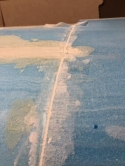
Fill Canard Core Joints
|
Details
|
  |
|
02-13-2021
|
1.50
|
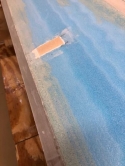
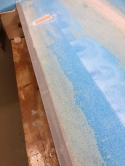
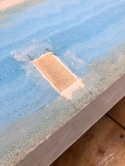
Feather Canard Trailing Edge Foam and High-Density
|
Details
|
|
|
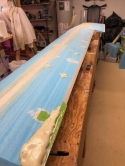
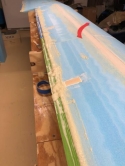
02-12-2021
|
0.50
|
Add More Expanding Foam Repairs
|
|
 |
|
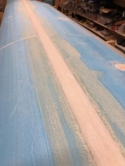
02-08-2021
|
0.50
|
More sanding...
|
Details
|
  |
|
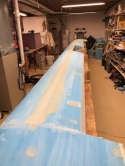
02-07-2021
|
2.50
|
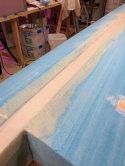
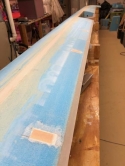
Sand off Excess Expanding Foam and Sand High-Densi
|
Details
|
|
|
02-06-2021
|
2.25
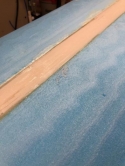
|
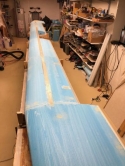
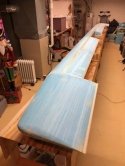
Plane and Sand Cured Spar Close to Final Shape
|
Details
|
|
|
02-06-2021
|
0.75
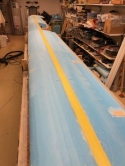
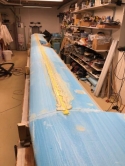
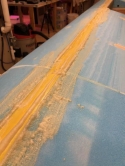
|
Add Expanding Foam to Spar/Foam Canard Transition
|
Details
|
|
|
02-05-2021
|
1.00
|
Clean Up Shop after Spar Layup
|
|
   |
|
02-04-2021
|
10.50
|
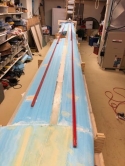
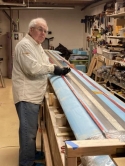
Lay up Upper Canard Spar
|
|

|
|
02-04-2021
|
2.00
|
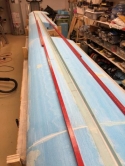
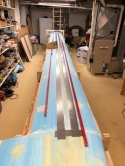
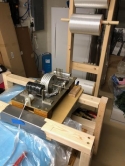
Final Prep for Upper Canard Spar Layup
|
Details
|
|
|
02-04-2021
|
1.50
|
Clean Up After Canard Spar Layup
|
|

  |
|
02-03-2021
|
2.00
|
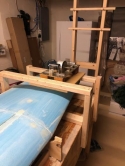
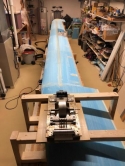
Build Bridge Over Canard Tip to Hold Roving Wheel
|
Details
|
 |
|
02-02-2021
|
0.75
|
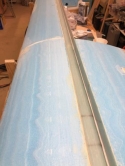
Sand to Roughen Up the Sides and Bottom of Upper C
|
Details
|
  |
|
02-01-2021
|
0.25
|
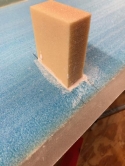
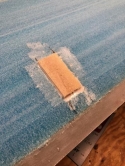
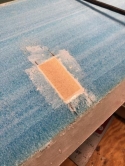
Rough-Trim High-Density Foam Inserts
|
Details
|
|
|
01-31-2021
|
0.50
|
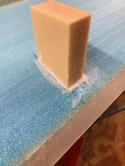
Add Additional Micro to High Density Foam Gaps
|
Details
|
  |
|
01-30-2021
|
0.50
|
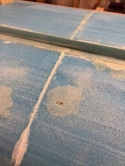
Fill Gap in Fore and Aft Canard Sections with Micr
|
Details
|
  |
|
01-30-2021
|
0.50
|
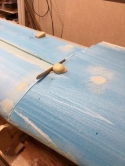
Add Expanding Foam to Repair Leading Edge and Cana
|
Details
|

 |
|
01-29-2021
|
0.50
|
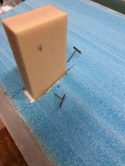
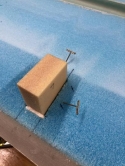
Anchor High-Density Foam Blocks into Canard w/Micr
|
Details
|
 |
|
01-28-2021
|
1.00
|
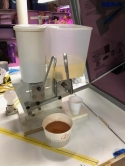
Reassemble Epoxy Pump
|
Details
|
  |
|
01-27-2021
|
1.00
|
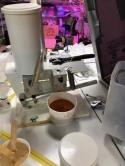
Disassemble and Clean Epoxy Pump Resin Side of Dis
|
Details
|
  |
|
01-26-2021
|
2.00
|
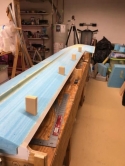
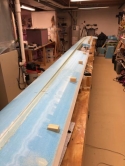
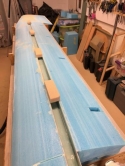
Continue to Shape and Dry-Fit High-Density Foam In
|
Details
|
|
|
01-25-2021
|
1.25
|
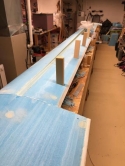
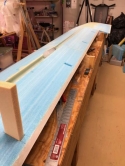
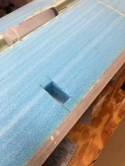
Continue Carving Holes For High Density Foam Inser
|
Details
|
|
|
01-24-2021
|
1.75
|
Continue Carving Holes For High Density Foam Inser
|
Details
|
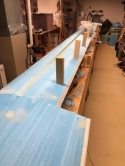
  |
|
01-22-2021
|
0.75
|
Continue Carving Holes for High Density Foam Inser
|
Details
|
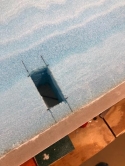
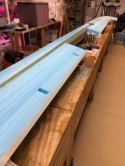
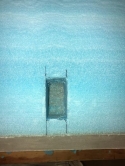
|
|
01-21-2021
|
2.50
|
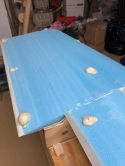
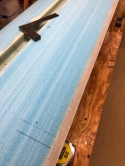
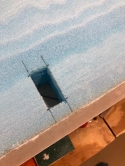
Fill "Dents" in Foam, Layout Hard Foam Inserts, an
|
Details
|
|
|
01-20-2021
|
2.25
|
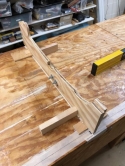
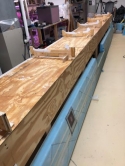
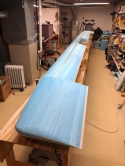
Finish Setting Up and Leveling Jigs For Upper Cana
|
Details
|
|
|
01-19-2021
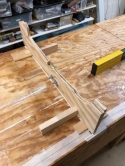
|
2.25
|
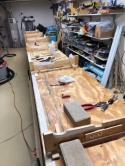
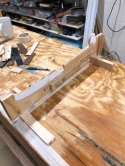
Begin Setting Up Jigs for UpperCanard Layup
|
Details
|
|
|
01-17-2021
|
3.50
|
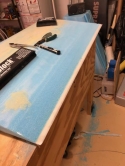
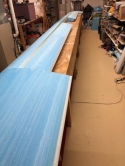
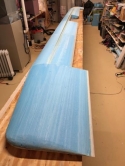
Finish Shaping Trailing Edges of Canard
|
Details
|
|
|
01-16-2021
|
2.25
|
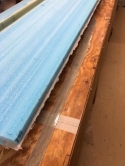
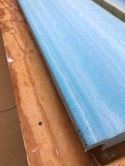
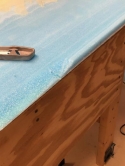
Begin Cleaning up Canard Trailing Edges
|
Details
|
|
|
01-13-2021
|
1.25
|
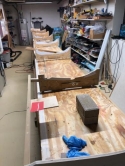
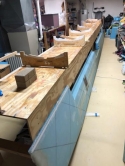
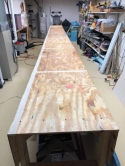
Remove Jigs from Tabletop and Clean Up
|
Details
|
|
|
01-13-2021
|
0.50
|
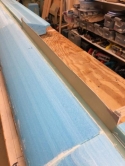
Remove Dam and Trim off Excess Fiberglass from Cen
|
Details
|
  |
|
01-13-2021
|
2.00
|
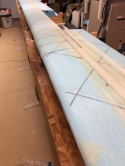
Continue Cleaning up Excess Fiberglass from Layup
|
Details
|
  |
|
01-11-2021
|
1.00
|
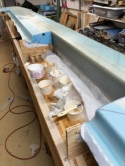
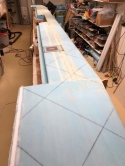
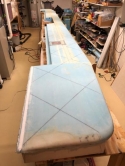
Remove Peel Ply from Canard and begin Trimming Exc
|
Details
|
|
|
01-11-2021
|
1.00
|
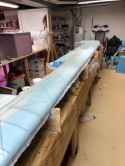
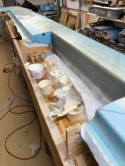
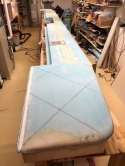
Remove Peel Ply From Canard And Begin Trimming Exc
|
Details
|
|
|
01-09-2021
|
7.00
|
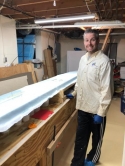
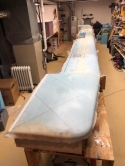
Skin Bottom of Canard
|
Details
|

|
|
01-09-2021
|
7.00
|
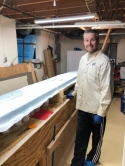
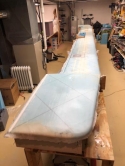
Skin Bottom Of Canard
|
Details
|

|
|
01-09-2021
|
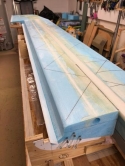
2.00
|
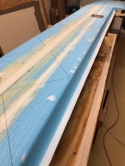
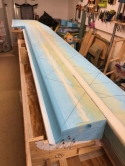
Prep Canard for Bottom Skin Layup
|
Details
|
|
|
01-09-2021
|
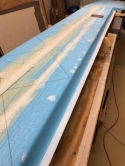
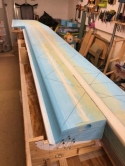
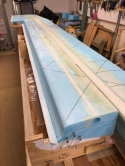
2.00
|
Prep Canard For Bottom Skin Layup
|
Details
|
|
|
01-04-2021
|
1.25
|
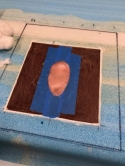
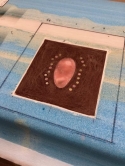
Fill Pitot Tube Support Plate Main Opening with Wa
|
Details
|
 |
|
01-04-2021
|
0.50
|
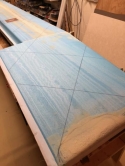
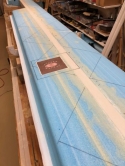
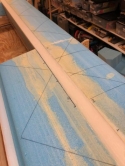
Draw Fiberglass Alignment Lines on Canard
|
Details
|
|
|
01-03-2021
|
0.75
|
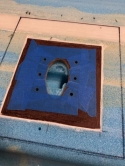
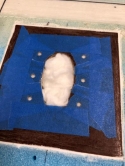
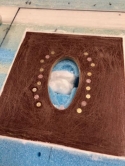
Fill Screw Holes in Pitot Tube Support Plate with
|
Details
|
|
|
01-02-2021
|
1.75
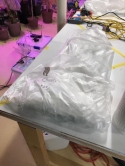
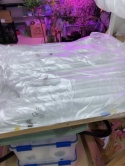
|
Cut BID Fiberglass and Cover all Fiberglass to Pr
|
Details
|
 |
|
01-01-2021
|
2.00
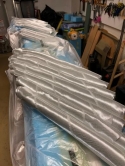
|
Cut UNI Fiberglass for Bottom of Canard
|
Details
|
  |
|
12-31-2020
|
0.25
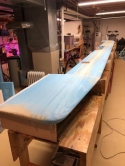
|
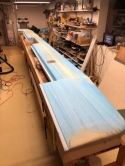
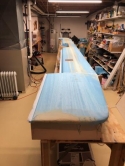
Add Peel Ply to Trailing Edges of Canard
|
Details
|
|
|
12-30-2020
|
2.50
|
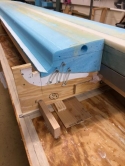
Continue to Align Canard in Jigs
|
Details
|

 |
|
12-29-2020
|
3.00
|
Continue to Align Canard in Jigs
|
Details
|


 |
|
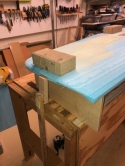
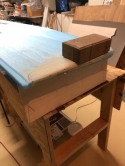
12-28-2020
|
2.25
|
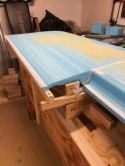
Start Final Alignment of Canard in Jigs
|
Details
|
|
|
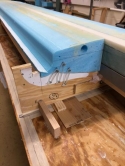
12-27-2020
|
1.25
|
Anchor Canard Cores to Jig
|
Details
|
  |
|
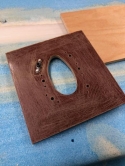
12-22-2020
|
1.00
|
Sand Pitot Plate and Rivet in Nut Plates
|
Details
|
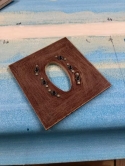
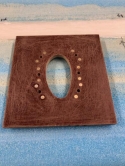
|
|
12-22-2020
|
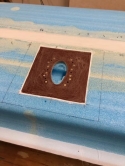
0.50
|
Micro Pitot Tube Support Plate into Canard
|
Details
|
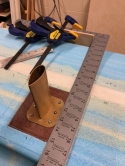
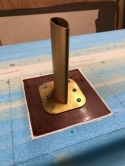
|
|
12-21-2020
|
1.75
|
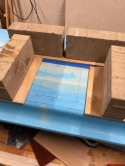
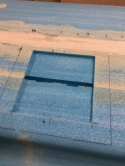
Route Out Area for Pitot Tube Support Plate
|
Details
|
|
|
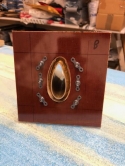
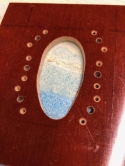
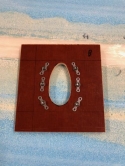
12-18-2020
|
2.00
|
Construct Pitot Tube Support Plate
|
|
|
|
12-16-2020
|
1.25
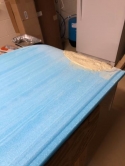
|
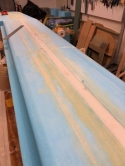
Use Expanding Foam to Perfect Canard Shape
|
Details
|

|
|
12-14-2020
|
0.75
|
Use Expanding Foam to Perfect Canard Shape
|
Details
|


|
|
12-10-2020
|
1.25
|
Use Expanding Foam to Perfect Canard Shape
|
Details
|


 |
|
11-24-2020
|
0.25
|
Layout Position for Pitot Tube Support Plate
|
Details
|

  |
|
11-24-2020
|
0.50
|
Begin Shaping Right Side Canard Tip
|
Details
|

  |
|
11-23-2020
|
1.50
|
Finish Shaping Right Side Canard Tip
|
Details
|


|
|
11-22-2020
|
1.25
|
Continue Shaping Right Side Canard Tip
|
Details
|

  |
|
11-21-2020
|
0.75
|
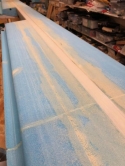
Sand Filled Canard Wire Channel Smooth
|
Details
|
  |
|
11-21-2020
|
1.00
|
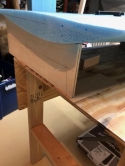
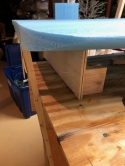
Begin Shaping Right Side Canard Tip
|
Details
|
 |
|
11-21-2020
|
0.75
|
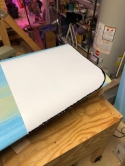
Begin Shaping Left Side Canard Tip
|
Details
|


|
|
11-20-2020
|
0.75
|
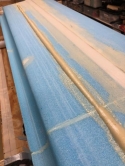
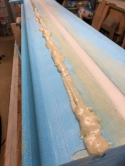
Fill Canard Wire Channel with Expanding Foam
|
Details
|
 |
|
11-19-2020
|
1.75
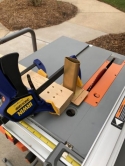
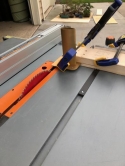
|
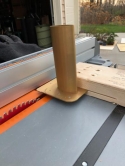
Shape Pitot Tube Base
|
Details
|
|
|
11-19-2020
|
0.75
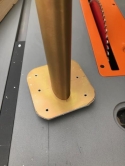
|
Final Shaping of Pitot Tube Support Mast
|
Details
|
  |
|
11-18-2020
|
0.50
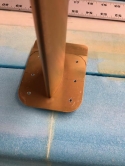
|
Drill Holes in Pitot Support Mast Base
|
Details
|
  |
|
11-17-2020
|
1.50
|
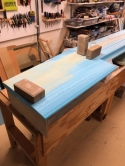
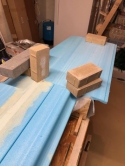
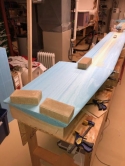
Micro Canard Tips to Canard
|
Details
|
|
|
11-10-2020
|
2.25
|
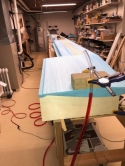
Align Canard Tips in Jigs
|
Details
|
  |
|
11-04-2020
|
0.75
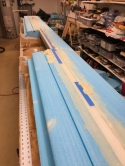
|
Final Sand Epanding Foam
|
Details
|
  |
|
11-02-2020
|
1.25
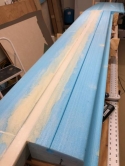
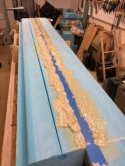
|
Sand Canard Spar Expanding Foam
|
Details
|
 |
|
11-01-2020
|
1.00
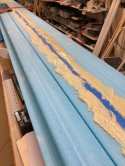
|
Add Expanding Foam Along Canard Spar Edges
|
Details
|
  |
|
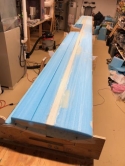
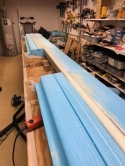
10-25-2020
|
2.25
|
Sand Canard Spar Flush
|
Details
|

|
|
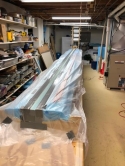
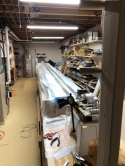
10-23-2020
|
13.50
|
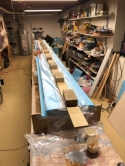
Lay Up Bottom Canard Spar
|
Details
|
|
|
10-18-2020
|
1.25
|
Build and Install Lower Spar Bridge Dam
|
Details
|


|
|
10-10-2020
|
1.50
|
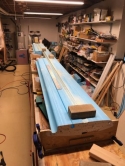
Fianl Sanding of Expanded Foam Repairs
|
Details
|
  |
|
10-01-2020
|
1.25
|
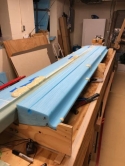
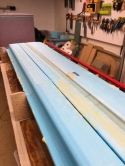
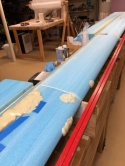
Use Expanding Foam to Repair Canard Foam Damage Ar
|
Details
|
|
|
09-17-2020
|
1.00
|
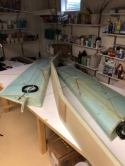
Tech Counselor Inspection - Pall Mcallister
|
Details
|

|
|
09-13-2020
|
3.00
|
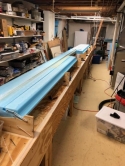
Finish Canard Jig Alignment
|
Details
|

 |
|
09-05-2020
|
2.50
|
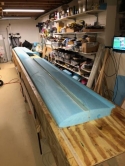
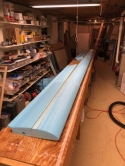
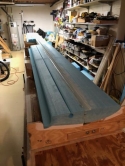
Remove Vertical Canard Jigs and Begin Realignment
|
Details
|
|
|
09-03-2020
|
1.50
|
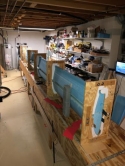
Micro Fore and Aft Canard Sections Together
|
|


|
|
09-01-2020
|
1.75
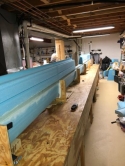
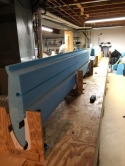
|
Final Canard Core Alignment
|
|

|
|
08-26-2020
|
1.75
|
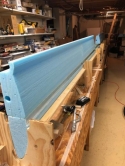
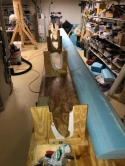
Work on Canard Core Alignment
|
Details
|

|
|
08-25-2020
|
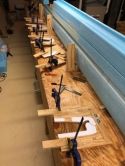
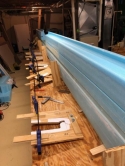
1.50
|
Finish Canard Jig Construction
|
Details
|
 |
|
08-23-2020
|
0.75
|
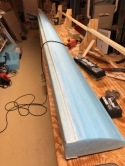
Trim fiberglass of second edge of canard forward s
|
Details
|
  |
|
08-20-2020
|
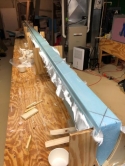
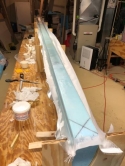
6.50
|
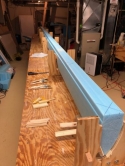
Layup Forward Section Shear Web
|
Details
|
|
|
08-18-2020
|
2.00
|
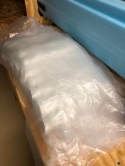
Cut Fiberglass for Canard Sheer Web
|
Details
|
  |
|
08-16-2020
|
0.75
|
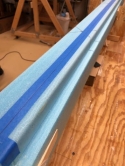
Finish Shaping Canard Core Edges
|
|
  |
|
07-07-2020
|
1.00
|
Roundover Canard Leading Edge Core Edges
|
Details
|
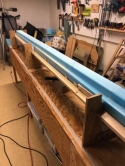
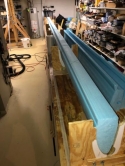
 |
|
06-13-2020
|
2.25
|
Micro Canard Leading Edge Cores Together
|
|
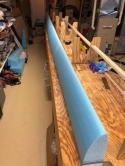
  |
|
06-12-2020
|
2.75
|
Micro Canard Trailing Cores Together
|
Details
|

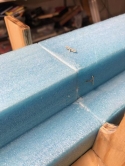

|
|
06-11-2020
|
4.00
|
Micro leading edge canard cores together
|
Details
|
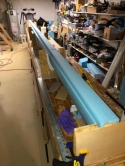
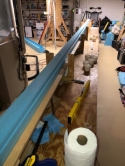

|
|
06-10-2020
|
3.50
|
Work on Aligning Canard Jigs and Cores
|
|
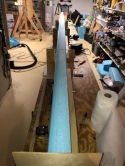
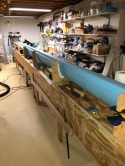
 |
|
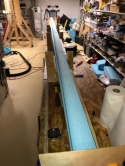
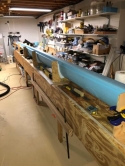
06-10-2020
|
6.00
|
Adjust foreward canard core lengths
|
Details
|
 |
|
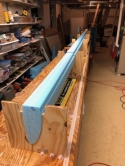
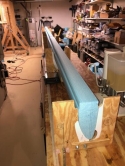
05-28-2020
|
6.00
|
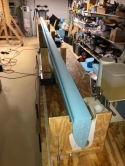
Set up jigs for forward canard core assembly
|
Details
|
|
|
05-26-2020
|
1.00
|
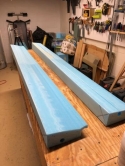
Trim out shear webs on canard trailing cores
|
Details
|
  |
|
05-23-2020
|
2.00
|
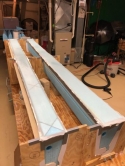
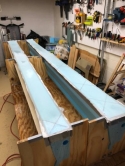
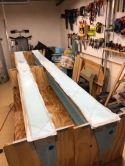
Lay up aft canard sections shear webs
|
Details
|
|
|
05-22-2020
|
1.50
|
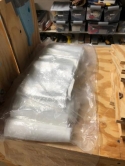
Cut UNI fiberglass for canard trailing edge shear
|
Details
|

 |
|
05-21-2020
|
2.00
|
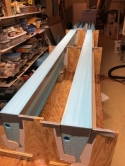
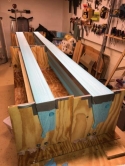
Clean up trailing canard cores and place in jigs
|
Details
|
 |
|
05-19-2020
|
1.00
|
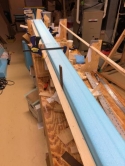
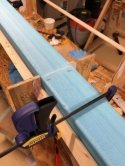
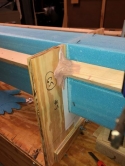
Micro together second pair of trailing edge canard
|
Details
|
|
|
05-17-2020
|
1.50
|
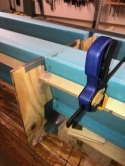
Micro'd together two of the training edge foam cor
|
Details
|
  |
|
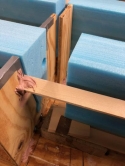
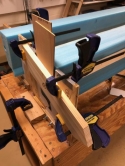
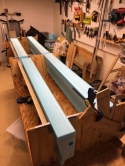
05-16-2020
|
2.00
|
Test assemble one set of training edge cores
|
Details
|
|
|
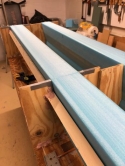
05-14-2020
|
1.50
|
Test fit trailing edge cores into jigs.
|
Details
|
  |
|
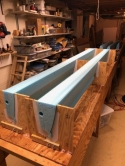
05-10-2020
|
4.00
|
Set up canard jigs for training edge core ass
|
Details
|
  |
|
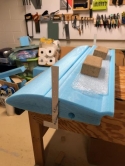
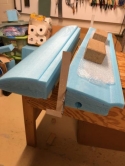
05-04-2020
|
3.50
|
Hotwire split in canard cores for shear web
|
Details
|

|
|
04-28-2020
|
1.50
|
Use expanding foam to repair hotwire error on one
|
Details
|

  |
|
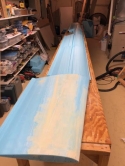
04-28-2020
|
1.00
|
Final sand repair to canard and rudder cores
|
|


|
|
04-15-2020
|
4.00
|
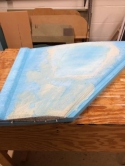
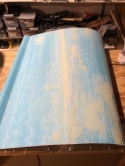
Use expanding foam to repair one canard tip and ru
|
Details
|

|
|
04-14-2020
|
6.00
|
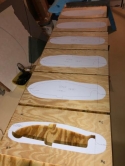
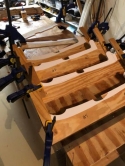
Construct canard jigs
|
Details
|

|
|
04-13-2020
|
2.00
|
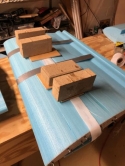
Micro new leading edge section to damaged canard t
|
Details
|
  |
|
04-03-2020
|
1.50
|
Trim out roots of both winglets. WINGLETS DONE!
|
Details
|


|
|
04-02-2020
|
2.00
|
Close out root of winglet #2
|
Details
|


 |
|
04-01-2020
|
2.00
|
Close out root of winglet #1
|
Details
|


 |
|
03-26-2020
|
2.00
|
Cut blanks and mark layout lines for canard jigs
|
Details
|

  |
|
03-25-2020
|
0.50
|
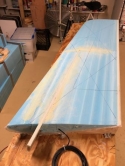
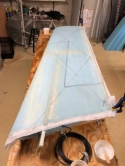
Trim out winglet #2
|
Details
|
 |
|
03-24-2020
|
1.00
|
Prepare fiberglass for close out of winglet bases
|
Details
|
  |
|
03-23-2020
|
3.00
|
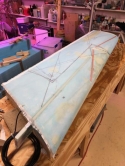
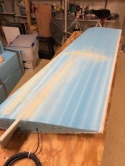
Skin side 2 of winglet #2 with two plies of UNI an
|
Details
|
 |
|
03-21-2020
|
3.00
|
Skin side 1 of winglet #2 with 2 layers UNI and pe
|
Details
|


 |
|
03-21-2020
|
0.75
|
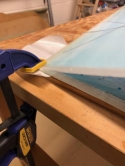
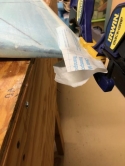
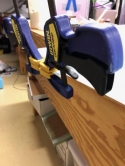
Make small repairs to trailing edge of winglet #1
|
|
|
|
03-15-2020
|
1.50
|
Set up winglet jigs and winglet #2 for skinning
|
Details
|


|
|
03-14-2020
|
1.50
|
Prep second winglet for first fiberglass skin layu
|
Details
|


|
|
03-14-2020
|
0.50
|
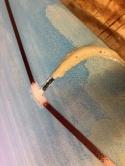
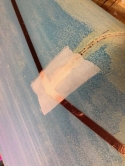
Continue work on antenna in second winglet
|
Details
|

|
|
03-13-2020
|
1.50
|
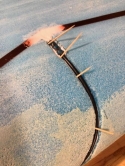
Install antenna in second winglet
|
Details
|
  |
|
03-12-2020
|
0.50
|
Carve channel for coax antenna lead in winglet #2
|
Details
|

  |
|
03-07-2020
|
1.00
|
FINISHED MAIN SPAR!!
|
Details
|


|
|
03-05-2020
|
2.25
|
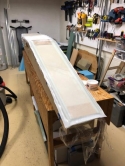
Lay up 4 layers of UNI on top of main spar
|
|
  |
|
03-02-2020
|
1.75
|
Sand spar #2 in main spar to final dimension
|
Details
|

  |
|
02-29-2020
|
9.00
|
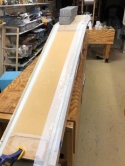
Layup spar #2 in main spar and peel ply
|
Details
|
  |
|
02-27-2020
|
1.50
|
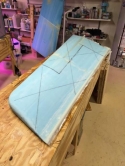
Trim training edge of winglet #1 and remove wingle
|
Details
|

 |
|
02-24-2020
|
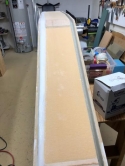
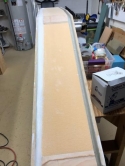
2.00
|
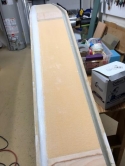
Sand spar #1 in main spar to final dimension
|
Details
|
|
|
02-23-2020
|
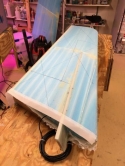
3.50
|
Layup outboard side of winglet #1 with 2 plys of U
|
Details
|
 |
|
02-21-2020
|
11.00
|
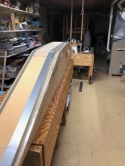
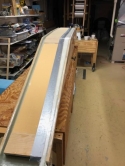
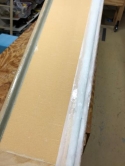
Lay up Spar 1 in main spar and Peel Ply - LONG day
|
Details
|
|
|
02-15-2020
|
3.00
|
Layup inboard side of winglet #1 with two plys of
|
Details
|


 |
|
02-14-2020
|
0.50
|
Prepare winglet #1 for layup #1
|
|


 |
|
02-10-2020
|
2.75
|
Set up winglet #1 on jigs
|
|


|
|
02-04-2020
|
0.75
|
Sand winglet #1 leading edge and fill expanding fo
|
Details
|


 |
|
02-03-2020
|
0.75
|
Mask off leading edge of winglet and fill coax cha
|
Details
|


|
|
02-02-2020
|
1.75
|
Embed coax in leading edge of winglet #1 and micro
|
Details
|


|
|
02-01-2020
|
2.00
|
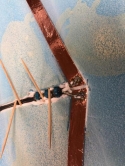
Install copper foil antenna in winglet #1, solder
|
Details
|


|
|
01-31-2020
|
0.75
|
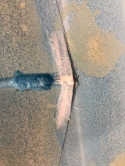
Cut channel for coax in winglet core #1 and prepar
|
Details
|

 |
|
01-25-2020
|
1.25
|
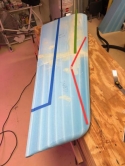
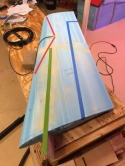
Layout location for winglet antenna
|
Details
|
 |
|
01-25-2020
|
1.25
|
Finalize shaping of foam and wood inserts in main
|
Details
|

  |
|
01-21-2020
|
2.50
|
Construct drilling jig and drill hole in winglet c
|
Details
|


|
|
01-20-2020
|
2.50
|
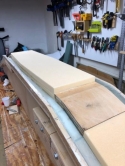
Shape top foam piece of main spar
|
Details
|


|
|
01-18-2020
|
0.50
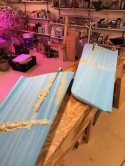
|
Continue using expanding foam to repair winglet co
|
Details
|

 |
|
01-16-2020
|
0.50
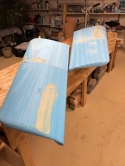
|
Continue using expanding foam to repair winglet co
|
Details
|
  |
|
01-04-2020
|
1.00
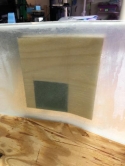
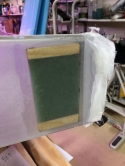
|
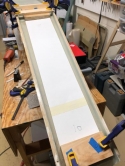
Inspect hard point adhesion and cut foam insert te
|
Details
|
|
|
01-04-2020
|
1.25
|
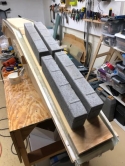
Epoxy all main spar foam inserts into place
|
Details
|


|
|
01-04-2020
|
1.25
|
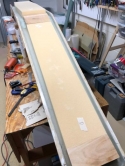
Cut main spar foam inserts
|
Details
|

 |
|
01-03-2020
|
0.75
|
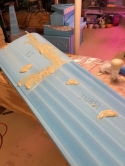
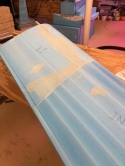
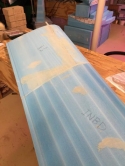
Use expanding foam to repair winglet dings.
|
Details
|
|
|
01-02-2020
|
1.25
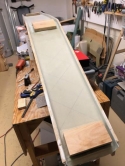
|
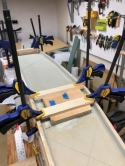
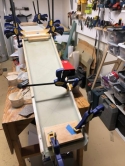
Epoxy hard point laminates into spar
|
Details
|
|
|
01-01-2020
|
1.50
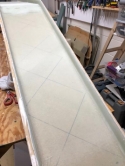
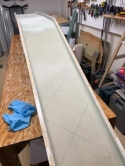
|
Trim out first spar layup
|
Details
|
|
|
12-31-2019
|
0.50
|
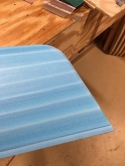
Shape top of winglet #1
|
Details
|
 |
|
12-24-2019
|
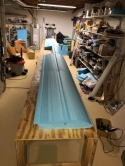
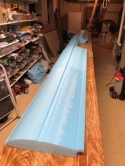
5.50
|
Finish canard templates and cut all canard cores
|
Details
|
 |
|
12-23-2019
|
6.25
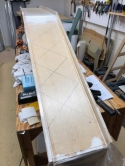
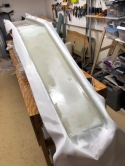
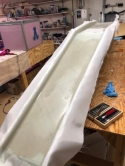
|
Redo 6-layer base fiberglass layup
|
Details
|
|
|
11-10-2019
|
0.75
|
Epoxy hardpoints into main spar DWA's
|
Details
|

  |
|
11-09-2019
|
4.25
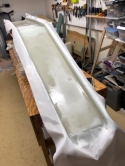
|
Layup 6-layer fiberglass base layup
|
Details
|


|
|
11-08-2019
|
0.75
|
Trim out hard point inserts for main spar
|
Details
|

  |
|
11-08-2019
|
0.50
|
Line main spar jig with contact release paper
|
Details
|

  |
|
11-08-2019
|
1.25
|
Cut fiberglass for main spar lauyups
|
Details
|


 |
|
11-05-2019
|
3.25
|
Lay up 1/4" thick fiberglass plate for hard points
|
Details
|

  |
|
11-03-2019
|
1.75
|
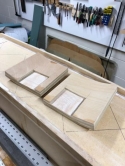
Route out for hardpoint inserts in DWA-4 and DWA-8
|
Details
|

 |
|
10-27-2019
|
1.75
|
Cut and laminate two DWA-5's
|
Details
|


 |
|
10-25-2019
|
2.25
|
Trim to final size DWA-4 and DWA-8
|
Details
|

  |
|
09-25-2019
|
0.25
|
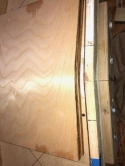
Final laminate for DWA-4 and DWA-8. Looking good!
|
Details
|


|
|
09-23-2019
|
2.50
|
Layup DWA-8 Laminate
|
Details
|


 |
|
09-21-2019
|
2.25
|
Layup DWA-4 Laminate
|
Details
|


|
|
09-20-2019
|
8.00
|
Construct solid block form for DWA-4 and DWA-8
|
Details
|


|
|
09-11-2019
|
1.00
|
Determined that spar was unacceptable and destroy.
|
Details
|


|
|
07-04-2019
|
9.00
|
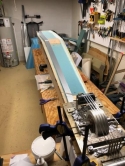
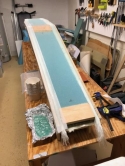
Lay up second spar in centersection spar.
|
Details
|
 |
|
06-23-2019
|
11.00
|
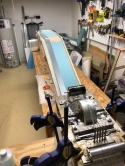
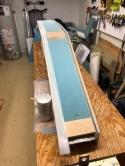
Lay up first spar in centersection spar.
|
Details
|
|
|
06-20-2019
|
1.00
|
Cut a template from the drawings on the plans and
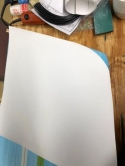
|
Details
|


|
|
06-20-2019
|
2.50
|
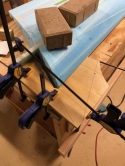
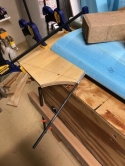
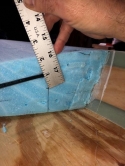
Build jig and drill hole for antenna coax cable in
|
Details
|
|
|
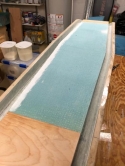
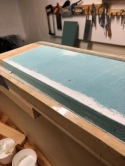
06-14-2019
|
0.75
|
Repair edges of center foam section for main spar
|
Details
|
 |
|
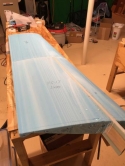
06-11-2019
|
0.50
|
Sand micro joint smooth on second winglet.
|
Details
|
  |
|
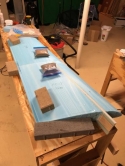
06-09-2019
|
2.00
|
Use epoxy and micro to attach upper and lower wing
|
Details
|
  |
|
06-06-2019
|
0.50
|
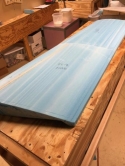
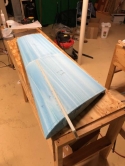
Sand micro joint smooth on first winglet.
|
Details
|
 |
|
06-04-2019
|
2.00
|
Use epoxy and micro to attach upper and lower wing
|
Details
|


 |
|
06-02-2019
|
0.10
|
Inspecting underside of centersection spar. I wil
|
Details
|


|
|
06-01-2019
|
0.50
|
Sand down high point edges of curved wooden sectio
|
Details
|


|
|
05-30-2019
|
2.50
|
Finish sanding middle foam section of centersectio
|
Details
|


|
|
05-27-2019
|
2.00
|
Began to sand additional high density foam piece i
|
Details
|

  |
|
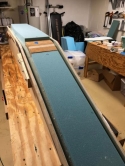
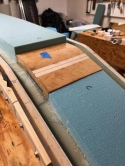
05-26-2019
|
1.75
|
Unmold spar from jig and trim fiberglass edges.
|
Details
|

|
|
05-25-2019
|
0.75
|
Epoxy second piece of foam to forward face of main
|
Details
|


 |
|
05-24-2019
|
3.50
|
Lay in 6 layers of UNI into main spar jig.
|
Details
|

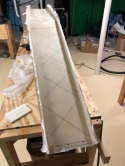
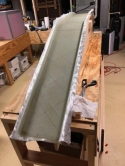
|
|
05-24-2019
|
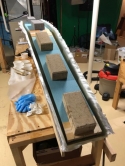
3.00
|
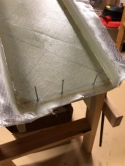
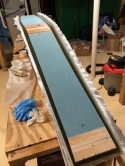
Install foam and laminated wood pieces into main s
|
Details
|
|
|
05-21-2019
|
1.50
|
Finish cutting last piece of foam and finished tri
|
Details
|


|
|
05-20-2019
|
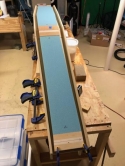
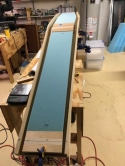
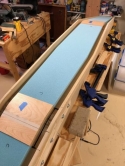
1.50
|
Final trimming and fitting of foam inserts for ma
|
Details
|
|
|
05-19-2019
|
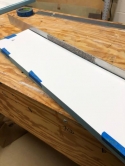
2.00
|
Rough cut foam inserts for main spar and start to
|
Details
|


|
|
05-18-2019
|
2.50
|
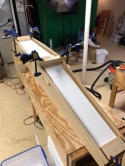
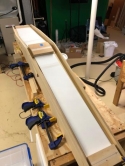
Make final alignment for main spar wood inserts an
|
Details
|
 |
|
05-13-2019
|
1.00
|
Finish sanding lower winglet spars.
|
Details
|


|
|
05-02-2019
|
2.00
|
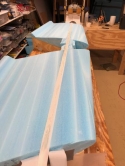
Layup second spars in lower winglets.
|
Details
|
  |
|
05-01-2019
|
0.75
|
Prep lower winglet channels for second spar layup.
|
Details
|

  |
|
04-30-2019
|
1.50
|
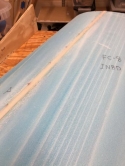
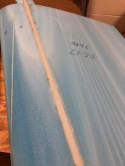
Plane and sand first spars on lower winglets to fi
|
Details
|
 |
|
04-29-2019
|
1.50
|
Finished cutting apart lower winglets after curing
|
Details
|


 |
|
04-28-2019
|
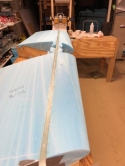
3.00
|
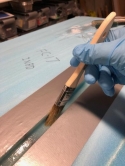
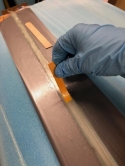
Layup lower winglet spar #1
|
Details
|
|
|
04-27-2019
|
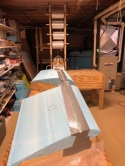
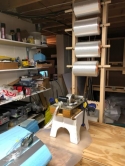
1.00
|
Final prep for winglet spar layup #1.
|
Details
|

|
|
04-24-2019
|
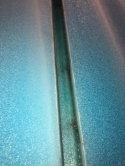
1.00
|
Finish filling in gaps in spar "trough" with flox
|
Details
|
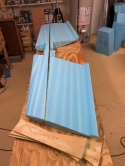
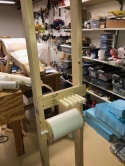
|
|
04-22-2019
|
0.75
|
Begin filling in gaps between shear web layups wit
|
Details
|
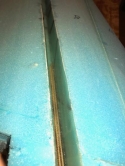
  |
|
04-21-2019
|
1.00
|
Flox together Fore and Aft sections of lower wingl
|
Details
|


|
|
04-21-2019
|
0.75
|
Begin final alignment markup on centersection spar
|
Details
|

  |
|
04-19-2019
|
2.00
|
Use Wet Flox to Attach Fore Lower Winglet Section
|
Details
|


|
|
04-19-2019
|
1.00
|
Use Flox to Epoxy all 4 Fiberglass Hardpoints into
|
Details
|

  |
|
04-19-2019
|
0.25
|
Test Wetout of New Spar Roving. Seemed to Wetout
|
Details
|


 |
|
04-19-2019
|
0.25
|
Put Roving and Silica Gel Packets in Gasketed Stor
|
Details
|


|
|
04-18-2019
|
1.20
|
Rout Out Area for Fiberglass Hardpoints in DWA-4 a
|
Details
|


|
|
04-17-2019
|
0.75
|
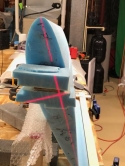
Trim Away Support Foam to Allow for Laser Alignmen
|
Details
|

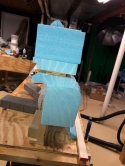
|
|
04-16-2019
|
1.75
|
Repair Air Bubble in Winglet #1 Stub
|
Details
|


|
|
04-11-2019
|
1.25
|
Trim all Fore and Aft Lower Winglet Shear Webs.
|
Details
|


|
|
04-09-2019
|
1.75
|
Layup Aft Lower Winglet #2 Shear Web.
|
Details
|


 |
|
04-07-2019
|
1.25
|
Prep Aft Section of Lower Winglet #2 for Shear Web
|
Details
|


 |
|
04-07-2019
|
1.25
|
Cut Out Hard Points for Main Spar Inserts
|
Details
|

  |
|
03-31-2019
|
2.50
|
Layup Aft Shear Web on Lower Winglet #1
|
Details
|


|
|
03-30-2019
|
1.25
|
Layup Forward Shear Web on Lower Winglet #2
|
Details
|


|
|
03-29-2019
|
2.00
|
Prep Forward Section of One Winglet and Layup Shea
|
Details
|


 |
|
03-28-2019
|
2.00
|
Layup 21 plies for 1/4" Hardpoints for Main Spar
|
Details
|


|
|
03-23-2019
|
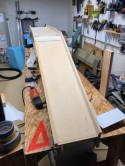
1.50
|
Sand main spar jog side rails to final dimensions
|
Details
|

 |
|
03-21-2019
|
3.00
|
Cut fiberglass for first main spar layup, lower wi
|
Details
|


|
|
03-20-2019
|
0.50
|
Apply final rails to main spar jig
|
Details
|


|
|
03-17-2019
|
0.60
|
Add two more rails to main spar jig sides
|
Details
|


|
|
03-16-2019
|
0.30
|
Attach MJS 5 to main spar jig
|
Details
|


 |
|
03-15-2019
|
4.00
|
Attach foam extensions to lower winglets
|
Details
|


 |
|
03-12-2019
|
2.00
|
Trim foam from lower winglets for shear web layup
|
Details
|


|
|
03-11-2019
|
2.00
|
Cut foam supports for shear web extensions for low
|
Details
|

  |
|
03-03-2019
|
0.25
|
Success! Shear web on the test looks great! Now
|
Details
|


 |
|
03-03-2019
|
0.25
|
Re-attach lower trimmed sections to winglets
|
Details
|

  |
|
03-02-2019
|
2.00
|
Test lower winglet shear web layup using "poor man
|
Details
|


|
|
03-01-2019
|
1.50
|
Build jig to hold lower winglet sections during sh
|
Details
|


|
|
02-28-2019
|
2.50
|
Trim out DWA-8 and DWA-4 to final shape.
|
Details
|


 |
|
02-25-2019
|
1.50
|
Layup 8-ply plywood laminate for DWA-4
|
Details
|


|
|
02-25-2019
|
0.30
|
Add final end pieces to DWA-5's
|
Details
|


 |
|
02-24-2019
|
2.00
|
Reinforce Jig prior to bending DWA-4
|
Details
|


 |
|
02-18-2019
|
1.50
|
Laminate 8 plys for DWA-8
|
Details
|


|
|
02-14-2019
|
1.00
|
Cut new wooden parts to test new method to make DW
|
Details
|
   |
|
02-10-2019
|
4.00
|
Cut first DWA-8 to final shape and size
|
Details
|


 |
|
02-09-2019
|
0.25
|
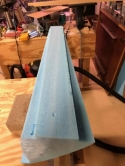
Sand/clean up channels in one lower winglet core f
|
Details
|
  |
|
02-09-2019
|
2.50
|
Define ends of main spar on jig
|
Details
|


|
|
02-07-2019
|
0.50
|
Laminate base 3-layers of plywood for DWA-5's
|
Details
|

  |
|
02-06-2019
|
0.75
|
Epoxy leading edge pieces of .7" cutoffs of lower
|
Details
|


|
|
02-05-2019
|
4.40
|
Epoxy lower winglet leading edge pieces together
|
Details
|


|
|
02-04-2019
|
2.00
|
Bend plywood sheets for DWA-8 and DWA 4
|
Details
|


|
|
02-02-2019
|
1.75
|
Cut .7" from bottom of lower winglet cores
|
Details
|


|
|
01-12-2019
|
1.50
|
Remove lower winglet leading edge for shear web la
|
Details
|

  |
|
01-09-2019
|
3.50
|
Re-cut lower winglet cores
|
Details
|


|
|
01-03-2019
|
2.50
|
Test three methods to prevent shear web lifting
|
Details
|


|
|
09-01-2018
|
2.50
|
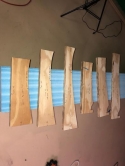
Cut all winglet jigs
|
Details
|
  |
|
07-22-2018
|
1.00
|
Cut two Winglet WWA-1's
|
Details
|


 |
|
07-21-2018
|
1.50
|
Beginning lower winglet shear web construction
|
Details
|


 |
|
07-20-2018
|
1.50
|
Cut templates to cut winglet shear web
|
Details
|

  |
|
07-18-2018
|
0.25
|
Reattach .7" bottom sections to lower winglets.
|
Details
|


 |
|
07-16-2018
|
0.75
|
Laminate WWA-1's and DWA-5's
|
Details
|

  |
|
07-16-2018
|
2.00
|
Attach leading edge sections to lower winglets.
|
Details
|


 |
|
07-16-2018
|
0.25
|
Attach leading edge pieces to .7" winglet cutoff s
|
Details
|


 |
|
07-15-2018
|
1.50
|
Test laminate DWA-4 and DWA-8's
|
Details
|


|
|
07-14-2018
|
0.50
|
Cut off lower .7" of lower winglet sections
|
Details
|


 |
|
07-10-2018
|
2.25
|
Re-Hotwire New FC-10 Blank
|
Details
|


 |
|
07-09-2018
|
1.00
|
Cut blanks for Winglet Jigs
|
Details
|

  |
|
07-08-2018
|
1.00
|
Add internal bridges and top to main spar jig
|
Details
|


|
|
07-07-2018
|
0.25
|
Join halves of main spar jig together
|
Details
|

  |
|
07-06-2018
|
4.00
|
Successfully cut all 4 winglet cores
|
Details
|


|
|
07-04-2018
|
2.00
|
Successfully hotwire FC-2, FC-3, FC-11 and FC-12 W
|
Details
|

  |
|
07-03-2018
|
0.75
|
Add internal supports for main spar jig
|
Details
|


|
|
07-02-2018
|
1.00
|
Continue laying out winglet layout lines
|
Details
|

  |
|
07-02-2018
|
1.00
|
Continue gluing up main spar jig
|
Details
|


|
|
07-01-2018
|
0.50
|
Layout template alignments lines for FC-17 lower w
|
Details
|

  |
|
07-01-2018
|
2.00
|
Finsih truing up foam billets and layout template
|
Details
|

  |
|
07-01-2018
|
0.50
|
Begin gluing up main spar jig
|
Details
|

  |
|
06-30-2018
|
4.00
|
Assemble replacement foam billet blanks for wing c
|
Details
|


|
|
06-29-2018
|
3.00
|
Begin putting together new main wing foam billets
|
Details
|
   |
|
06-28-2018
|
1.50
|
Test cut winglet with new power supply and wire in
|
Details
|


 |
|
06-25-2018
|
1.50
|
Finish prepping foam for winglet cutting test
|
Details
|
   |
|
06-22-2018
|
0.50
|
Evaluate hardpoint test
|
Details
|


 |
|
06-20-2018
|
1.25
|
Assemble foam blanks for winglets
|
Details
|


 |
|
06-19-2018
|
1.00
|
Make test layup of bent hardpoints
|
Details
|


|
|
06-17-2018
|
0.50
|
Adjust bending jig alignment guides to fit
|
Details
|

  |
|
06-16-2018
|
1.00
|
Add alignment guides to bending jig.
|
Details
|


|
|
06-15-2018
|
0.25
|
Finish sanding MSJ-1's and test final angle.
|
Details
|


 |
|
06-14-2018
|
1.50
|
Cut MSJ-1's, 10's, 11's, and 12's.
|
Details
|


|
|
06-14-2018
|
0.25
|
Begin sanding MSJ-1's to final shape and size.
|
Details
|


 |
|
06-10-2018
|
0.75
|
Finish gluing up bending jig
|
Details
|


|
|
06-07-2018
|
0.50
|
Continue guling up bending jig
|
Details
|

  |
|
06-04-2018
|
0.50
|
Glue up first part of bending jig
|
Details
|

  |
|
05-31-2018
|
0.75
|
Finish cutting all parts for DWA-4 and 8 Bending J
|
Details
|


|
|
05-30-2018
|
1.50
|
Layout DWA 4 and 8 bending jig can cut first piece
|
Details
|

  |
|
05-29-2018
|
0.50
|
Continue trimming out wood for Main Spar jig
|
Details
|
   |
|
05-28-2018
|
1.25
|
Rough cut wood for Main Spar jig and DWA-4 & 8 Ben
|
Details
|


 |
|
04-07-2018
|
1.50
|
Trim foam blank for second lower winglet
|
Details
|

  |
|
03-31-2018
|
2.00
|
Trim second set of replacement foam billets for la
|
Details
|

  |
|
03-27-2018
|
2.00
|
Trim first set of replacement foam billets for la
|
Details
|

  |
|
03-05-2018
|
0.10
|
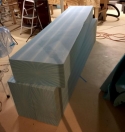
NEW FOAM!!!
|
Details
|
  |
|
02-13-2018
|
2.00
|
Test New Hotwire Saw
|
Details
|


 |
|
08-26-2017
|
1.50
|
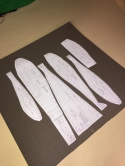
Remaking a few templates
|
Details
|

 |
|
08-05-2017
|
0.50
|
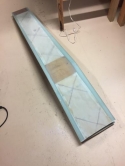
Cut Main Spar in Half
|
Details
|

 |
|
05-29-2017
|
1.50
|
Build new hotwire saw.
|
Details
|
   |
|
05-28-2017
|
0.25
|
Cut wood for new hotwire saw.
|
Details
|
   |
|
05-27-2017
|
0.25
|
Test cut core - Kind of a C+ result.
|
Details
|


 |
|
05-26-2017
|
1.00
|
Drill holes in small squares and prep for long cut
|
Details
|
   |
|
05-26-2017
|
1.50
|
Cut test templates for hotwire trial
|
Details
|

  |
|
05-25-2017
|
3.00
|
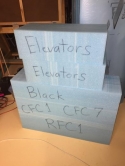
Trim out a portion of Black Billet
|
|
  |
|
05-24-2017
|
3.00
|
Trim out Blue Billet
|
|

  |
|
05-23-2017
|
1.50
|
Set up cutting table for straight cuts
|
|

  |
|
05-22-2017
|
2.00
|
Trim out Green Billet
|
Details
|


|
|
05-21-2017
|
2.00
|
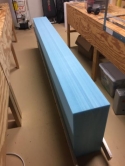
Square off and set up for long diagonal cut on Gre
|
Details
|
  |
|
05-20-2017
|
3.00
|
Trim out Brown Billet
|
Details
|

  |
|
05-19-2017
|
3.00
|
Trim out Red Billet
|
Details
|

  |
|
05-18-2017
|
3.00
|
Trim out Orange Billet
|
Details
|

  |
|
05-17-2017
|
2.00
|
Square off first new Buoyancy Billets
|
Details
|

  |
|
04-16-2017
|
2.00
|
Glue new template sheets to formica sheet.
|
Details
|

  |
|
04-14-2017
|
4.50
|
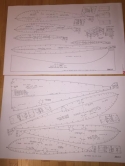
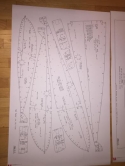
Printing new sheets for templates
|
Details
|
 |
|
02-18-2017
|
3.00
|
Finish squaring off first foam block and cutting t
|
Details
|


|
|
02-11-2017
|
4.50
|
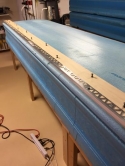
Start trimming out first foam block.
|
Details
|


|
|
02-04-2017
|
0.50
|
The spar is finished!
|
Details
|


 |
|
02-03-2017
|
0.75
|
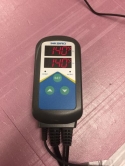
Baking the Centersection Spar for 15 hours at a ni
|
Details
|
  |
|
02-02-2017
|
2.00
|
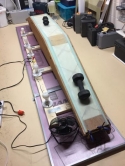
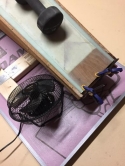
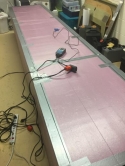
Install spar in jig, and finish prepping for post-
|
Details
|
|
|
01-31-2017
|
0.50
|
Modify bulb setup to prevent overheating
|
Details
|
   |
|
01-30-2017
|
1.50
|
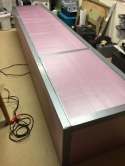
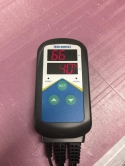
Test heating of post-cure oven.
|
Details
|

|
|
01-29-2017
|
2.25
|
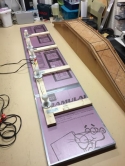
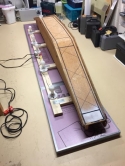
Build bottom of post-cure oven and position light
|
|
 |
|
01-28-2017
|
0.25
|
Caulk inside seams of top of post-cure oven.
|
Details
|

  |
|
01-28-2017
|
2.00
|
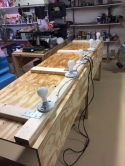
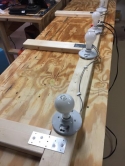
Build Light bar heat source for post-cure oven.
|
Details
|

|
|
01-27-2017
|
2.00
|
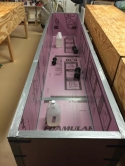
Assemble top of Post-Cure Oven
|
Details
|

 |
|
01-23-2017
|
2.00
|
Assembling foam planks for sides and top of post-c
|
Details
|


 |
|
01-21-2017
|
0.50
|
Purchase foam for post-cure oven. Construction st
|
Details
|

  |
|
01-11-2017
|
0.50
|
Tried a different hair dryer but only on high heat
|
Details
|
   |
|
01-10-2017
|
1.25
|
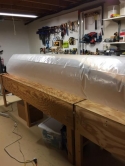
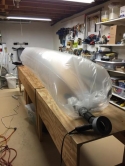
Construct and test post cure plastic oven.
|
Details
|
 |
|
01-09-2017
|
1.00
|
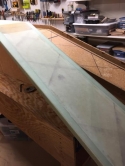
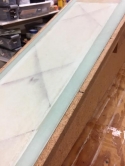
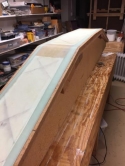
Trim out finished centersection spar!
|
Details
|
|
|
01-07-2017
|
0.50
|
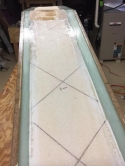
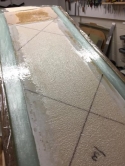
Slurry foam and wet out foam and spar caps with ep
|
Details
|
 |
|
01-07-2017
|
4.50
|
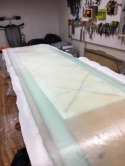
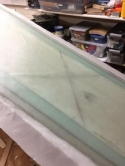
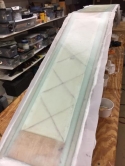
Layup 4 layers UNI and final peel-ply on Forward F
|
Details
|
|
|
01-07-2017
|
1.50
|
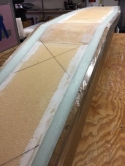
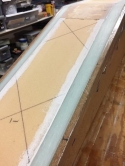
Final sanding of centersection spar, masking & lin
|
Details
|
 |
|
01-04-2017
|
1.00
|
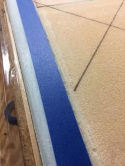
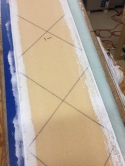
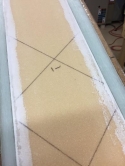
Mask off spar caps and feather foam and wood trans
|
Details
|
|
|
01-04-2017
|
1.25
|
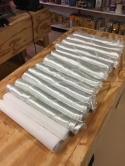
Cut UNI and peel ply for final centersection spar
|
Details
|
  |
|
01-03-2017
|
2.50
|
Clean the shop!
|
Details
|
   |
|
01-01-2017
|
2.00
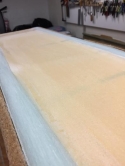
|
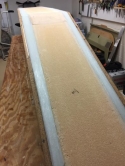
Finish cleanup of spar caps
|
|
 |
|
01-01-2017
|
0.25
|
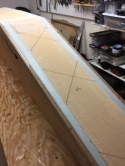
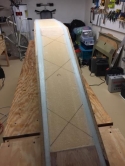
Add alignment lines for final UNI layup on centers
|
Details
|
 |
|
12-27-2016
|
1.50
|
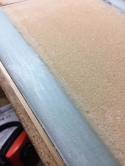
Plane down excess roving on spar caps
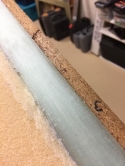
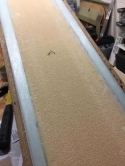
|
Details
|
|
|
12-25-2016
|
0.75
|
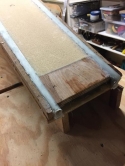
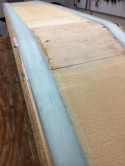
Remove peel-ply from spar cap layup and continue c
|
Details
|
 |
|
12-24-2016
|
1.00
|
Begin cleanup after second centersection spar cap
|
Details
|
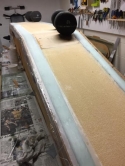
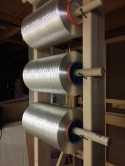
|
|
12-23-2016
|
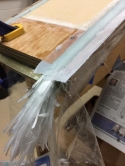
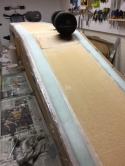
9.00
|
Finish second centersection spar cap layup.
|
Details
|
|
|
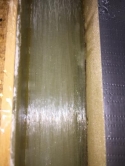
12-23-2016
|
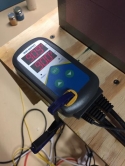
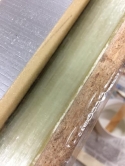
2.00
|
Epoxy up to temperature, begin centersection spar
|
Details
|
|
|
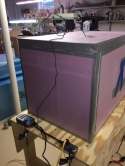
12-22-2016
|
1.00
|
Pre-measure epoxy for second spar cap layup.
|
Details
|

 |
|
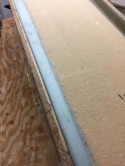
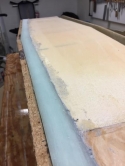
12-21-2016
|
1.00
|
Remove duct tape and start cleanup of spar cap.
|
Details
|
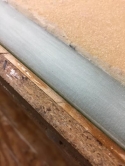
|
|
12-17-2016
|
11.00
|
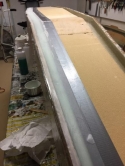
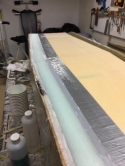
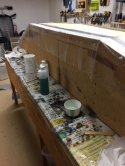
Layup first Centersection spar - and, the aftermat
|
Details
|
|
|
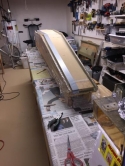
12-17-2016
|
2.00
|
Finish prep work for centersection spar layup
|
Details
|
  |
|
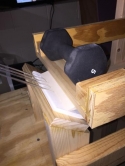
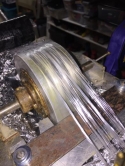
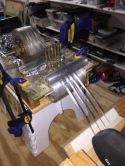
12-14-2016
|
2.50
|
Finish construction and testing of roving "de-sizi
|
Details
|
|
|
12-11-2016
|
2.00
|
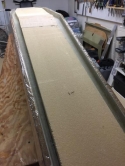
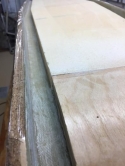
Sand Centersection Spar "Troughs"
|
Details
|
 |
|
12-01-2016
|
0.75
|
Test MGS Epoxy
|
Details
|


 |
|
12-01-2016
|
1.25
|
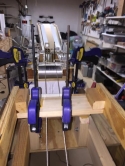
Continue working on roving de-sizing fixture
|
Details
|


|
|
11-29-2016
|
2.00
|
Begin construction of roving "anti-sizing" fixture
|
Details
|


|
|
11-20-2016
|
0.50
|
Begin checking airfoil templates for accuracy. Sl
|
Details
|


 |
|
11-19-2016
|
1.50
|
Begin adding roving only to find out that my rovin
|
Details
|


 |
|
11-18-2016
|
1.00
|
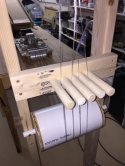
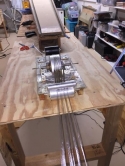
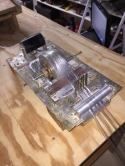
Final prep of roving setup and prep of centersecti
|
Details
|
|
|
11-17-2016
|
1.00
|
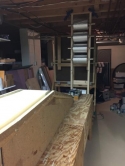
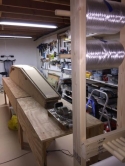
Setup roving area with main spar. Tomorrow night
|
Details
|
 |
|
11-17-2016
|
2.00
|
Assemble roving support/dispensing stand.
|
Details
|
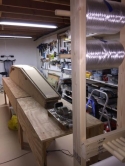
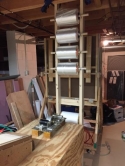
 |
|
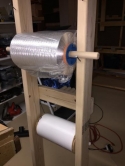
11-16-2016
|
1.00
|
Finish constructing roving support/dispensing stru
|
Details
|
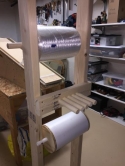
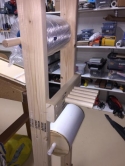
|
|
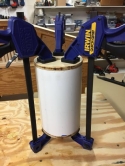
11-16-2016
|
1.00
|
Construct roving roller
|
Details
|
  |
|
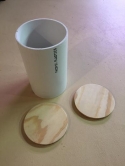
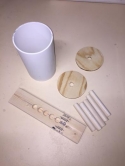
11-15-2016
|
2.00
|
Prepare final parts for roving support structure
|
Details
|
 |
|
11-14-2016
|
2.00
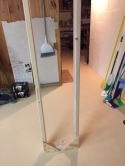
|
Begin construction of the roving support stand.
|
Details
|

 |
|
11-13-2016
|
1.50
|
Final smoothing of foam to plywood transitions of
|
Details
|


 |
|
11-13-2016
|
0.75
|
Back to the original roving plan. 8 strands look l
|
Details
|

  |
|
11-13-2016
|
0.50
|
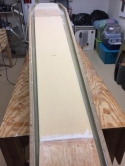
A little more cleanup needed but almost ready for
|
Details
|
  |
|
11-12-2016
|
0.50
|
Creating an add-on to the wetting wheel to allow f
|
Details
|


|
|
11-11-2016
|
2.50
|
....sand, sand, sand, sand, sand...DONE!!
|
Details
|


|
|
11-10-2016
|
2.00
|
Sand, sand, sand, sand, sand.....
|
Details
|


 |
|
11-10-2016
|
0.25
|
Attached metal guards to protect fibreglass edges
|
Details
|

  |
|
11-09-2016
|
1.25
|
Continue sanding additional foam on centersection
|
Details
|

  |
|
11-08-2016
|
0.50
|
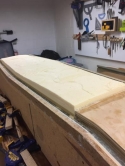
Weights off and beginning to sand foam to shape.
|
Details
|
  |
|
11-07-2016
|
0.50
|
Sand edges of centersection spar to final shape.
|
Details
|

  |
|
11-07-2016
|
1.00
|
Epoxy additional foam to forward center area of ce
|
Details
|


|
|
11-06-2016
|
1.25
|
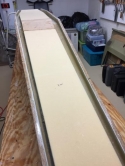
Excess fiberglass removed and spar pried out of ji
|
Details
|

 |
|
11-06-2016
|
0.50
|
All weights and clamps off and peel-ply removed
|
Details
|
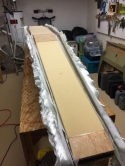


|
|
11-05-2016
|
0.50
|
After last evening, clean up only today. 27 epoxy
|
Details
|

  |
|
11-04-2016
|
3.50
|
Lay in 6 layers UNI into centersection spar jig
|
Details
|
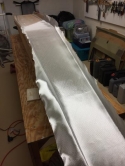
  |
|
11-04-2016
|
1.50
|
Add in all internal spar components, clamp and wei
|
Details
|


|
|
11-03-2016
|
0.75
|
Wood blocks ready with clamps for tomorrow!
|
Details
|


 |
|
11-03-2016
|
3.50
|
Epoxy Hot Box ready for tomorrow! Nice toasty 95
|
Details
|


 |
|
11-02-2016
|
0.01
|
Ready for Fiberglass!!
|
Details
|
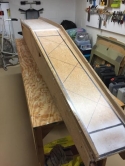
  |
|
11-02-2016
|
1.00
|
Line Centersection Spar Jig with Contact Paper
|
Details
|
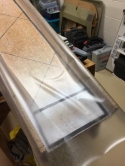

 |
|
11-02-2016
|
1.00
|
Edge Centersection Spar Jig with Packaging Tape
|
Details
|


 |
|
10-31-2016
|
0.75
|
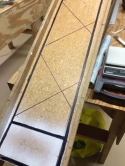
Mark Outline Position of all Centersection Interna
|
Details
|


|
|
10-31-2016
|
0.50
|
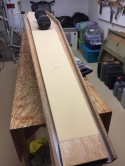
Final Fitting of Internal Centersection Spar Parts
|
Details
|

 |
|
10-31-2016
|
0.40
|
Add Temporary Alignment Nails for DWA-5 Positionin
|
Details
|


 |
|
10-20-2016
|
0.75
|
Final adjustment of DWA-5's
|
Details
|


 |
|
10-19-2016
|
1.00
|
Begin to dry-fit all Centersection Spar internal p
|
Details
|


|
|
10-18-2016
|
1.50
|
Cut 18 pieces of UNI fiberglass for Centersection
|
Details
|


 |
|
10-10-2016
|
0.25
|
Clean up/Finish DWA-5's
|
Details
|

  |
|
10-08-2016
|
1.50
|
Trim DWA-5 Hardpoints and Epoxy into DWA-5's
|
Details
|


|
|
10-07-2016
|
2.00
|
Trim DWA-5's to shape
|
Details
|


 |
|
10-06-2016
|
0.50
|
Test fit and set Final Alignment of DWA-4 & DWA-8
|
Details
|


 |
|
10-05-2016
|
0.50
|
Sand and Clean Up DWA-4 & DWA-8
|
Details
|


|
|
10-04-2016
|
1.00
|
Wet Flox WA-1's into DWA-4 and DWA-8
|
Details
|


 |
|
10-03-2016
|
1.50
|
Final shape all foam for main wing spar
|
Details
|


 |
|
10-02-2016
|
2.25
|
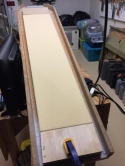
Begin cutting foam for main wing spar
|
Details
|
  |
|
09-30-2016
|
1.00
|
Finish main wing spar foam templates
|
Details
|
   |
|
09-29-2016
|
1.25
|
Cut templates for main wing spar foam inserts.
|
Details
|

  |
|
09-28-2016
|
1.50
|
Finish alignment lines on main spar jig.
|
Details
|

  |
|
09-27-2016
|
2.50
|
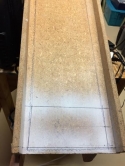
Layout alignment lines on main spar jig
|
Details
|

 |
|
09-26-2016
|
2.00
|
Lay up 1/4" fibreglass for WA-5 hardpoints
|
Details
|

  |
|
07-29-2016
|
2.75
|
Construct Bulkhead FS-180
|
Details
|

  |
|
07-22-2016
|
3.75
|
Construct Bulkhead 153
|
Details
|

  |
|
06-18-2016
|
4.75
|
Construct bulkhead 144.5
|
Details
|


 |
|
05-27-2016
|
3.25
|
Construct Front Seat Bulkhead
|
Details
|

  |
|
05-07-2016
|
5.50
|
Construct Bulkhead FS 73
|
Details
|

  |
|
04-16-2016
|
5.00
|
Construct Bulkhead FS 57
|
Details
|

  |
|
03-05-2016
|
4.00
|
Construct Bulkhead FS-47
|
Details
|

  |
|
11-14-2015
|
3.00
|
Final shape DWA 4 & 8
|
Details
|


|
|
10-30-2015
|
3.00
|
Cut plywood and bend to form DWA-4 & 8
|
Details
|


|
|
10-04-2014
|
14.00
|
Finish Main Spar Jig
|
|


 |
|
05-19-2007
|
0.50
|
Test epoxy mix
|
Details
|
   |
|
05-19-2007
|
0.50
|
Add one set of legs to fiberglass cabinet
|
Details
|
   |
|
05-18-2007
|
0.75
|
Clean, Charge, and Recalibrate Epoxy Pump
|
Details
|
   |
|
05-16-2007
|
0.50
|
Calibrate Epoxy Pump
|
Details
|
   |
|
05-15-2007
|
10.00
|
Finish building benches
|
Details
|
   |
|
05-08-2007
|
5.00
|
Build fiberglass cabinet support
|
Details
|
   |
|
01-07-2007
|
1.00
|
Prime and paint folding cutting table sections
|
Details
|
   |
|
01-06-2007
|
2.00
|
Build folding cutting table sections
|
Details
|
   |
|
01-05-2007
|
2.00
|
Finish cutting wood for fiberglass cabinet and tem
|
Details
|
   |
|
01-05-2007
|
2.50
|
Build one 4' bench and start folding table constru
|
Details
|
   |
|
01-04-2007
|
2.50
|
Cut wood for templates and fiberglass cabinet
|
Details
|
   |
|
01-03-2007
|
1.50
|
Assemble Bench Legs
|
Details
|
   |
|
01-01-2007
|
2.50
|
Cut wood for benches
|
Details
|
   |

