Date
|
Hours
|
Work Log Summary

|
Details
|
04-11-2009
|
2.50
|
Sec Final-51
|
Details
|
")
")
")
|
|
04-10-2009
|
2.50
|
Sec Final-50
|
Details
|
")
")
")
|
|
04-03-2009
|
3.00
|
Sec Interior-23
|
Details
|
")
")

(Click Here to view Full Log Entry)")
|
|
04-02-2009
|
5.00
|
Sec Interior-22
|
Details
|
")
")
")
|
|
03-31-2009
|
2.00
|
Sec Final-49
|
Details
|
")
")
|
|
03-30-2009
|
2.00
|
Sec Interior-21
|
Details
|
")
")
")
|
|
03-28-2009
|
13.00
|
Sec Interior-20
|
Details
|
")
")

(Click Here to view Full Log Entry)")
|
|
03-20-2009
|
4.50
|
Sec Final-48
|
Details
|
")
")
")
|
|
03-17-2009
|
2.50
|
Sec Final-47
|
Details
|
")
")
")
|
|
03-16-2009
|
1.50
|
Sec Final-46
|
Details
|
")
")
")
|
|
03-13-2009
|
3.00
|
Sec Final-45
|
Details
|
")

")
|
|
03-06-2009
|
2.50
|
Sec Final-44
|
Details
|

(Click Here to view Full Log Entry)")
")
|
|
03-02-2009
|
2.00
|
Sec First - 1
|
Details
|
")
")
")
|
|
02-25-2009
|
5.00
|
Sec Final-43
|
Details
|
")
")
")
|
|
02-20-2009
|
10.00
|
Sec Final-42
|
Details
|
")
")
")
|
|
02-12-2009
|
3.00
|
Sec Final-41
|
Details
|
")
")
")
|
|
02-11-2009
|
2.50
|
Sec Final-40
|
Details
|
")
")
")
|
|
02-10-2009
|
1.00
|
Sec Final-39
|
Details
|
")
")
")
|
|
02-09-2009
|
4.00
|
Sec Final-38
|
Details
|
")
")
")
|
|
02-06-2009
|
4.50
|
Sec Final-37
|
Details
|
")
")
")
|
|
02-05-2009
|
4.00
|
Sec Final-36
|
Details
|
")
")
")
|
|
02-04-2009
|
1.50
|
Sec Final-35
|
Details
|
")
")
")
|
|
02-03-2009
|
4.50
|
Sec Final-34
|
Details
|
")
")
")
|
|
01-29-2009
|
4.00
|
Sec Final-33
|
Details
|
")

(Click Here to view Full Log Entry)")
")
|
|
01-28-2009
|
4.50
|
Sec Final-32
|
Details
|
")
")
")
|
|
01-26-2009
|
2.50
|
Sec Final-31
|
Details
|
")
")
")
|
|
01-23-2009
|
3.00
|
Sec Final-30
|
Details
|
")
")
")
|
|
01-22-2009
|
3.00
|
Sec Final-29
|
Details
|
")
")
")
|
|
01-21-2009
|
5.00
|
Sec Final-28
|
Details
|
")
")
")
|
|
01-17-2009
|
2.00
|
Sec Final-27
|
Details
|
")
")
")
|
|
01-16-2009
|
2.50
|
Sec Final-26
|
Details
|
")
")
")
|
|
01-13-2009
|
3.00
|
Sec Final-25
|
Details
|
")
")
")
|
|
01-09-2009
|
3.00
|
Sec Final-24
|
Details
|
")
")
")
|
|
01-07-2009
|
4.00
|
Sec Final-23
|
Details
|
")
")
")
|
|
01-05-2009
|
3.00
|
Sec-Final-22
|
Details
|
")
")
")
|
|
01-02-2009
|
3.00
|
Sec Final-21
|
Details
|
")
")

(Click Here to view Full Log Entry)")
|
|
12-22-2008
|
2.50
|
Sec Final-20
|
Details
|

")
")
|
|
12-17-2008
|
2.00
|
Sec Final-19
|
Details
|
")
")
")
|
|
12-13-2008
|
3.00
|
Sec Final-18
|
Details
|
")
")
")
|
|
12-11-2008
|
3.25
|
Sec Final-17
|
Details
|
")
")
")
|
|
12-09-2008
|
3.25
|
Sec Final-16
|
Details
|
")
")
")
|
|
12-08-2008
|
3.25
|
Sec Final-15
|
Details
|
")
")
")
|
|
12-04-2008
|
2.50
|
Sec Final-14
|
Details
|
")
")
")
|
|
12-02-2008
|
2.00
|
Sec Final-13
|
Details
|
")
")
")
|
|
11-26-2008
|
6.00
|
Sec Final-12
|
Details
|
")
")
")
|
|
11-21-2008
|
2.75
|
Sec Final-11
|
Details
|

 of the upper plenum
(Click Here to view Full Log Entry)")
")
|
|
11-20-2008
|
6.25
|
Sec Final-10
|
Details
|
")
")

(Click Here to view Full Log Entry)")
|
|
11-13-2008
|
5.25
|
Sec Final-9
|
Details
|
")
")
")
|
|
11-11-2008
|
3.75
|
Sec Final-8
|
Details
|
")
")
")
|
|
11-05-2008
|
2.75
|
Sec Final-7
|
Details
|
")
")
")
|
|
11-04-2008
|
4.50
|
Sec Final-6
|
Details
|
")
")
")
|
|
10-28-2008
|
2.50
|
Sec Final-5
|
Details
|
")
")
")
|
|
10-25-2008
|
3.50
|
Sec Final-4
|
Details
|
")
")
 and safetied prop bolts
(Click Here to view Full Log Entry)")
|
|
10-17-2008
|
2.50
|
Sec Final-3
|
Details
|
")
")
")
|
|
10-16-2008
|
3.50
|
Sec Final-2
|
Details
|
")
")
")
|
|
10-06-2008
|
25.00
|
Sec Paint-12
|
Details
|
")
")
")
|
|
10-04-2008
|
2.00
|
Sec Final-1
|
Details
|
")
")
")
|
|
09-30-2008
|
20.00
|
Sec Paint-11
|
Details
|
")
")
")
|
|
09-27-2008
|
20.00
|
Sec Paint-10
|
Details
|
")
 N numbers
(Click Here to view Full Log Entry)")
")
|
|
09-23-2008
|
15.00
|
Sec Paint-9
|
Details
|
")
")
")
|
|
09-18-2008
|
20.00
|
Sec Paint-8
|
Details
|
")
")
")
|
|
09-15-2008
|
10.00
|
Sec Paint-7
|
Details
|
")
")
")
|
|
09-10-2008
|
10.00
|
Sec Paint-6
|
Details
|
")
")
")
|
|
09-06-2008
|
15.00
|
Sec Paint-5
|
Details
|
")
")
")
|
|
08-28-2008
|
25.00
|
Sec Paint-4
|
Details
|
")
")
")
|
|
07-25-2008
|
10.00
|
Sec Paint-3
|
Details
|
")
")
")
|
|
07-18-2008
|
1.50
|
Sec Paint-2
|
Details
|
")
")
")
|
|
07-14-2008
|
1.00
|
Sec Paint-1
|
Details
|
")
")
")
|
|
07-11-2008
|
1.50
|
Sec Home-81
|
Details
|
")
")
")
|
|
07-05-2008
|
1.50
|
Sec Home-80
|
Details
|
")
")
")
|
|
07-03-2008
|
6.00
|
Sec Home-79
|
Details
|
")
")
")
|
|
07-02-2008
|
3.00
|
Sec Home-78
|
Details
|
")
")
")
|
|
07-01-2008
|
3.00
|
Sec Home-77
|
Details
|
")

(Click Here to view Full Log Entry)")
")
|
|
06-28-2008
|
4.50
|
Sec Home-76
|
Details
|
")
")
")
|
|
06-26-2008
|
2.00
|
Sec Home-75
|
Details
|
")

(Click Here to view Full Log Entry)")
")
|
|
06-25-2008
|
4.50
|
Sec Home-74
|
Details
|
")
")
")
|
|
06-24-2008
|
5.00
|
Sec Home-73
|
Details
|
")
")
")
|
|
06-20-2008
|
5.00
|
Sec Home-72
|
Details
|
")
")
")
|
|
06-18-2008
|
4.50
|
Sec Home-71
|
Details
|
")
")
")
|
|
06-13-2008
|
15.00
|
Sec Home-70
|
Details
|
")
")

|
|
06-09-2008
|
2.50
|
Sec Home-69
|
Details
|
 tested and working !!!!!
(Click Here to view Full Log Entry)")
")
|
|
06-05-2008
|
4.00
|
Sec Home-68
|
Details
|
")
")
")
|
|
06-03-2008
|
7.50
|
Sec Home-67
|
Details
|
")
")
")
|
|
05-31-2008
|
7.50
|
Sec Home-66
|
Details
|
")
")
")
|
|
05-28-2008
|
4.50
|
Sec PP-30
|
Details
|
")
")
")
|
|
05-27-2008
|
3.50
|
Sec PP-29
|
Details
|
")
")
")
|
|
05-26-2008
|
4.50
|
Sec PP-28
|
Details
|
")
")
")
|
|
05-24-2008
|
3.50
|
Sec PP-27
|
Details
|
")
")
")
|
|
05-22-2008
|
6.25
|
Sec Interior-19
|
Details
|
")
")
")
|
|
05-20-2008
|
3.00
|
Sec Interior-18
|
Details
|
")
")
")
|
|
05-17-2008
|
1.50
|
Sec Interior-17
|
Details
|
")
")
|
|
05-16-2008
|
3.50
|
Sec Interior-16
|
Details
|

(Click Here to view Full Log Entry)")
")
")
|
|
05-15-2008
|
6.00
|
Sec Interior-15
|
Details
|
")
")
")
|
|
05-13-2008
|
3.50
|
Sec Home-65
|
Details
|
")
")
")
|
|
05-12-2008
|
6.50
|
Sec Home-64
|
Details
|
")
")
")
|
|
05-07-2008
|
9.00
|
Sec Home-63
|
Details
|
")
")
")
|
|
05-05-2008
|
3.50
|
Sec Home-62
|
Details
|
")
")
")
|
|
05-02-2008
|
4.50
|
Sec Home-61
|
Details
|
")
")
")
|
|
05-01-2008
|
4.00
|
Sec Home-60
|
Details
|
")
")
")
|
|
04-29-2008
|
6.50
|
Sec Home-59
|
Details
|
")
")
")
|
|
04-21-2008
|
3.00
|
Sec Home-58
|
Details
|
")
")
")
|
|
04-19-2008
|
1.00
|
Sec Home-57
|
Details
|
")
")
")
|
|
04-18-2008
|
2.00
|
Sec Home-56
|
Details
|
")
")
")
|
|
04-17-2008
|
2.00
|
Sec Home-55
|
Details
|
")
")
")
|
|
04-16-2008
|
3.00
|
Sec Home-54
|
Details
|
")
 in the console
(Click Here to view Full Log Entry)")
|
|
04-15-2008
|
3.50
|
Sec home-53
|
Details
|
")
")
")
|
|
04-14-2008
|
6.50
|
Sec Home-52
|
Details
|

")
")
|
|
04-04-2008
|
2.00
|
Sec Home-51
|
Details
|
")
")
")
|
|
04-02-2008
|
3.50
|
Sec Home-50
|
Details
|
")
")
")
|
|
04-01-2008
|
3.50
|
Sec Home-49
|
Details
|
")
")
")
|
|
03-31-2008
|
1.50
|
sec Home-48
|
Details
|
")
")
")
|
|
03-28-2008
|
3.00
|
Sec Home-47
|
Details
|
")
")
")
|
|
03-27-2008
|
3.50
|
Sec Home-46
|
Details
|
")
")
")
|
|
03-26-2008
|
7.00
|
Sec Home-45
|
Details
|
")
")
")
|
|
03-22-2008
|
3.25
|
Sec Home-44
|
Details
|
")
")
")
|
|
03-18-2008
|
2.75
|
Sec Home-43
|
Details
|
")
")
")
|
|
03-14-2008
|
4.00
|
Sec Home-42
|
Details
|
")
")
")
|
|
03-12-2008
|
3.50
|
Sec Home-41
|
Details
|
")
")
")
|
|
03-04-2008
|
3.00
|
Sec Home-40
|
Details
|
")
")
")
|
|
03-03-2008
|
2.00
|
Sec Home-39
|
Details
|
")
")
")
|
|
03-01-2008
|
4.00
|
Sec Home-38
|
Details
|
")

")
|
|
02-29-2008
|
5.50
|
Sec Home-37
|
Details
|
")
")
")
|
|
02-26-2008
|
6.25
|
Sec Home-36
|
Details
|
")
")
")
|
|
02-12-2008
|
3.50
|
Sec 44 misc right 2
|
Details
|
")
")
")
|
|
02-09-2008
|
4.00
|
Sec 44 misc right wing
|
Details
|
")
")
")
|
|
02-04-2008
|
3.50
|
Sec Home-34
|
Details
|
")
")
")
|
|
01-29-2008
|
5.00
|
Sec Home-33
|
Details
|
")
")
")
|
|
01-26-2008
|
2.75
|
Sec 44 miscellaneous steps #2
|
Details
|
")
")
")
|
|
01-24-2008
|
4.00
|
Sec 44 misc steps left wing
|
Details
|
")
")
")
|
|
01-19-2008
|
4.00
|
Sec 44-3 thru 44-9 Left wing
|
Details
|
")
")
")
|
|
12-11-2007
|
5.50
|
Sec 44-2 step 6&7, 44-6 step 1-3 and 44-8s1-2
|
Details
|
")
")
")
|
|
12-06-2007
|
5.00
|
Sec 44-2 steps 1-6 Plus some rework on wing tips
|
Details
|
")
")
")
|
|
12-03-2007
|
5.25
|
Sec Home-32
|
Details
|
")
")
")
|
|
12-01-2007
|
6.00
|
Sec Home-31
|
Details
|
")
")
")
|
|
11-30-2007
|
2.50
|
Sec Home-30
|
Details
|
")
")
")
|
|
11-29-2007
|
12.00
|
Sec Home-29
|
Details
|
")
")

|
|
11-26-2007
|
3.00
|
Sec Home-28
|
Details
|
")
")
")
|
|
11-24-2007
|
3.75
|
Sec Home-27
|
Details
|
")

(Click Here to view Full Log Entry)")
")
|
|
11-23-2007
|
3.00
|
sec Home-26
|
Details
|
")
")
")
|
|
11-20-2007
|
3.25
|
Sec Home-25
|
Details
|
")
")

|
|
11-19-2007
|
5.00
|
Sec Home-24
|
Details
|
")
")
")
|
|
11-17-2007
|
6.00
|
Sec Home-23
|
Details
|
")
")
")
|
|
11-16-2007
|
4.75
|
Sec Home-22
|
Details
|

(Click Here to view Full Log Entry)")
")
")
|
|
11-15-2007
|
8.50
|
Sec Home-21
|
Details
|
")

(Click Here to view Full Log Entry)")
")
|
|
11-12-2007
|
4.00
|
Sec Home-20
|
Details
|
")
")
")
|
|
11-10-2007
|
3.25
|
Sec Home-19
|
Details
|
")
")
")
|
|
11-09-2007
|
5.25
|
Sec Panel-41
|
Details
|
")
")
")
|
|
11-08-2007
|
5.00
|
Sec Panel-40
|
Details
|

(Click Here to view Full Log Entry)")
")
")
|
|
11-06-2007
|
4.00
|
Sec Panel-39
|
Details
|
")
")
")
|
|
11-01-2007
|
2.25
|
Sec Panel-38
|
Details
|
")
")
|
|
10-31-2007
|
5.50
|
Sec Panel-37
|
Details
|
")
")
")
|
|
10-30-2007
|
4.25
|
Sec Panel-36
|
Details
|
")
")
")
|
|
10-25-2007
|
2.00
|
Sec FF6-4
|
Details
|
")
")
")
|
|
10-24-2007
|
5.00
|
Sec 50 Cabin Heat
|
Details
|
")
")
 per John Forsling recommendation
(Click Here to view Full Log Entry)")
|
|
10-22-2007
|
6.00
|
Sec Interior-14
|
Details
|
")
")
")
|
|
10-19-2007
|
4.75
|
Sec Interior-13
|
Details
|
")
")
")
|
|
10-18-2007
|
6.25
|
Sec Interior-12
|
Details
|
")
")
")
|
|
10-17-2007
|
4.50
|
Sec Interior-11
|
Details
|
")
")
")
|
|
10-15-2007
|
4.50
|
Sec FF6-3
|
Details
|
")
 side heat muff attached and connected to heater duct/valve
(Click Here to view Full Log Entry)")
")
|
|
10-12-2007
|
6.00
|
sec Interior-10
|
Details
|
")
")
")
|
|
10-11-2007
|
4.25
|
Sec Interior-9
|
Details
|
")
")
")
|
|
10-10-2007
|
7.50
|
Sec Interior-8
|
Details
|
")
")
")
|
|
10-08-2007
|
6.75
|
Sec Interior-7
|
Details
|
")
")
")
|
|
10-04-2007
|
4.50
|
Sec Interior-6
|
Details
|
")
")
")
|
|
10-03-2007
|
3.75
|
Sec interior-5
|
Details
|
")
")
")
|
|
10-02-2007
|
7.00
|
Sec Home-18
|
Details
|
")
")
")
|
|
09-24-2007
|
3.75
|
Sec Home-17
|
Details
|
")
")
")
|
|
09-21-2007
|
4.00
|
Sec Home-16
|
Details
|
")
")
")
|
|
09-19-2007
|
3.25
|
Sec Home-15
|
Details
|
 XM weather (aft)
(Click Here to view Full Log Entry)")
")
")
|
|
09-18-2007
|
4.00
|
Sec Home-14
|
Details
|
")
")
")
|
|
09-14-2007
|
5.25
|
Sec Home-13
|
Details
|
")
")

(Click Here to view Full Log Entry)")
|
|
09-12-2007
|
2.25
|
Sec Home-12
|
Details
|
")
")
")
|
|
09-10-2007
|
4.00
|
Sec Home-11
|
Details
|
")
")
")
|
|
09-08-2007
|
7.50
|
Sec Home-10
|
Details
|
")
")
")
|
|
09-06-2007
|
3.00
|
Sec Home-9
|
Details
|
")
")
")
|
|
08-29-2007
|
3.50
|
Sec Home-8
|
Details
|

(Click Here to view Full Log Entry)")
")
")
|
|
08-27-2007
|
3.50
|
Sec Home-7
|
Details
|
")
")
")
|
|
08-25-2007
|
5.50
|
Sec Home-6
|
Details
|
")
")
")
|
|
08-22-2007
|
4.00
|
Sec Home-5
|
Details
|
")

(Click Here to view Full Log Entry)")
")
|
|
08-21-2007
|
6.00
|
Sec Home-4
|
Details
|
")
")
")
|
|
08-15-2007
|
2.50
|
Sec Ram-9
|
Details
|
")
")
")
|
|
08-14-2007
|
2.50
|
Sec Home-3
|
Details
|
")
")

|
|
08-13-2007
|
3.50
|
Sec Home-2
|
Details
|
")

(Click Here to view Full Log Entry)")
")
|
|
08-11-2007
|
3.00
|
Sec Home-1
|
Details
|
")
")
")
|
|
08-10-2007
|
2.00
|
Sec 36-4-pbrake
|
Details
|
")
")
")
|
|
08-09-2007
|
4.75
|
Sec Ram-8
|
Details
|
")
")
")
|
|
08-08-2007
|
4.00
|
Sec FF3-5
|
Details
|
")
")
")
|
|
08-07-2007
|
4.75
|
Sec FF3-4
|
Details
|
")
")
")
|
|
08-06-2007
|
5.50
|
Sec FF3-3
|
Details
|
")
")
")
|
|
08-04-2007
|
5.00
|
Sec Panel-35
|
Details
|
 lights and")
")
")
|
|
08-03-2007
|
5.50
|
Sec Ram-7
|
Details
|
")
")
")
|
|
08-03-2007
|
3.25
|
Sec interior-4
|
Details
|
")
")
")
|
|
07-31-2007
|
2.00
|
Sec Ram-6
|
Details
|
")
")
")
|
|
07-30-2007
|
5.50
|
Sec Panel-34
|
Details
|
")
")
")
|
|
07-28-2007
|
6.50
|
Sec Interior-3
|
Details
|
")
")
")
|
|
07-21-2007
|
2.50
|
Sec Interior-2
|
Details
|
")
")
")
|
|
07-19-2007
|
3.00
|
Sec Ram-5
|
Details
|
")

")
|
|
07-19-2007
|
1.50
|
Sec 47 hinge-1
|
Details
|
")
")
")
|
|
07-18-2007
|
4.50
|
Sec Ram-4
|
Details
|
")
")
")
|
|
07-17-2007
|
4.50
|
Sec Ram-3
|
Details
|
")
")
")
|
|
07-16-2007
|
6.00
|
Sec Ram-2
|
Details
|
")
")
")
|
|
07-13-2007
|
5.50
|
Sec 38 step 11
|
Details
|
")
")
")
|
|
07-12-2007
|
2.00
|
Sec Ram-1
|
Details
|
")
")
")
|
|
07-12-2007
|
1.50
|
Sec Interior-1
|
Details
|
")
")
")
|
|
07-11-2007
|
4.25
|
Sec Panel-33
|
Details
|
")
")
")
|
|
07-09-2007
|
3.50
|
Sec Panel-32
|
Details
|
")
")
 with some micro)
(Click Here to view Full Log Entry)")
|
|
07-07-2007
|
5.50
|
Sec Panel-31
|
Details
|
")
")
")
|
|
07-06-2007
|
5.50
|
Sec FFPS-9
|
Details
|
")
")
")
|
|
07-05-2007
|
5.25
|
Sec FFPS-8
|
Details
|
")
")
")
|
|
06-28-2007
|
5.25
|
Sec FFPS-7
|
Details
|
")
")
")
|
|
06-27-2007
|
4.75
|
Sec FFPS-6
|
Details
|
")
")
")
|
|
06-26-2007
|
4.25
|
Sec FFPS-5
|
Details
|
")
")
")
|
|
06-25-2007
|
6.50
|
Sec FFPS-4
|
Details
|
")
")
")
|
|
06-21-2007
|
7.50
|
Sec Panel-30
|
Details
|
")
")
")
|
|
06-19-2007
|
3.00
|
Sec FFPS-3
|
Details
|
")
")
")
|
|
06-18-2007
|
1.75
|
Sec FF2-21
|
Details
|
")
|
|
06-16-2007
|
4.25
|
Sec FF2-17 through FF2-20
|
Details
|
")
")
")
|
|
06-15-2007
|
0.75
|
Sec FF5-finish
|
Details
|
")
")
|
|
06-15-2007
|
1.50
|
Sec FF4-Finish
|
Details
|
")
")
")
|
|
06-15-2007
|
2.00
|
FF2-plenum step 12
|
Details
|
")
")
")
|
|
06-14-2007
|
5.00
|
Sec FF4-3 all steps
|
Details
|
")
")
")
|
|
06-13-2007
|
5.50
|
Sec FF2 plenum step 11
|
Details
|
")
")
")
|
|
06-12-2007
|
5.25
|
Sec FF2 plenum step 10
|
Details
|
")
")
")
|
|
06-11-2007
|
4.25
|
Sec FF2 plenum step 9
|
Details
|
")

")
|
|
06-09-2007
|
5.25
|
Sec FF2 Plenum step 8
|
Details
|
")
")
")
|
|
06-07-2007
|
4.50
|
Sec FF2 plenum step 7
|
Details
|
")
")
")
|
|
06-06-2007
|
4.75
|
Sec FF2 Plenum step 6
|
Details
|
")
")
|
|
06-04-2007
|
5.50
|
Sec FF2-plenum step 5
|
Details
|
")
")
")
|
|
06-02-2007
|
5.50
|
Sec FF2 Plenum step 4
|
Details
|
")
")
")
|
|
06-01-2007
|
5.25
|
Sec FF2 plenum step 3
|
Details
|
")
")
")
|
|
05-31-2007
|
5.00
|
Sec FF2 plenum step 2
|
Details
|
")
")
")
|
|
05-29-2007
|
5.25
|
Sec FF2-plenum step 1
|
Details
|
")
")
")
|
|
05-28-2007
|
5.00
|
Fec FF2-12 Steps 1 thru 11
|
Details
|

")
")
|
|
05-26-2007
|
5.00
|
Sec FF2-4 thru FF2-11
|
Details
|
")
")
")
|
|
05-24-2007
|
3.00
|
Sec FF2-2 and -3 all steps
|
Details
|
")
")
")
|
|
05-23-2007
|
5.00
|
Sec FF5-2 all and FF5-3 steps `1-3
|
Details
|
")

")
|
|
05-22-2007
|
4.00
|
Sec FF3-2 steps 1-3
|
Details
|
")
")
|
|
05-22-2007
|
2.00
|
Sec FF1-4 step 5
|
Details
|
")
|
|
05-21-2007
|
5.50
|
Sec Panel-29
|
Details
|
")
")
|
|
05-17-2007
|
3.50
|
Sec 45-21
|
Details
|
")
")
")
|
|
05-16-2007
|
5.00
|
Sec 45-20
|
Details
|
")
")
")
|
|
05-15-2007
|
1.75
|
Sec FF6-2
|
Details
|
")
")
")
|
|
05-14-2007
|
3.75
|
Sec FF6 -1
|
Details
|
")
")
")
|
|
05-10-2007
|
3.25
|
Sec PP-26
|
Details
|
")
")
")
|
|
05-09-2007
|
4.00
|
Sec PP-25
|
Details
|
")
")
")
|
|
05-08-2007
|
3.00
|
Sec PP-24
|
Details
|

(Click Here to view Full Log Entry)")
")
")
|
|
05-07-2007
|
5.00
|
Sec PP-23
|
Details
|
")
")
")
|
|
05-04-2007
|
5.00
|
Sec PP-22
|
Details
|
")
")
")
|
|
05-03-2007
|
9.50
|
Sec PP-21
|
Details
|
")
")
")
|
|
04-30-2007
|
1.50
|
Sec PP-20
|
Details
|
")
")
")
|
|
04-28-2007
|
3.50
|
Sec PP-19
|
Details
|
")
")
")
|
|
04-27-2007
|
6.25
|
Sec PP-18
|
Details
|
")
")
")
|
|
04-26-2007
|
5.25
|
Sec PP-17
|
Details
|
")
")
")
|
|
04-25-2007
|
5.00
|
Sec PP-16
|
Details
|
")
")
")
|
|
04-24-2007
|
5.00
|
Sec PP-15
|
Details
|
")
")
")
|
|
04-23-2007
|
5.00
|
Sec PP-14
|
Details
|
")
")
")
|
|
04-21-2007
|
4.00
|
Sec PP-13
|
Details
|
")
")

(Click Here to view Full Log Entry)")
|
|
04-19-2007
|
6.00
|
Sec PP-12
|
Details
|
")
")
")
|
|
04-18-2007
|
6.50
|
Sec PP-11
|
Details
|
")
")
")
|
|
04-17-2007
|
5.75
|
Sec PP-10
|
Details
|
")
")
")
|
|
04-16-2007
|
5.50
|
Sec PP-9
|
Details
|

")
")
|
|
04-14-2007
|
4.00
|
Sec PP-8
|
Details
|

")
")
|
|
04-13-2007
|
4.25
|
Sec PP-7
|
Details
|
")
")
")
|
|
04-12-2007
|
3.50
|
Sec PP-6
|
Details
|
")
")
")
|
|
04-11-2007
|
5.00
|
Sec PP-5
|
Details
|
")
")
")
|
|
04-10-2007
|
4.50
|
Sec PP-4
|
Details
|
")
")
")
|
|
04-07-2007
|
4.00
|
Sec PP-3
|
Details
|
")

")
|
|
04-06-2007
|
3.50
|
Sec PP-2
|
Details
|
")

(Click Here to view Full Log Entry)")
")
|
|
04-04-2007
|
4.50
|
Sec PP-1
|
Details
|
")
")
")
|
|
04-03-2007
|
6.50
|
Sec 43-11 steps 1-2
|
Details
|
")
")
")
|
|
04-02-2007
|
6.50
|
Sec 43 Overhead step 8
|
Details
|
")
")
")
|
|
03-31-2007
|
5.50
|
Sec 45-19 steps 2-3
|
Details
|

")
")
|
|
03-29-2007
|
6.00
|
Sec 45-18 Steps 4 thru 9
|
Details
|
")
")
")
|
|
03-28-2007
|
5.50
|
Sec 45-18 Steps 1-3
|
Details
|
")
")
")
|
|
03-27-2007
|
7.00
|
Sec 41 Access panels step 2
|
Details
|
")
")
")
|
|
03-26-2007
|
2.00
|
Sec 49-2 step 1
|
Details
|
")
")
")
|
|
03-26-2007
|
3.50
|
Sec 45-8 step 6
|
Details
|
")
")
")
|
|
03-26-2007
|
1.50
|
Sec 41 access panels part 1
|
Details
|
")
")
|
|
03-23-2007
|
5.00
|
Sec 45-08 steps 1-5
|
Details
|
")
")
")
|
|
03-21-2007
|
4.00
|
Sec 45-18 step 2 left window
|
Details
|
")
")
")
|
|
03-20-2007
|
4.00
|
Sec 45-18 step 1 rear
|
Details
|

")
")
|
|
03-19-2007
|
4.50
|
Sec 47 Finishing step 9
|
Details
|
")
")
")
|
|
03-17-2007
|
5.50
|
Sec 47 finishing Step 8 (Final)
|
Details
|
")
")
")
|
|
03-16-2007
|
5.50
|
Sec 47 finishing step 7
|
Details
|
")
")
")
|
|
03-15-2007
|
5.00
|
Sec 47 finishing step 6
|
Details
|
")
")
|
|
03-14-2007
|
3.00
|
Sec 48-finisihing step 16
|
Details
|
")
|
|
03-14-2007
|
3.50
|
Sec 47 Finishing step 5
|
Details
|
")
")
|
|
03-13-2007
|
3.00
|
Sec 48 finishing step 15
|
Details
|
")
|
|
03-13-2007
|
4.00
|
Sec 47-finishing step 4
|
Details
|
")
")
")
|
|
03-12-2007
|
4.50
|
Sec 48-Finishing Step 14
|
Details
|
")
|
|
03-12-2007
|
4.50
|
Sec 47 finishing step 3
|
Details
|
")
")
")
|
|
03-07-2007
|
3.00
|
Sec 48 finishing step 13
|
Details
|
")
")
|
|
03-07-2007
|
3.00
|
Sec 47 Finishing Step 2
|
Details
|
")
")
")
|
|
03-06-2007
|
4.00
|
Sec 48 finishing Step 12
|
Details
|
")
")
|
|
03-06-2007
|
4.00
|
Sec 47-Finishing Step 1
|
Details
|
")
")
")
|
|
03-05-2007
|
3.00
|
Sec 48-finishing step 11
|
Details
|
")
")
|
|
03-05-2007
|
5.00
|
Sec 47-12 steps 4-7
|
Details
|
")
")
")
|
|
03-03-2007
|
4.00
|
Sec 47-12 steps 1 thru 4
|
Details
|
")
")
")
|
|
03-02-2007
|
5.50
|
Sec 47-11 steps 1 thru 7
|
Details
|
")
")
")
|
|
02-28-2007
|
3.50
|
Sec 47-10 steps 4 thru 9
|
Details
|
")
")
")
|
|
02-28-2007
|
3.00
|
Sec 43-9 step 1
|
Details
|
")
")
")
|
|
02-22-2007
|
3.00
|
Sec 47-10 steps 1-3
|
Details
|
")
")
")
|
|
02-21-2007
|
5.50
|
Sec 47 step 8e
|
Details
|
")
")

(Click Here to view Full Log Entry)")
|
|
02-21-2007
|
3.00
|
Sec 47 step 8d
|
Details
|
")
")
")
|
|
02-19-2007
|
4.50
|
Sec 47-8c
|
Details
|
")
")
")
|
|
02-17-2007
|
2.00
|
Sec 47-8b
|
Details
|
")
")
")
|
|
02-16-2007
|
3.00
|
Sec 47-8a
|
Details
|
")
")
")
|
|
02-14-2007
|
6.50
|
Sec 47-7 and Sec 47-8 all steps
|
Details
|
")
")
")
|
|
02-12-2007
|
4.25
|
Sec 47-8 steps 9 thru 13
|
Details
|
")
")
")
|
|
02-10-2007
|
5.25
|
Sec 47-6 steps 7 thru 13
|
Details
|
")
")
")
|
|
02-09-2007
|
3.25
|
Sec 47-6 step 6d
|
Details
|
")
")
")
|
|
02-08-2007
|
2.75
|
Sec 47-6 step 6c
|
Details
|
")
")
")
|
|
02-07-2007
|
5.25
|
Sec 47-6 step 6b
|
Details
|
")
")
")
|
|
02-06-2007
|
4.00
|
Sec 47-6 Step 6
|
Details
|
")
")
")
|
|
02-05-2007
|
6.00
|
Sec 47 6 Steps 1-6
|
Details
|
")
 the bottom cowl
(Click Here to view Full Log Entry)")
|
|
02-03-2007
|
5.00
|
Sec 47-4 and 47-5 all steps
|
Details
|

(Click Here to view Full Log Entry)")
")
")
|
|
02-02-2007
|
5.00
|
Sec 45 Finishing step 7
|
Details
|
")
")
")
|
|
02-01-2007
|
5.00
|
Sec 45 finishing step 6
|
Details
|
")
")
")
|
|
01-31-2007
|
6.50
|
Sec 45 Finishing Step 5
|
Details
|
")
")
")
|
|
01-30-2007
|
4.50
|
Sec 45 Finishing Step 4
|
Details
|
")
")
")
|
|
01-29-2007
|
7.00
|
Sec 45 Finishing step 3
|
Details
|
")
")
 lay-up on top of it all.
(Click Here to view Full Log Entry)")
|
|
01-26-2007
|
6.00
|
Sec 49 Finishing step 10
|
Details
|
")
|
|
01-25-2007
|
1.00
|
Sec FFPS-2 manifold pressure sensor
|
Details
|
")
")
")
|
|
01-25-2007
|
7.00
|
Sec 48 Finishing step 9
|
Details
|
")
")
|
|
01-24-2007
|
0.75
|
Sec FF1-7
|
Details
|
")
")
")
|
|
01-24-2007
|
3.00
|
Sec 48 finishing step 8
|
Details
|
")
")
")
|
|
01-23-2007
|
0.50
|
Sec FFPS probes and sensors step 1
|
Details
|
")
|
|
01-23-2007
|
1.00
|
Sec FF4-3 steps 7-9
|
Details
|
")
")
")
|
|
01-23-2007
|
3.00
|
Sec FF1-3 and FF1-4 and FF1-6
|
Details
|
")
")
")
|
|
01-22-2007
|
3.50
|
Sec FF1-3 steps 1 thru 3
|
Details
|
")
")
")
|
|
01-20-2007
|
0.00
|
Sec FF1 Project Mtg
|
Details
|
")
")
")
|
|
01-19-2007
|
5.00
|
Sec FF1-5 step 1
|
Details
|
")
 with new positioning
(Click Here to view Full Log Entry)")
")
|
|
01-18-2007
|
3.25
|
Sec 48 Finsihing Step 7
|
Details
|
")
")
")
|
|
01-17-2007
|
5.00
|
Sec 48 finishing Step 6
|
Details
|
")
 of smooth Prime
(Click Here to view Full Log Entry)")
")
|
|
01-16-2007
|
6.00
|
Sec FF1 miscellaneous 2
|
Details
|
")
")
")
|
|
01-15-2007
|
4.00
|
Sec 48 Finishing step 5
|
Details
|
")
")
")
|
|
01-13-2007
|
5.00
|
Sec 48 Finishing step 4
|
Details
|
")
")
")
|
|
01-12-2007
|
2.50
|
Sec 48 Finishing step 3
|
Details
|
")
")
")
|
|
01-10-2007
|
6.00
|
Sec FF1-miscellaneous
|
Details
|
 side of the throttle/Popr/Mixture eyeball mount
(Click Here to view Full Log Entry)")
")
")
|
|
01-09-2007
|
6.00
|
Sec 48-finishing step2
|
Details
|
")
")
|
|
01-08-2007
|
5.00
|
Sec 48 Finishing
|
Details
|
")
")
")
|
|
01-08-2007
|
1.50
|
Sec 43 Ohead A
|
Details
|
")
")
")
|
|
01-05-2007
|
1.00
|
Sec FF1 3rd try
|
Details
|
")
")
")
|
|
01-04-2007
|
1.00
|
Sec FF1-5 step 1
|
Details
|
")

(Click Here to view Full Log Entry)")
")
|
|
01-02-2007
|
7.00
|
Sec 48-19 thru Sec 48-21
|
Details
|
")
")
")
|
|
01-01-2007
|
3.25
|
Sec 48-18 steps 1-5
|
Details
|
")
")
")
|
|
12-30-2006
|
4.75
|
Sec 48-15, 48-16, & 48-17
|
Details
|
")
")
")
|
|
12-28-2006
|
3.50
|
Sec 41-9 all steps
|
Details
|
")
")
")
|
|
12-20-2006
|
4.75
|
Sec 48-11 & Sec 48-12 both legs
|
Details
|
")
")
")
|
|
12-19-2006
|
8.00
|
Sec 48-10 & Sec 48-11 Both Gear legs
|
Details
|
")
 lay-up
(Click Here to view Full Log Entry)")
")
|
|
12-16-2006
|
5.50
|
Sec 48-8 and 48-9 Left and Right all steps
|
Details
|
")
")
")
|
|
12-15-2006
|
7.50
|
Sec 48-7 Steps 3-5
|
Details
|
")
")
")
|
|
12-14-2006
|
4.75
|
Sec 48-7 right and Left Gear Pants
|
Details
|
")
")
")
|
|
12-13-2006
|
6.00
|
Sec 48-5 Right and Sec 48-6 Right & Left
|
Details
|
")
")
")
|
|
12-12-2006
|
1.50
|
Sec 48-5L steps 1-5
|
Details
|
")
")
")
|
|
12-11-2006
|
3.50
|
Sec 48-2 thru 48-4 all steps Left & Right
|
Details
|
")
")
")
|
|
12-11-2006
|
1.75
|
Sec 46-7 steps 1-6
|
Details
|
")
")
")
|
|
12-08-2006
|
5.50
|
Sec 46-6 steps 2-6;46-7 steps 1-5; Sec 46-7 step 1
|
Details
|
")
")
")
|
|
12-07-2006
|
5.00
|
Sec 46-6 steps 1-7 Left & Right
|
Details
|
")
")
")
|
|
12-06-2006
|
5.00
|
Sec 45 finishing doors session #2
|
Details
|

(Click Here to view Full Log Entry)")
")
")
|
|
12-05-2006
|
5.50
|
Sec 45 Doors finishing
|
Details
|
")
")

(Click Here to view Full Log Entry)")
|
|
12-04-2006
|
7.00
|
Sec 45 Door gap fix Session #9
|
Details
|
")
")
|
|
12-01-2006
|
3.00
|
Sec 45 Door gap fix session # 8 both doors
|
Details
|
 and curing
(Click Here to view Full Log Entry)")
")
")
|
|
11-30-2006
|
6.50
|
Sec 45 Door Gap fix session #7 Both doors
|
Details
|
")
")
")
|
|
11-29-2006
|
5.00
|
Sec 45- Doorgap fix #6 Right and Left doors + cabi
|
Details
|
")
")
")
|
|
11-28-2006
|
5.00
|
Sec 45 Doorgap 5 Right and Left doors
|
Details
|
")
")
")
|
|
11-27-2006
|
3.75
|
Sec 45-Door gap 4 L& R
|
Details
|
")
")
|
|
11-27-2006
|
3.75
|
Sec 43-12 steps 1-3
|
Details
|
")
")
")
|
|
11-25-2006
|
2.50
|
Sec 45 Door gap fix Right and Left doors
|
Details
|
")
")
")
|
|
11-24-2006
|
3.00
|
Sec 45 Door gap fix right and Left doors
|
Details
|
")
")
")
|
|
11-23-2006
|
2.00
|
Sec-45 Door Gap fix Right door
|
Details
|
")
")
")
|
|
11-21-2006
|
2.50
|
Sec 45-Door Gap
|
Details
|
")
")
")
|
|
11-20-2006
|
2.00
|
Sec 43 Overhead console step #7
|
Details
|
")
")
")
|
|
11-18-2006
|
2.75
|
Sec 43 Overhead console fabricate aft flange
|
Details
|
")
")
")
|
|
11-17-2006
|
5.00
|
Sec 45-15 Right and Sec 45-16 steps 2-4 Left & Rig
|
Details
|
")
")
")
|
|
11-16-2006
|
6.50
|
Sec 45-15 Steps 1-3 Left door
|
Details
|
")
")
")
|
|
11-15-2006
|
6.50
|
Sec 45-12 & 45-14 Left Door
|
Details
|
")
")
")
|
|
11-14-2006
|
4.50
|
Sec 45-9,10,11, & 13 Left door
|
Details
|

")
")
|
|
11-13-2006
|
5.50
|
Sec 45-14 right
|
Details
|

(Click Here to view Full Log Entry)")
")
")
|
|
11-10-2006
|
4.50
|
Sec 45-12&45-14 Right
|
Details
|
")
")
")
|
|
11-09-2006
|
5.00
|
Sec 45-9,-10,-11,-13 Right door
|
Details
|
")
")
")
|
|
11-08-2006
|
1.50
|
Sec 43-10 steps 3-6
|
Details
|
")
")
")
|
|
11-07-2006
|
2.75
|
Sec 43-9 steps 2-9 Sec 43-10 steps 1-2
|
Details
|
")
")
")
|
|
10-30-2006
|
1.00
|
Sec FF1-2 Steps 1-4
|
Details
|
")
")
")
|
|
10-27-2006
|
6.00
|
Sec - 43 Window Trim Rings
|
Details
|
")
")
")
|
|
10-26-2006
|
6.00
|
Sec 43 - Overhead Console Step #5
|
Details
|

(Click Here to view Full Log Entry)")
")
")
|
|
10-25-2006
|
6.00
|
Sec 43-Overhead console Step # 4
|
Details
|
")
")
")
|
|
10-24-2006
|
5.00
|
Sec-43 overhead console step #3
|
Details
|
")
")

|
|
10-23-2006
|
6.00
|
Sec 43 Overhead Console step 2
|
Details
|
")
")
")
|
|
10-21-2006
|
1.00
|
Sec 45-16 step 1
|
Details
|
")
")
|
|
10-21-2006
|
4.75
|
Sec 43-Overhead Console
|
Details
|
")
")
")
|
|
10-20-2006
|
3.00
|
Sec 45-5 Steps 8-12 Right
|
Details
|
")
")
")
|
|
10-19-2006
|
4.50
|
Sec 45-6 and Sec 45-7 Right ALL steps
|
Details
|
")
")
")
|
|
10-18-2006
|
6.25
|
Sec 45-6 and Sec 45-7 all steps Left Door
|
Details
|
")
")
")
|
|
10-17-2006
|
3.25
|
Sec 45-5 Steps 8-11 Left
|
Details
|
")
")
")
|
|
10-17-2006
|
2.25
|
Sec 45-5 steps 1-7 Right
|
Details
|
")
")
|
|
10-16-2006
|
2.50
|
Sec 45-5 steps 1-7 Left
|
Details
|
")
")
")
|
|
10-14-2006
|
3.75
|
Sec 45-3 and Sec 45-4 all steps
|
Details
|
 door drilled and clecoed to fuse
(Click Here to view Full Log Entry)")
")
")
|
|
10-13-2006
|
6.25
|
Sec 45-2 steps 1 Thru 4
|
Details
|
")
 down 2 to go!
(Click Here to view Full Log Entry)")
")
|
|
10-12-2006
|
3.75
|
Sec 43-8 steps 1-8
|
Details
|
")
")
")
|
|
10-12-2006
|
2.00
|
Sec 43-6 & 43-7 all steps
|
Details
|
")
")
")
|
|
10-11-2006
|
2.50
|
Sec 43-5 steps 1 thru 5
|
Details
|
")
")
")
|
|
10-04-2006
|
5.50
|
Sec 43-3 step 3c (filling/sanding
|
Details
|
")
")
")
|
|
10-03-2006
|
6.00
|
Sec 43-3 step 3c
|
Details
|
")
")
")
|
|
10-02-2006
|
8.00
|
Sec 43-3 step3b
|
Details
|
")
")
")
|
|
09-30-2006
|
3.25
|
Sec 43-3 step 3-4
|
Details
|
")
")
")
|
|
09-29-2006
|
6.00
|
Sec 41-7 steps 2-4 & 41-4 steps 1-6
|
Details
|
")
")

(Click Here to view Full Log Entry)")
|
|
09-28-2006
|
1.00
|
Sec 46-3 steps 1-5
|
Details
|

(Click Here to view Full Log Entry)")
")
|
|
09-27-2006
|
1.75
|
Sec 46-2 steps 1-2
|
Details
|
")
")
")
|
|
09-27-2006
|
1.50
|
Complete check out of panel components
|
Details
|
")
")
")
|
|
09-25-2006
|
4.50
|
Install dimmer switches and circuits. Continue on
|
Details
|
")
")
")
|
|
09-23-2006
|
3.00
|
Re-work and plan & test dimmer circuits
|
Details
|
")
")

(Click Here to view Full Log Entry)")
|
|
09-22-2006
|
4.00
|
Rebuilt 1/2 of Audio Panel harness
|
Details
|
")
")
")
|
|
09-21-2006
|
2.25
|
Fix EIU interface and add Crosstalk interface
|
Details
|
")
|
|
09-20-2006
|
2.25
|
checked out panel for functionality
|
Details
|

(Click Here to view Full Log Entry)")
")
 is working
(Click Here to view Full Log Entry)")
|
|
09-19-2006
|
3.00
|
initial power-up and configuration of EFIS
|
Details
|
")
")
")
|
|
09-18-2006
|
3.25
|
Finished up the RS 232 connections to the EFIS & M
|
Details
|
")
")
|
|
09-16-2006
|
3.50
|
Switch and light power wiring
|
Details
|
")
")
|
|
09-15-2006
|
3.75
|
EIU& Autopilot wired to EFIS
|
Details
|
")

(Click Here to view Full Log Entry)")
")
|
|
09-14-2006
|
4.50
|
Headset & Mic plugs
|
Details
|
")
")
")
|
|
09-13-2006
|
5.00
|
Autopilot harness and power distribution
|
Details
|
")
")
")
|
|
09-12-2006
|
0.50
|
Affix the autopilot & switches to center console
|
Details
|

(Click Here to view Full Log Entry)")
")
")
|
|
09-09-2006
|
5.75
|
Mount auto pilot more switches and trim indicators
|
Details
|
")
")
")
|
|
09-08-2006
|
5.50
|
Lighted rocker switches & Flap switch
|
Details
|
")
")

(Click Here to view Full Log Entry)")
|
|
09-06-2006
|
7.00
|
Wiring EFIS to Radios & ADC
|
Details
|
")
")
|
|
08-29-2006
|
5.50
|
Panel and firewal wwiring
|
Details
|
")
")
")
|
|
08-25-2006
|
3.50
|
Final install of Faux firewall and misc firewall i
|
Details
|
")
")
")
|
|
08-24-2006
|
4.00
|
Prepared Faux-Firewall for installation
|
Details
|
")
")
")
|
|
08-23-2006
|
2.50
|
Harnesses for AHRS, Pitch Servo, & Elevator trim
|
Details
|
")
")
")
|
|
08-22-2006
|
1.50
|
Dynon Remote Magnetic sensor & Strobe wiring
|
Details
|
")
")
")
|
|
08-21-2006
|
2.00
|
Ran most of the wires from the Aft fuse forward
|
Details
|
")
")
")
|
|
08-19-2006
|
2.25
|
Mount Strobe power supply and ELT
|
Details
|
")
")
")
|
|
08-17-2006
|
3.75
|
Pitch servo, AHRS, & Batteries
|
Details
|
")
")
")
|
|
08-15-2006
|
4.50
|
Betteries and contactors.
|
Details
|
")
")

|
|
08-11-2006
|
1.50
|
Mounting of Dynon D10A back-up EFIS
|
Details
|
")
")
")
|
|
08-10-2006
|
4.75
|
Center Radio Stack
|
Details
|
")
")
")
|
|
08-09-2006
|
3.25
|
physical assembly of the 2 outboard panels
|
Details
|
")
")
")
|
|
08-08-2006
|
4.25
|
Physically mount the EFIS & MFD
|
Details
|
")
")
")
|
|
08-07-2006
|
3.25
|
Initial configuration of sub-panel
|
Details
|
")
")
")
|
|
08-03-2006
|
1.75
|
Sec 41-Faux2
|
Details
|
 opened up and aligned
(Click Here to view Full Log Entry)")
")
 attach.
(Click Here to view Full Log Entry)")
|
|
08-02-2006
|
4.00
|
Sec 41-Faux Firewall
|
Details
|
")
")
")
|
|
08-01-2006
|
2.25
|
Sec 41- extra
|
Details
|
")
")
")
|
|
07-24-2006
|
2.50
|
Sec 43.5 control sticks
|
Details
|
")
")
")
|
|
07-12-2006
|
2.50
|
Sec 43-4 steps 1-3
|
Details
|

(Click Here to view Full Log Entry)")

")
|
|
07-11-2006
|
3.00
|
Sec 43-2 and 43-3 steps 1-4
|
Details
|
")
")
")
|
|
07-08-2006
|
2.25
|
Sec 41 and misc catch-up items.
|
Details
|
")
")
")
|
|
07-07-2006
|
3.00
|
Sec 41-2 instrument panel final
|
Details
|
")
")
")
|
|
07-06-2006
|
4.25
|
Sec 41-2 console finished
|
Details
|
")
")
")
|
|
07-05-2006
|
3.75
|
Sec 41-2 panel inserts installed
|
Details
|
")
")
")
|
|
07-04-2006
|
3.25
|
Sec 41-2 inserts
|
Details
|
")
")
")
|
|
06-29-2006
|
5.00
|
Sec 41-2 primed
|
Details
|

(Click Here to view Full Log Entry)")
")
")
|
|
06-28-2006
|
7.50
|
Sec 41-2 joined
|
Details
|
")
")

(Click Here to view Full Log Entry)")
|
|
06-24-2006
|
3.00
|
Sec 41-2 console123
|
Details
|
")
")
")
|
|
06-23-2006
|
3.00
|
Sec 41-2 console#2
|
Details
|
")
")
")
|
|
06-21-2006
|
3.25
|
Sec 41-2 console3b
|
Details
|
")
")
")
|
|
06-20-2006
|
3.75
|
Sec 41-2 console 3A
|
Details
|
")
")
")
|
|
06-19-2006
|
5.50
|
Sec 41-2 Console #3
|
Details
|
")
")
")
|
|
06-16-2006
|
4.00
|
Sec 41-2 console1
|
Details
|
")
")
")
|
|
06-15-2006
|
2.50
|
Sec 41-2 console
|
Details
|
")
")
")
|
|
06-14-2006
|
6.50
|
Sec 41-2 Instrument panel
|
Details
|
")


(Click Here to view Full Log Entry)")
|
|
06-10-2006
|
7.00
|
Sec 41-1 mount instrument panel
|
Details
|

(Click Here to view Full Log Entry)")
")
")
|
|
06-08-2006
|
1.25
|
Sec 41-1 initial trimming and noodeling
|
Details
|
")
")
")
|
|
06-07-2006
|
6.00
|
Sec 40-1 thru 40-8
|
Details
|
")
")
")
|
|
06-06-2006
|
3.25
|
Sec 39-9 steps 1-6
|
Details
|
")
")
")
|
|
06-06-2006
|
0.75
|
Sec 39-10 step 3
|
Details
|
")
")
")
|
|
06-05-2006
|
2.75
|
Sec 39-10 steps 1-2
|
Details
|


|
|
06-03-2006
|
8.00
|
Sec 39-5&6&7&8
|
Details
|
")
")
 to !@#$ hot to continue today (110!)
(Click Here to view Full Log Entry)")
|
|
06-02-2006
|
2.25
|
Sec 39-2 through 39-4
|
Details
|
")
")
")
|
|
06-01-2006
|
4.50
|
Sec 38-8 & 38-9 & 38-10 all steps
|
Details
|
")
")
")
|
|
05-27-2006
|
2.75
|
Sec 38-6 & Sec 38-7 all steps
|
Details
|
")
")
")
|
|
05-26-2006
|
6.00
|
Sec 38-3 & 4 all steps
|
Details
|
")
")
")
|
|
05-25-2006
|
3.00
|
Sec 38-2 steps 1-6
|
Details
|
")
")
")
|
|
05-25-2006
|
0.75
|
Sec 37-4 Final
|
Details
|
")
")

(Click Here to view Full Log Entry)")
|
|
05-24-2006
|
4.75
|
Sec 37-3 & Sec 37-4
|
Details
|
")
")
")
|
|
05-23-2006
|
5.25
|
Sec 37-2 & 37-3
|
Details
|
")
")

(Click Here to view Full Log Entry)")
|
|
05-22-2006
|
4.50
|
Sec 34-5 & 34-6 & 34-7
|
Details
|
")
")
")
|
|
05-19-2006
|
4.25
|
Sec 34-3&4 and half of 5
|
Details
|
")
")
")
|
|
05-18-2006
|
2.50
|
Sec 35-7 thru 35-10
|
Details
|
")
")
")
|
|
05-17-2006
|
4.25
|
Sec 35-4;35-5;35-6
|
Details
|
")
")
 in, just clecoed as it all has to come out for systems installation.
(Click Here to view Full Log Entry)")
|
|
05-16-2006
|
4.00
|
Sec 35-3 steps 2-4
|
Details
|
")
")
")
|
|
05-15-2006
|
1.25
|
Sec 35-3 step 1
|
Details
|
")
")
")
|
|
05-15-2006
|
5.00
|
Sec 35-2 steps 1-5
|
Details
|
")
")
")
|
|
05-13-2006
|
0.75
|
Sec 34-2 steps 1-8
|
Details
|
")
")
")
|
|
05-11-2006
|
6.00
|
Sec 33-8&33-9&33-10
|
Details
|
")
")
")
|
|
05-10-2006
|
2.25
|
Sec 33-7 steps 1-5
|
Details
|
")
")
")
|
|
05-10-2006
|
2.75
|
Sec 33-6 step 2
|
Details
|
")
")
")
|
|
05-09-2006
|
5.00
|
Sec 33-6 Comm Antennas
|
Details
|
")
")
")
|
|
05-08-2006
|
1.00
|
Sec 33-6 steps 1-2
|
Details
|
")
")
|
|
05-08-2006
|
4.00
|
Sec 33-5 steps 3-11
|
Details
|
")
")
")
|
|
05-06-2006
|
4.50
|
Sec 33-4 all steps Sec 33-5 steps 1-2
|
Details
|
")
")
")
|
|
05-04-2006
|
1.00
|
Sec 30 rework
|
Details
|
")
")
")
|
|
05-03-2006
|
3.00
|
Sec 33-2 and 33-3 All steps
|
Details
|
")
")
")
|
|
05-02-2006
|
4.50
|
Sec 32-5 steps 7-18
|
Details
|
")
")
")
|
|
05-01-2006
|
3.25
|
Sec 32-4 all steps 32-5 steps 1-6
|
Details
|
")
")
")
|
|
05-01-2006
|
3.25
|
Sec 32-2 & 32-3 all steps
|
Details
|
")
")
")
|
|
04-27-2006
|
3.25
|
Sec 31-9 steps 1-3
|
Details
|
")
")
")
|
|
04-27-2006
|
1.50
|
Sec 31-10 steps 1-4
|
Details
|
")
")
")
|
|
04-26-2006
|
2.00
|
Sec 31-8 steps 11-15
|
Details
|
")
")
")
|
|
04-25-2006
|
1.50
|
Sec 29-22 step 1
|
Details
|
")
")
")
|
|
04-25-2006
|
2.50
|
Sec 29-21 steps 1-2 right
|
Details
|
")
")
")
|
|
04-24-2006
|
1.25
|
Sec 29-21 Left
|
Details
|
")
")
|
|
04-24-2006
|
5.00
|
Sec 29-20 All Steps
|
Details
|
")
")
")
|
|
04-22-2006
|
1.00
|
Sec 29-18 more clean up
|
Details
|
")
")
")
|
|
04-21-2006
|
3.25
|
Sec 29-18 clean-up
|
Details
|
")

(Click Here to view Full Log Entry)")
")
|
|
04-20-2006
|
4.50
|
Sec 31-8 steps 1-10
|
Details
|
")
")
")
|
|
04-19-2006
|
3.25
|
Sec 31-6 and Sec 31-7 All steps
|
Details
|
")
")
")
|
|
04-19-2006
|
1.50
|
Sec 31-4 and Sec 31-5 ALL steps
|
Details
|

(Click Here to view Full Log Entry)")
")
")
|
|
04-18-2006
|
3.25
|
Sec 31-2 & 31-3
|
Details
|
")
")
")
|
|
04-18-2006
|
2.50
|
Sec 30 all
|
Details
|
")
")
")
|
|
04-17-2006
|
3.00
|
Sec 36-1 and 36-3
|
Details
|
")
")
")
|
|
04-17-2006
|
3.75
|
Sec 29-21 steps 1-2
|
Details
|
")
")
")
|
|
04-15-2006
|
2.50
|
Sec 29-19 steps 1-8
|
Details
|
")
")
")
|
|
04-15-2006
|
1.25
|
Sec 29-17 step 3
|
Details
|
")
")
")
|
|
04-14-2006
|
4.50
|
Sec 29-17 steps 1-2
|
Details
|

(Click Here to view Full Log Entry)")
")
")
|
|
04-13-2006
|
6.75
|
Sec 29-17 steps 1 Left and some right
|
Details
|
")
")
")
|
|
04-12-2006
|
6.50
|
Sec 29-16 steps 1-10
|
Details
|
")
")
")
|
|
04-06-2006
|
5.00
|
Sec 36-3 steps 1-6
|
Details
|
")
")
")
|
|
04-05-2006
|
3.00
|
Sec 29-16 steps 2-5
|
Details
|
")
")
")
|
|
04-04-2006
|
7.00
|
Sec 29-15 steps 1-3
|
Details
|
")
")
")
|
|
04-03-2006
|
8.25
|
Sec 29-14 steps 1-9
|
Details
|
")
")
")
|
|
03-31-2006
|
3.00
|
Sec 29-13 steps 1-10
|
Details
|
")

(Click Here to view Full Log Entry)")
")
|
|
03-30-2006
|
1.75
|
Sec 29-12 steps 1-5
|
Details
|
")
")
")
|
|
03-30-2006
|
2.25
|
Sec 29-11 steps 1-5
|
Details
|
")
")
")
|
|
03-30-2006
|
0.75
|
Sec 29-10 steps 1-2
|
Details
|
")
")
")
|
|
03-29-2006
|
5.50
|
Sec 29-9 steps 1-4
|
Details
|
")
")
")
|
|
03-28-2006
|
3.75
|
Sec 28-16thru18
|
Details
|
")
")
")
|
|
03-28-2006
|
4.00
|
Sec 28-15 steps 1-4
|
Details
|
")
")
")
|
|
03-27-2006
|
2.00
|
Sec 20-6 steps 1-4
|
Details
|
")
")
")
|
|
03-27-2006
|
4.50
|
Sec 20-5 step 12 right
|
Details
|
")
")
")
|
|
03-25-2006
|
4.50
|
Sec 20-5 steps 10-12 right
|
Details
|
")
")
")
|
|
03-24-2006
|
0.75
|
Sec 20-6 steps 3-4 left
|
Details
|
")
|
|
03-24-2006
|
3.00
|
Sec 20-5 step 12 left
|
Details
|
")
")
|
|
03-23-2006
|
8.00
|
Sec 20-5 step 10-11
|
Details
|
")
")
")
|
|
03-22-2006
|
9.09
|
Sec 20-5 steps 9-10
|
Details
|
")
")
")
|
|
03-21-2006
|
5.50
|
Sec 20-5 steps 6-9
|
Details
|
")
")
")
|
|
03-20-2006
|
4.50
|
Sec 20-5 steps 1-6
|
Details
|
")
")
|
|
03-20-2006
|
2.00
|
Sec 20-5 aileron trim
|
Details
|
")
")
")
|
|
03-18-2006
|
0.75
|
Sec 29-8 steps 1-4
|
Details
|
")
")
")
|
|
03-18-2006
|
0.75
|
Sec 29-7 steps 1-3
|
Details
|
")
")
|
|
03-18-2006
|
1.50
|
Sec 29-6 steps 1-7
|
Details
|
")
")
")
|
|
03-17-2006
|
2.75
|
Sec 29-5 steps 1-4
|
Details
|
")
")
")
|
|
03-17-2006
|
1.00
|
Sec 29-4 steps 2-4
|
Details
|
")
")
")
|
|
03-17-2006
|
1.00
|
Sec 29-3 steps 2-4
|
Details
|
")
")
")
|
|
03-16-2006
|
1.25
|
Sec 29-3 step1
|
Details
|
")
|
|
03-16-2006
|
2.50
|
Sec 29-2 steps 1-7
|
Details
|
")
")
|
|
03-15-2006
|
2.50
|
Sec 28-14 steps 4-12
|
Details
|
")
")
")
|
|
03-14-2006
|
2.50
|
Sec 28-14 steps 1-3
|
Details
|
")
")
")
|
|
03-14-2006
|
0.60
|
Sec 28-13 step 4
|
Details
|

(Click Here to view Full Log Entry)")
")
|
|
03-10-2006
|
1.50
|
Sec 29-4 step 1
|
Details
|
")
|
|
03-10-2006
|
0.75
|
Sec 28-13 step 4
|
Details
|
")
")
|
|
03-09-2006
|
4.50
|
Sec 28-13 steps 1-3
|
Details
|
")
")
")
|
|
03-08-2006
|
1.10
|
Sec 28-12 steps 1-2
|
Details
|
")
")
|
|
03-08-2006
|
3.30
|
Sec 28-11 steps 1-6
|
Details
|
")
")
")
|
|
03-08-2006
|
2.70
|
Sec 28-10 step 13
|
Details
|
")
|
|
03-07-2006
|
1.25
|
Sec 28-9 steps 1-2
|
Details
|
")

(Click Here to view Full Log Entry)")
")
|
|
03-07-2006
|
5.40
|
Sec 28-10 steps 1-13
|
Details
|
")
")
")
|
|
03-06-2006
|
1.00
|
Sec 28-8 steps 1-5
|
Details
|
")
")
|
|
03-06-2006
|
1.90
|
Sec 28-7 steps 1-4
|
Details
|
")
")
|
|
03-06-2006
|
1.10
|
Sec 28-6 steps 1-3
|
Details
|
")
")
")
|
|
03-06-2006
|
2.40
|
Sec 28-5 steps 1-4
|
Details
|
")
")
")
|
|
03-04-2006
|
3.00
|
Sec 28-4 steps 1-5
|
Details
|
")
")
")
|
|
03-04-2006
|
3.25
|
Sec 28-2&3all steps
|
Details
|
")
")
")
|
|
03-03-2006
|
1.75
|
Sec 28-2 steps 1-5
|
Details
|
")
")
|
|
03-03-2006
|
0.25
|
Sec 27-6 steps 4-5
|
Details
|
")
|
|
03-02-2006
|
1.25
|
Sec 27-6 steps 1-3
|
Details
|
")
")
")
|
|
03-02-2006
|
5.00
|
Sec 27-4 steps 7-8
|
Details
|
")
")
")
|
|
03-01-2006
|
5.00
|
Sec 27-4 steps 1-7
|
Details
|
")
")
")
|
|
03-01-2006
|
0.96
|
Sec -adjustment
|
Details
|
")
|
|
02-28-2006
|
0.50
|
Sec 27-3 steps 1-7
|
Details
|

")
|
|
02-28-2006
|
5.75
|
Sec 27-2 steps 6-7
|
Details
|
")
")
")
|
|
02-27-2006
|
4.25
|
Sec 27-2 steps 1-6
|
Details
|
")
")
")
|
|
02-27-2006
|
2.00
|
Initial TC visit Ed Daror
|
Details
|
")
|
|
02-25-2006
|
7.00
|
Sec 26-7 step 5
|
Details
|
")
")
")
|
|
02-24-2006
|
3.75
|
Wing Wiring
|
Details
|
")
")
")
|
|
02-23-2006
|
3.50
|
Misc electrical for wings
|
Details
|
")
")
")
|
|
02-22-2006
|
2.00
|
Sec 24-LED nav & Strobe LEFT
|
Details
|
")
")
")
|
|
02-21-2006
|
5.50
|
LED Nav and Strobe lights
|
Details
|
")
")
")
|
|
02-20-2006
|
6.25
|
Sec 26-7 steps 3-4
|
Details
|
")
")
")
|
|
02-18-2006
|
4.00
|
Sec 26-7 steps 1-3
|
Details
|
")
")
")
|
|
02-18-2006
|
3.25
|
Sec 26-6 steps 3-9
|
Details
|
")
")
")
|
|
02-16-2006
|
1.50
|
Sec 26-6 steps 1-2
|
Details
|
")
")
|
|
02-15-2006
|
7.50
|
Sec 26-5 steps 1-11
|
Details
|
")
")
")
|
|
02-14-2006
|
2.50
|
Sec 26-4 steps 1-6
|
Details
|
")
")
")
|
|
02-14-2006
|
2.00
|
Sec 26-3 steps 8-10
|
Details
|
")
")
")
|
|
02-13-2006
|
1.50
|
Sec 26-3 steps 1-7
|
Details
|
")
")
")
|
|
02-11-2006
|
4.75
|
Sec 26-2 steps 1-7
|
Details
|
")
")
")
|
|
02-11-2006
|
1.50
|
Sec 25-8 steps 1-7
|
Details
|
")
|
|
02-10-2006
|
4.00
|
Sec 25-7 steps 1-7
|
Details
|
")
")
")
|
|
02-10-2006
|
3.00
|
Sec 25-6 steps 1-7
|
Details
|
")
")
")
|
|
02-09-2006
|
6.00
|
Sec 25-5 steps 1-11
|
Details
|
")
")
|
|
02-09-2006
|
2.00
|
Sec 25-4 steps 1-7
|
Details
|
")
")
")
|
|
02-08-2006
|
2.75
|
Sec 25-3 steps 1-9
|
Details
|
")
")
")
|
|
02-08-2006
|
1.75
|
Sec 25-2 steps 1-9
|
Details
|
")
")
")
|
|
02-07-2006
|
5.25
|
Sec 20-7 Pitot and Servo
|
Details
|
")
")
")
|
|
02-06-2006
|
3.50
|
Sec 24-3 remainder
|
Details
|
")
")
")
|
|
02-06-2006
|
2.00
|
Sec 20-7 step Gretz Pitot
|
Details
|
")
")
")
|
|
02-04-2006
|
2.00
|
Sec 24-2 steps 2-4
|
Details
|
")
")
")
|
|
02-03-2006
|
5.25
|
Sec 24-3 steps 5-7 right
|
Details
|

")
")
|
|
02-02-2006
|
3.00
|
Sec 24-3 steps 5-7 left
|
Details
|
")
")
|
|
02-02-2006
|
3.00
|
Sec 24-2 and 3 right
|
Details
|
")
")
")
|
|
02-01-2006
|
5.75
|
Sec 24-3 steps 1-4
|
Details
|
")
")
")
|
|
01-31-2006
|
2.25
|
Sec 24-2 step 1
|
Details
|
")
")
")
|
|
01-30-2006
|
7.40
|
Sec 17-5 steps 1-40 right
|
Details
|
")
")

(Click Here to view Full Log Entry)")
|
|
01-28-2006
|
2.50
|
Sec 23-5 thru 23-9 Left
|
Details
|
")
")
")
|
|
01-28-2006
|
2.00
|
Sec 18-8 step 5 left
|
Details
|
")
|
|
01-28-2006
|
3.00
|
Sec 17-5 steps 20-40 left
|
Details
|
")
")
")
|
|
01-27-2006
|
6.00
|
Sec 17-5 steps 1-20
|
Details
|
")
")

|
|
01-26-2006
|
3.00
|
Sec 17-4 steps 1-5 left
|
Details
|
")
")
")
|
|
01-25-2006
|
3.50
|
Sec 20-4 steps 2-6 left
|
Details
|
")
")
")
|
|
01-24-2006
|
1.50
|
Sec 19-3 steps 1-6
|
Details
|
")
")
")
|
|
01-24-2006
|
3.00
|
Sec 16-3 step 3 left Sec 16-4 step 1-3 left
|
Details
|
")
")
")
|
|
01-23-2006
|
3.50
|
Sec 16-3 step 3 Left
|
Details
|
")
")
|
|
01-21-2006
|
7.00
|
Sec 16-2 5-6 and 16-3 step 1-2 left
|
Details
|
")
")
")
|
|
01-20-2006
|
3.75
|
Sec 16-2 steps 1-4 left
|
Details
|
")
")
")
|
|
01-19-2006
|
4.75
|
Sec 15-4 steps 1-4 left
|
Details
|
")
")
")
|
|
01-17-2006
|
2.75
|
Sec 23-5 through 23-9 right
|
Details
|
")
")
")
|
|
01-16-2006
|
0.75
|
Sec 23-5 steps 1-2
|
Details
|
")
|
|
01-16-2006
|
2.10
|
Sec 23-3 and 4 All
|
Details
|
")
")
")
|
|
01-16-2006
|
2.30
|
Sec 23-2 steps 1-4
|
Details
|
")
")
")
|
|
01-16-2006
|
0.50
|
Sec 22-8 steps13-14 right
|
Details
|
")
")
|
|
01-16-2006
|
0.50
|
Sec 21-8 step 2-3 right
|
Details
|
")
")
")
|
|
01-13-2006
|
3.75
|
Sec 20-4 steps 2-6 right
|
Details
|
")
")
")
|
|
01-13-2006
|
2.90
|
Sec 18-8 step 5 right
|
Details
|
")
")
")
|
|
01-12-2006
|
3.10
|
Sec 17-4 steps 1-5 right
|
Details
|
")
")
")
|
|
01-09-2006
|
0.50
|
Sec 16-4 steps 1-3 right
|
Details
|
")
")
")
|
|
01-09-2006
|
4.25
|
Sec 16-3 step 3 right continued
|
Details
|
")
")
")
|
|
01-07-2006
|
5.25
|
Sec 16-3step 3 right
|
Details
|
")
")
")
|
|
01-06-2006
|
2.85
|
Sec 16-3 steps 1-2 right
|
Details
|
")
")
")
|
|
01-06-2006
|
2.25
|
Sec 16-2 step 6 right
|
Details
|
")
")
|
|
01-05-2006
|
5.25
|
Sec 16-2 steps 4-6 right
|
Details
|
")
")
")
|
|
12-30-2005
|
3.25
|
Sec 16-2 steps 1-3 right
|
Details
|
")
")
")
|
|
12-30-2005
|
2.50
|
Sec 15-4 steps 3-4 right
|
Details
|
")
")
")
|
|
12-29-2005
|
1.75
|
Sec 15-4 steps 1-3 right
|
Details
|
")
")
|
|
12-28-2005
|
1.25
|
Sec 15-3 steps 1-4 left
|
Details
|
")
")
")
|
|
12-27-2005
|
2.25
|
Sec 15-2 steps 1-t
|
Details
|
")
")
")
|
|
12-26-2005
|
4.75
|
Sec 14-4and 5and 6
|
Details
|
")
")
")
|
|
12-24-2005
|
2.90
|
Sec 14-3 Step 4 Right
|
Details
|
")
")
")
|
|
12-22-2005
|
2.75
|
Sec 14-3 steps 1-4 right
|
Details
|
")
")
")
|
|
12-20-2005
|
1.75
|
Sec 14-6 step 1 Left
|
Details
|

(Click Here to view Full Log Entry)")
")
|
|
12-20-2005
|
3.40
|
Sec 14-5 steps 1-4 left
|
Details
|
")
")
")
|
|
12-20-2005
|
1.40
|
Sec 14-4 steps 1-2 Left
|
Details
|
 and electrical conduit
(Click Here to view Full Log Entry)")
")
|
|
12-19-2005
|
5.80
|
Sec 14-3 steps 4-8l eft
|
Details
|
")
")
")
|
|
12-17-2005
|
1.10
|
Sec 18-8 leak test #2 (and repair)
|
Details
|
")
")
")
|
|
12-17-2005
|
1.50
|
Sec 14-3 steps 1-4 Left
|
Details
|
")
")
")
|
|
12-17-2005
|
2.75
|
Sec 14-2 steps 1-9
|
Details
|
")
")
")
|
|
12-16-2005
|
0.75
|
Sec 18-8 leak repair
|
Details
|
")
")
")
|
|
12-16-2005
|
3.25
|
Sec 14-2 steps 1-9left
|
Details
|
")
")
")
|
|
12-15-2005
|
0.60
|
Sec 18-8 leak test
|
Details
|
")
")
")
|
|
12-15-2005
|
1.25
|
Sec 14-2 step 1
|
Details
|
")
|
|
12-13-2005
|
5.90
|
Sec 22-8 steps 3-12
|
Details
|
")
")
")
|
|
12-12-2005
|
4.12
|
sec 22-8 steps 1-3
|
Details
|
")
")
")
|
|
12-09-2005
|
4.25
|
Sec 22-7 steps 1-5
|
Details
|

")
")
|
|
12-06-2005
|
1.50
|
Sec 22-7 step 1
|
Details
|
")
")
")
|
|
12-06-2005
|
2.50
|
Sec 22-6 steps 1-6
|
Details
|
")
")
")
|
|
12-01-2005
|
3.50
|
Sec 22-5 step 6
|
Details
|
")
")
")
|
|
11-29-2005
|
7.10
|
Sec 22-5 steps 5-6
|
Details
|
")
")
|
|
11-28-2005
|
5.10
|
Sec 22-5 steps 4-6
|
Details
|
")
")
")
|
|
11-25-2005
|
2.80
|
Sec 22-5 steps 2-4
|
Details
|
")
")
")
|
|
11-23-2005
|
2.40
|
Sec 22-5 steps 1-2
|
Details
|
")
")
")
|
|
11-23-2005
|
1.30
|
Sec 22-4 step 2
|
Details
|
")
")
")
|
|
11-22-2005
|
1.44
|
Sec 22-4 steps 1-2
|
Details
|
")
")
")
|
|
11-22-2005
|
0.65
|
Sec 22-3 steps 1-5
|
Details
|
")
")
")
|
|
11-22-2005
|
1.80
|
Sec 22-2 steps 1-5
|
Details
|
")

(Click Here to view Full Log Entry)")
|
|
11-21-2005
|
1.25
|
Sec 22-2 steps 1-3.
|
Details
|
")
")
")
|
|
11-21-2005
|
0.75
|
Sec 21-8 steps 1-3
|
Details
|
")
|
|
11-19-2005
|
2.10
|
Sec 21-7 step 5
|
Details
|
")
")
")
|
|
11-18-2005
|
1.50
|
Sec 21-7 steps 1-5
|
Details
|
")
")
")
|
|
11-18-2005
|
4.70
|
Sec 21-6 steps 2-4
|
Details
|
")
")
")
|
|
11-17-2005
|
1.20
|
Sec 21-6 steps 1-2
|
Details
|
")
")
")
|
|
11-17-2005
|
4.50
|
Sec 21-5 steps 2-4
|
Details
|
")
")
")
|
|
11-17-2005
|
1.45
|
Sec 21-5 step 4-5
|
Details
|
")
")
")
|
|
11-16-2005
|
4.00
|
Sec 21-4 steps 1-7
|
Details
|
")
")
")
|
|
11-16-2005
|
2.00
|
Sce 21-5 steps 1-2
|
Details
|
")
")
")
|
|
11-15-2005
|
0.01
|
Sec 21-3 steps 5-7 continued
|
Details
|
")
")
")
|
|
11-15-2005
|
6.20
|
Sec 21-3 steps 5-7
|
Details
|
")
")
")
|
|
11-14-2005
|
3.00
|
Sec 21-3 steps 1-6
|
Details
|
")
")

(Click Here to view Full Log Entry)")
|
|
11-14-2005
|
2.50
|
Sec 21-2 steps 1-5
|
Details
|
")
")
")
|
|
11-12-2005
|
4.80
|
Sec 18-8 steps 1-3 right
|
Details
|

")
")
|
|
11-11-2005
|
5.40
|
Sec 18-8 steps 1-3left tank
|
Details
|
")
")

|
|
11-10-2005
|
1.70
|
Sec 18-7 steps 1-3
|
Details
|
")
")
")
|
|
11-10-2005
|
1.50
|
Sec 18-6steps 1-6 left
|
Details
|
")
")
")
|
|
11-09-2005
|
0.01
|
Sec 18-6 steps 1-6 continued
|
Details
|
")
")
|
|
11-09-2005
|
3.50
|
Sec 18-6 steps 1-6
|
Details
|
")
")
")
|
|
11-08-2005
|
1.50
|
Sec 18-6 step 7 Right
|
Details
|
")
")
")
|
|
11-08-2005
|
1.40
|
Sec 18-5 step 8
|
Details
|
")
")
")
|
|
11-07-2005
|
1.75
|
Sec 18-5step 7 Left
|
Details
|
")
")
")
|
|
11-07-2005
|
5.00
|
Sec 18-5 step6 right
|
Details
|
")
")
")
|
|
11-05-2005
|
3.30
|
Sec 18-5 step 6 Right tank
|
Details
|
")
")
")
|
|
11-04-2005
|
6.70
|
Sec 18-5 step 6 left continued
|
Details
|
")
")
")
|
|
11-03-2005
|
4.60
|
Sec 18-5 step 6 left
|
Details
|
")
")
")
|
|
11-02-2005
|
8.25
|
Sec 18-5 steps 4-5
|
Details
|
")
")
")
|
|
11-01-2005
|
6.70
|
Sec 18-5 steps 2-3 left & right
|
Details
|
")
")
")
|
|
10-31-2005
|
3.00
|
sec 18-5 steps 1-5LR
|
Details
|
")
")
")
|
|
10-31-2005
|
1.25
|
Sec 18-5 step 2 L&R
|
Details
|
")
")
|
|
10-31-2005
|
2.50
|
Sec 18-4 steps 8-9
|
Details
|
")
|
|
10-25-2005
|
4.20
|
Sec 18-4 steps 8-9r
|
Details
|
")
")
")
|
|
10-24-2005
|
1.60
|
Sec 18-4 steps8-9Left
|
Details
|
")
|
|
10-24-2005
|
6.25
|
Sec 18-2steps 5-6 18-3 steps 1-4,18-4s 1-7
|
Details
|
")
")
")
|
|
10-22-2005
|
3.25
|
Sec 18-4s1-7left
|
Details
|
")
")
")
|
|
10-22-2005
|
0.75
|
Sec 18-3 steps3-4 Left
|
Details
|
")
")
|
|
10-21-2005
|
6.00
|
Sec 18-2 steps 1-4
|
Details
|
")
")
|
|
10-21-2005
|
2.00
|
Sec 18-2 &3 steps5-6 and 1-2 L
|
Details
|
")
")
")
|
|
10-19-2005
|
1.00
|
Sec 18-2 step 1
|
Details
|
")
|
|
10-18-2005
|
1.75
|
Sec 17-3 steps 13-14r
|
Details
|
")
")
")
|
|
10-17-2005
|
1.50
|
Sec 19-2 steps 5-15
|
Details
|
")
")
")
|
|
10-17-2005
|
6.75
|
Sec 17-2 steps 11-14
|
Details
|
")
")
")
|
|
10-15-2005
|
0.90
|
Sec 19-2 steps 1-4
|
Details
|
")
")
")
|
|
10-14-2005
|
2.75
|
Sec 17-3 step 10
|
Details
|
")
")
")
|
|
10-13-2005
|
7.10
|
Sec 17-3 steps 7-9
|
Details
|
")
")
")
|
|
10-12-2005
|
6.00
|
Sec 17-3 steps 1-8
|
Details
|
")
")
")
|
|
10-12-2005
|
1.25
|
Sec 17-2 steps 4-5
|
Details
|
")
|
|
10-12-2005
|
1.00
|
Sec 13-5 step 1
|
Details
|
")
|
|
10-10-2005
|
3.10
|
Sec 17-2 steps 1-4
|
Details
|
")
")
")
|
|
10-10-2005
|
4.20
|
Sec 13-4 & 5 steps All
|
Details
|
")
")
")
|
|
10-07-2005
|
2.40
|
Sec 13-3 steps 6-9
|
Details
|
")
")
")
|
|
10-07-2005
|
4.10
|
Sec 13-3 steps 3-5
|
Details
|
")
")
")
|
|
10-06-2005
|
2.90
|
Sec 13-3 Steps 1-3
|
Details
|
")
")
")
|
|
10-06-2005
|
2.75
|
Sec 13-2 Steps 5-8
|
Details
|
")
")
")
|
|
10-05-2005
|
3.00
|
Sec 13 steps 1-4
|
Details
|
")
")
")
|
|
10-03-2005
|
0.01
|
Sec 12-4 steps 1-5
|
Details
|
")
")
|
|
10-03-2005
|
6.00
|
Sec 12-3 steps ALL
|
Details
|
")

")
|
|
10-03-2005
|
0.01
|
Sec 12-3 steps ALL
|
Details
|
 tip
(Click Here to view Full Log Entry)")
")
")
|
|
10-01-2005
|
4.00
|
Sec 12-2 Steps all
|
Details
|

")
")
|
|
10-01-2005
|
0.01
|
Sec 12-2 steps all
|
Details
|
")
")
")
|
|
09-29-2005
|
6.00
|
Sec 11-8 step 8 Sec 11-9 all
|
Details
|
")
")
")
|
|
09-28-2005
|
3.60
|
Sec 11-8 steps 4-7
|
Details
|
")
")
|
|
09-27-2005
|
1.40
|
Sec 11-8 steps 1-3
|
Details
|
")
|
|
09-27-2005
|
1.10
|
Sec 11-7 steps 1 9
|
Details
|
")
")
")
|
|
09-27-2005
|
1.90
|
Sec 11-6 steps 1-6
|
Details
|
")
")
|
|
09-26-2005
|
1.90
|
Sec 11-5 steps 1-5
|
Details
|
")
|
|
09-25-2005
|
0.40
|
Sec 11-4 step 4
|
Details
|
")
")
|
|
09-24-2005
|
0.95
|
Sec 11-4 steps 1-3
|
Details
|
")
")
|
|
08-25-2005
|
3.40
|
Sec 11-2&3 all
|
Details
|

")
")
|
|
08-25-2005
|
0.01
|
Sec 11-2 and 3 all steps
|
Details
|
")
")
")
|
|
08-24-2005
|
0.90
|
Sec 10-24 step 3
|
Details
|
")
")
|
|
08-24-2005
|
3.80
|
Sec 10-21 steps 1-3 & 10-23 steps 3-5
|
Details
|

(Click Here to view Full Log Entry)")
")
")
|
|
08-23-2005
|
5.00
|
Sec 10-23 steps 1-3
|
Details
|
")
")
")
|
|
08-22-2005
|
1.70
|
Sec 10-22 steps 1-3
|
Details
|
")
|
|
08-22-2005
|
2.60
|
Sec 10-20 aft bottom skin Sec 10-21 steps 4-5
|
Details
|
")
")
")
|
|
08-20-2005
|
5.00
|
Sec 10-20 Steps 1-7 Left Side
|
Details
|
")
")
")
|
|
08-19-2005
|
6.50
|
Sec 10-20 Steps 1-7 Right side only
|
Details
|
")
")
")
|
|
08-18-2005
|
2.75
|
Sec 10-20 steps 1-7
|
Details
|
")
")
|
|
08-18-2005
|
1.80
|
Sec 10-19 Steps 1-7
|
Details
|
")
")
")
|
|
08-18-2005
|
1.50
|
Sec 10-18 steps 1-3
|
Details
|
")
")
")
|
|
08-18-2005
|
0.80
|
Sec 10-17 steps 4-6
|
Details
|
")
")
")
|
|
08-17-2005
|
7.50
|
Sec 10-17 step 3
|
Details
|
")
")

(Click Here to view Full Log Entry)")
|
|
08-16-2005
|
2.00
|
Sec 10-17 step 1
|
Details
|
")
|
|
08-16-2005
|
1.70
|
Sec 10-16 step 6-8 & 10-17 steps 1-2
|
|
")
")
")
|
|
08-15-2005
|
4.75
|
Sec 10-16 s1-5
|
Details
|
")
")
")
|
|
08-13-2005
|
0.01
|
sec 10-16 steps 1-5 continued
|
Details
|
")
")
|
|
08-13-2005
|
9.80
|
Sec 10-16 steps 1-5
|
Details
|
")
")
")
|
|
08-12-2005
|
1.60
|
Sec 10-15 steps 1-9 Sec 10-16 steps 1-5
|
Details
|
")
")
")
|
|
08-11-2005
|
0.90
|
Sec 10-14 steps 1-5
|
Details
|
")
")
|
|
08-11-2005
|
1.30
|
Sec 10-13 steps 1-7
|
Details
|
")
")
|
|
08-10-2005
|
2.90
|
Sec 10-12 steps 1-9
|
Details
|
")
")
")
|
|
08-10-2005
|
0.01
|
Sec 10-12 more photos
|
Details
|
")

(Click Here to view Full Log Entry)")
|
|
08-09-2005
|
1.20
|
sec 10-9 steps 1-5
|
Details
|
")
")
")
|
|
08-09-2005
|
0.90
|
Sec 10-8 steps 4-7
|
Details
|
")
|
|
08-09-2005
|
4.20
|
Sec 10-11 steps 1-5
|
Details
|
")
")
")
|
|
08-09-2005
|
1.10
|
Sec 10-10 steps 1-5
|
Details
|
")
")
")
|
|
08-08-2005
|
3.30
|
Sec 10-8 steps 1-3
|
Details
|
")
")
")
|
|
08-08-2005
|
3.40
|
Sec 10-7 steps 1-7
|
Details
|
")
")

(Click Here to view Full Log Entry)")
|
|
08-08-2005
|
0.01
|
Sec 10-7 steps 1-7
|
|
")
")
")
|
|
08-08-2005
|
0.40
|
Sec 10-6 steps 2-3
|
Details
|
")
|
|
08-06-2005
|
0.60
|
Sec 10-6 Step 1
|
Details
|
")
|
|
08-06-2005
|
2.70
|
Sec 10-5 steps 1-4
|
Details
|
")
|
|
08-05-2005
|
1.20
|
Sec 10-4 steps1-5
|
Details
|
")
")
")
|
|
08-05-2005
|
1.20
|
Sec 10-4 all & 10-5Steps 1
|
Details
|
")
")
")
|
|
08-05-2005
|
0.60
|
Sec 10-3 Steps 1-5
|
|
")
")
")
|
|
08-05-2005
|
1.00
|
Sec 10-2 steps 1-5
|
|
")
")
")
|
|
08-04-2005
|
2.80
|
Sec 9-19 steps 1-2
|
|

(Click Here to view Full Log Entry)")
")
|
|
08-04-2005
|
2.20
|
Sec 9-18 step 1-4
|
Details
|
")
")
")
|
|
08-03-2005
|
1.80
|
Sec 9-17 steps 8-10
|
Details
|
")
")
")
|
|
08-02-2005
|
1.50
|
Sec 9-17 Steps 5-7
|
|
")
")
")
|
|
08-02-2005
|
1.60
|
Sec 9-16 steps 1-4
|
Details
|
")
")
")
|
|
08-01-2005
|
1.30
|
Sec 9-15 steps 6-9
|
Details
|
")
")
")
|
|
08-01-2005
|
1.50
|
Sec 9-15 steps 1-5
|
Details
|
")
")
")
|
|
08-01-2005
|
2.50
|
Sec 9-14 steps 9-12
|
Details
|
")
")
")
|
|
07-27-2005
|
3.00
|
Sec 9-14 steps 4-8
|
Details
|
")
")
")
|
|
07-26-2005
|
4.20
|
Sec 9-13 steps 1-3 Sec 9-14 steps 1-3
|
Details
|
")
")
")
|
|
07-26-2005
|
0.01
|
more pics
|
Details
|
")
")
")
|
|
07-25-2005
|
3.50
|
Sec 9-12 steps 1-6
|
Details
|
")
")
")
|
|
07-20-2005
|
6.00
|
Sec 9-11 steps 1-6
|
Details
|
")
")
")
|
|
07-19-2005
|
0.60
|
Sec 9-11 steps 1-2
|
Details
|
")
|
|
07-19-2005
|
3.40
|
Sec 9-10 steps 2-7
|
Details
|
")
")
")
|
|
07-19-2005
|
2.50
|
Sec 9-10 step 1
|
Details
|
")
")
|
|
07-18-2005
|
2.20
|
Sec 9-9 steps 4-8
|
|
")
")
")
|
|
07-18-2005
|
5.50
|
Sec 9-10 step 1
|
Details
|
")
|
|
07-17-2005
|
2.50
|
Sec 9-8 & 9
|
Details
|
")
")
|
|
07-16-2005
|
1.00
|
Sec 9-8 step 1
|
Details
|
")
|
|
07-16-2005
|
5.40
|
Sec 9-7 Steps 7-9
|
Details
|
")
")
")
|
|
07-13-2005
|
1.20
|
Sec 9-7 steps 4 6
|
Details
|
")
")
|
|
07-13-2005
|
2.60
|
Sec 9-7 steps 1-3
|
Details
|
")
")
")
|
|
07-13-2005
|
1.50
|
Sec 9-6 steps 1-8
|
Details
|
")
")
")
|
|
07-13-2005
|
2.20
|
Sec 9-5 steps 1-4
|
Details
|
")
")
")
|
|
07-13-2005
|
2.50
|
Sec 9-4 Steps 1-3
|
Details
|
")
")

|
|
07-12-2005
|
1.00
|
Sec 9-3 steps 1-3
|
Details
|
")
")

(Click Here to view Full Log Entry)")
|
|
07-11-2005
|
1.60
|
Sec 9-2 steps 3-7
|
Details
|
")
")
")
|
|
07-11-2005
|
3.00
|
Sec 9-2 step 1&2
|
Details
|
")
")
")
|
|
07-08-2005
|
2.50
|
Sec 8-13;14 Steps 6 & 7
|
Details
|
")
")
")
|
|
07-08-2005
|
2.00
|
Sec 8-13 steps 5
|
Details
|
")
")
")
|
|
07-08-2005
|
0.01
|
Final HS photos
|
|
")
")
")
|
|
07-07-2005
|
6.40
|
Sec 8-13 Steps 1,2,3 &4
|
Details
|
")
")
")
|
|
07-06-2005
|
1.50
|
Sec 8-9 Step 9
|
Details
|
")
")
")
|
|
07-06-2005
|
1.00
|
Sec 8-9 step 8
|
Details
|
")
")
|
|
07-06-2005
|
3.00
|
Sec 8-12 Steps 1 &2
|
Details
|
")
")
")
|
|
07-06-2005
|
2.30
|
Sec 8-11 Steps 1-3
|
Details
|
")
")
|
|
07-06-2005
|
2.00
|
Sec 8-10 Step 1&2
|
Details
|
")
")
|
|
07-05-2005
|
6.25
|
Sec 8-9 Steps 6, 7, 8 & 9
|
Details
|
")
")
")
|
|
07-05-2005
|
0.01
|
Horizontal Stab countersink
|
|
")
")
|
|
07-03-2005
|
3.50
|
Sec 8-9 Step 6
|
Details
|
")
|
|
07-02-2005
|
2.00
|
Sec 8-9 step6
|
Details
|
")
")
|
|
07-01-2005
|
2.50
|
Sec 8-9 step 5,6
|
Details
|
")
")
|
|
06-30-2005
|
4.30
|
Sec 8-9 steps 1-4
|
Details
|
")
")
")
|
|
06-29-2005
|
1.70
|
Sec 8-8 Steps 6-8
|
Details
|
")
")
")
|
|
06-29-2005
|
0.01
|
Sec 8-8 steps 6-8
|
|
")
")
")
|
|
06-29-2005
|
1.20
|
Sec 8-7 Steps 3 & 4
|
Details
|
")
")
")
|
|
06-29-2005
|
2.40
|
Sec 8-7 Step 5 Sec 8-8 Step 1-5
|
Details
|
")
")
")
|
|
06-29-2005
|
1.20
|
Sec 8-6 Steps 1-4 & Sec 8-7 Steps 1& 2
|
Details
|
")
")
")
|
|
06-28-2005
|
1.10
|
Sec 8-5 step 8
|
Details
|
")
|
|
06-27-2005
|
8.00
|
Sec 8-5 Steps 1,2,3,4,5,6,7,
|
Details
|
")
")
")
|
|
06-27-2005
|
2.10
|
Sec 8-4 Step 1
|
Details
|
")
|
|
06-25-2005
|
3.10
|
Sec 8-3 Steps 1,2 & 3
|
Details
|
")
|
|
06-24-2005
|
1.00
|
Sec 8-2 Steps 5-6
|
Details
|
")
")
")
|
|
06-24-2005
|
2.70
|
Sec 8-2 Step 2-4
|
Details
|
")
")
")
|
|
06-24-2005
|
0.01
|
Sec 8-2 more photos
|
|
")
")
")
|
|
06-24-2005
|
1.50
|
Sec 8 Step 1
|
Details
|
")
")
")
|
|
06-23-2005
|
4.50
|
Sec 7-11: 12 Steps 4, 5, 6 ; Steps 1-5
|
Details
|
")
")
")
|
|
06-22-2005
|
0.10
|
Sec 7-11 Steps 2, 3, 4
|
Details
|
")
")
")
|
|
06-22-2005
|
6.00
|
Sec 7-11 Steps 1
|
Details
|
")
")
")
|
|
06-22-2005
|
2.60
|
Sec 7-10 Steps 5, 6, & 7
|
Details
|
")
")
")
|
|
06-21-2005
|
0.90
|
Sec 7-10 Steps 1,2 & 3
|
Details
|
")
|
|
06-20-2005
|
4.50
|
Sec 7-8 & 7-9
|
Details
|
")
")
")
|
|
06-20-2005
|
2.50
|
Sec 7-7 steps 1-5
|
Details
|
")
")
")
|
|
06-19-2005
|
2.50
|
Sec 7-6 Step 13
|
Details
|
")
")
")
|
|
06-16-2005
|
2.40
|
Sec 7-6 steps 11 & 12
|
Details
|
")
")
")
|
|
06-16-2005
|
0.70
|
Sec 7-6 step 13
|
Details
|
")
|
|
06-16-2005
|
2.20
|
Sec 7-6 Step 10
|
Details
|
")
")
")
|
|
06-15-2005
|
1.40
|
Sec 7-6 Steps 3, 4
|
Details
|
")
")
")
|
|
06-15-2005
|
1.60
|
Sec 7-6 Step 5, 6,7,8,9
|
Details
|
")
")
")
|
|
06-14-2005
|
0.20
|
Sec 7-6 step 1
|
|
")
|
|
06-14-2005
|
0.90
|
Sec 7-5 steps 1-5
|
Details
|
")
")
")
|
|
06-14-2005
|
1.40
|
Sec 7-4 steps 1-6
|
Details
|
")
")
")
|
|
06-14-2005
|
1.00
|
Sec 7-3,cut out rudder stiffener part 1 only
|
Details
|
")
")
")
|
|
06-13-2005
|
4.80
|
Steps 4,5,6,7,8 & 9
|
Details
|
")
")
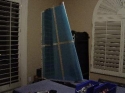
|
|
06-13-2005
|
2.50
|
Sec 6-6 Steps 1,2,3
|
Details
|
")
")
")
|
|
06-13-2005
|
0.40
|
Sec 6-5 Steps 2&3
|
Details
|
")
")
")
|
|
06-13-2005
|
1.00
|
Cut out and debur some rudder parts
|
Details
|
")
")
|
|
06-11-2005
|
4.30
|
steps 1,2,3,4,5,6
|
Details
|
")
")
")
|
|
06-11-2005
|
2.35
|
6-4 step 7, 6-5 step 1&2
|
Details
|
 caused by mistake countersinking too many holes requiring flush vs universal head
(Click Here to view Full Log Entry)")
")
")
|
|
06-10-2005
|
5.50
|
Steps 5,6,7,8,9,10,11
|
Details
|
")
")
")
|
|
06-10-2005
|
0.00
|
Misc photo
|
|
")
")
|
|
06-09-2005
|
3.50
|
6-3 steps 3 & 4
|
Details
|
")
")
")
|
|
06-08-2005
|
6.00
|
VS skeleton and skin prep
|
Details
|
")
")
")
|
|
06-08-2005
|
0.00
|
Misc photos
|
|
")
")
")
|
|
06-08-2005
|
0.00
|
Misc photos
|
|
")
")
")
|
|
06-07-2005
|
4.50
|
Rear Spar Web and Caps
|
Details
|
")
")
")
|